

Published: Feb 6, 2025 by Isaac Johnson
Today we will dig into Azure AI Foundry and specifically how to tie it to Continue.dev for use with Visual Studio Code. We will add some models including GPT 4 and a GPT 4o model for fine-tuning. We’ll also look at how to use these models in Visual Studio Code (by way of Continue.dev). Lastly, we will fine-tune a GPT 4 model on blog data and touch on costs and usage.
Let’s get started!
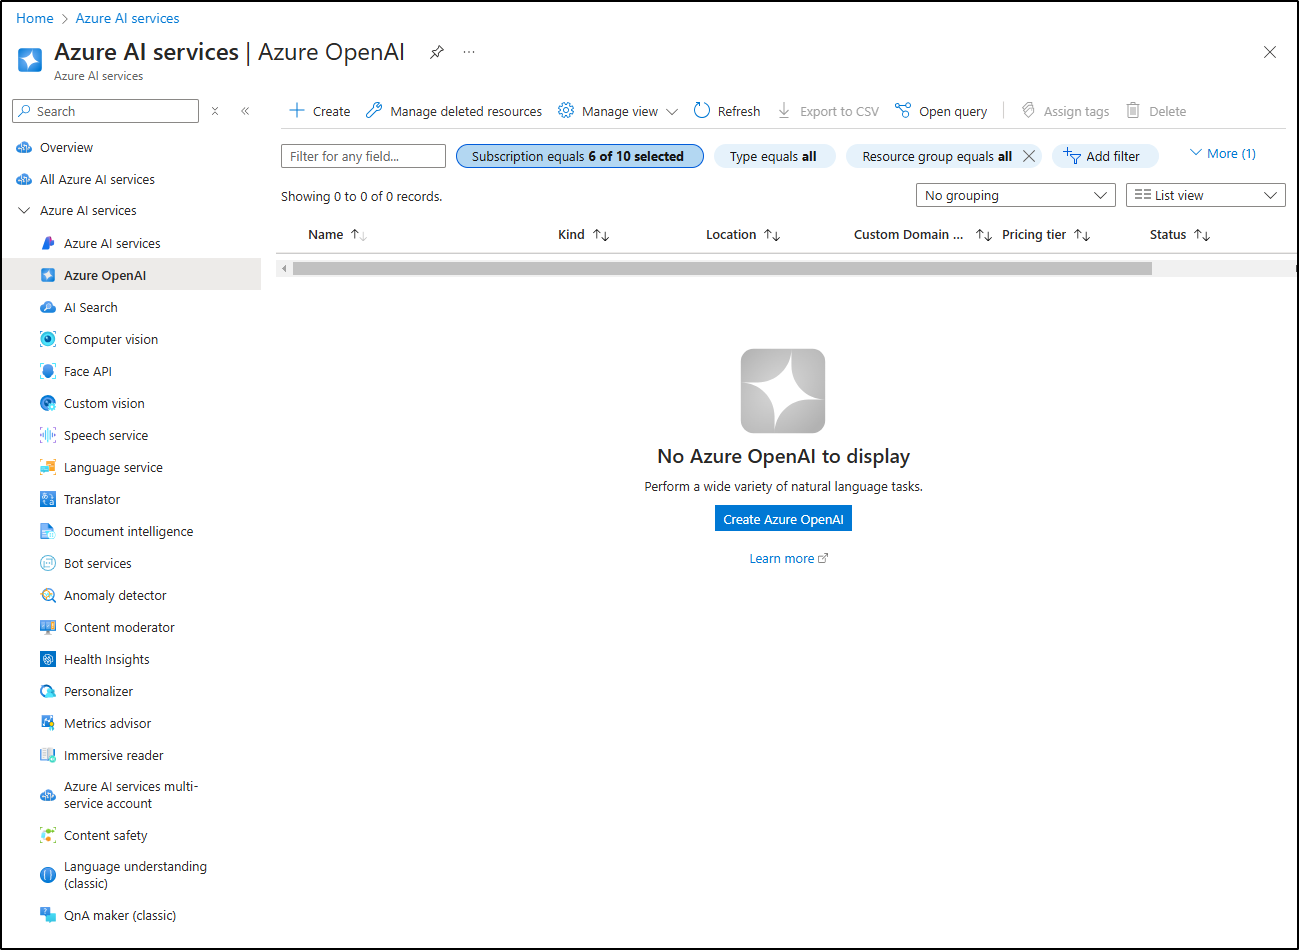
Azure OpenAI
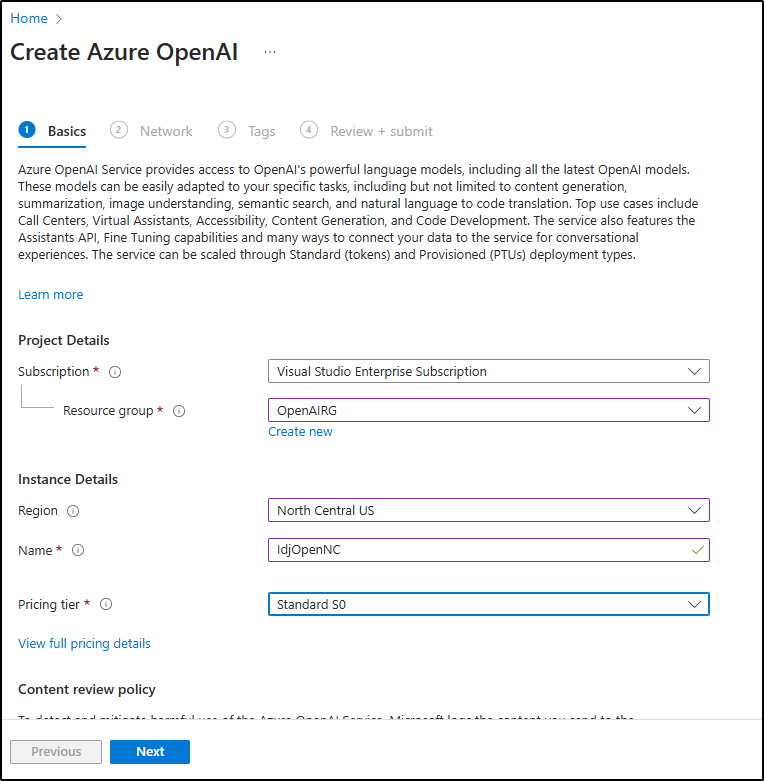
I can go to OpenAI in Azure
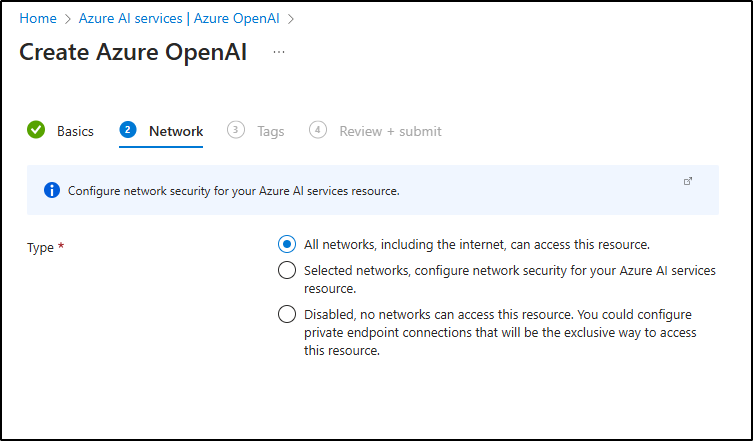
And from there create a new instance

I can decide which networks to which it can be used
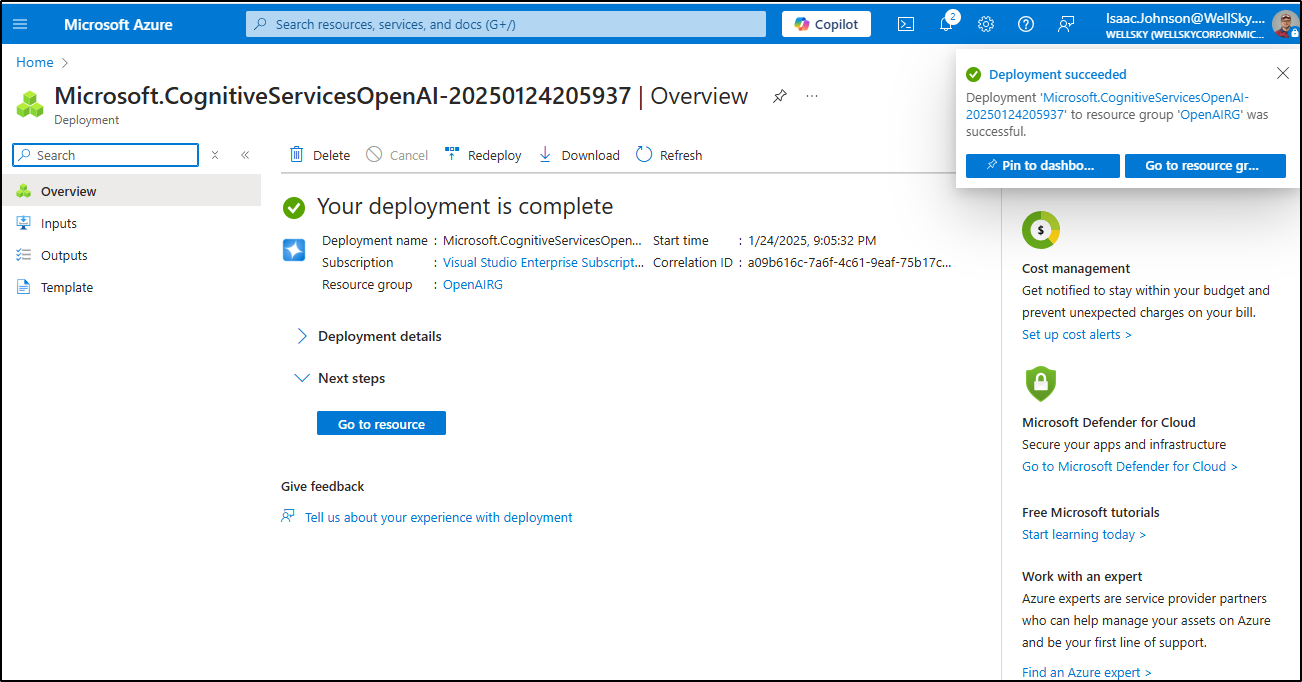
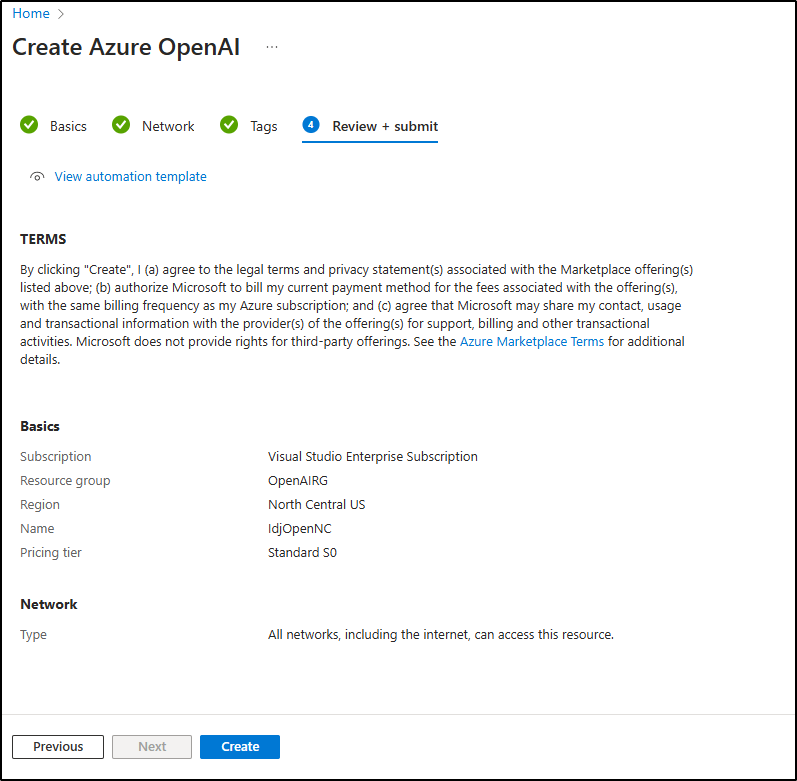
I then can click finish to create the instance

Once created
I can then get an API Key
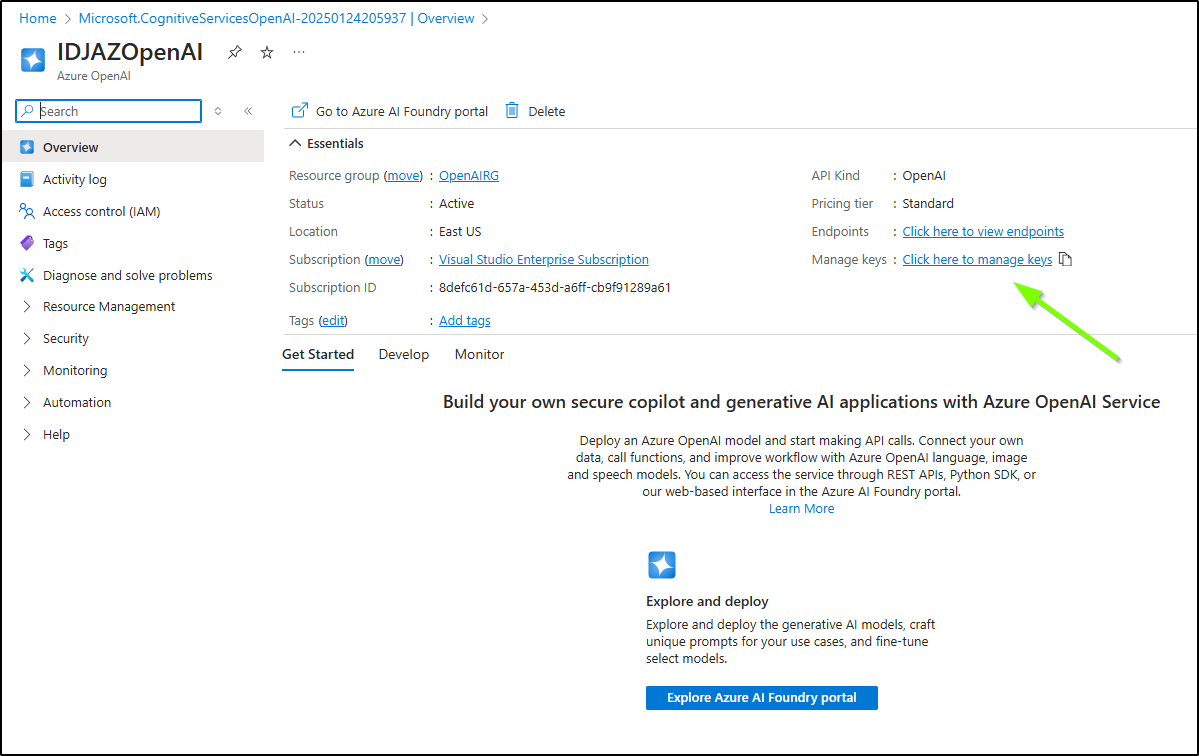
I can click show keys to view them

I next want to go to Azure OpenAI Service to create a deployment
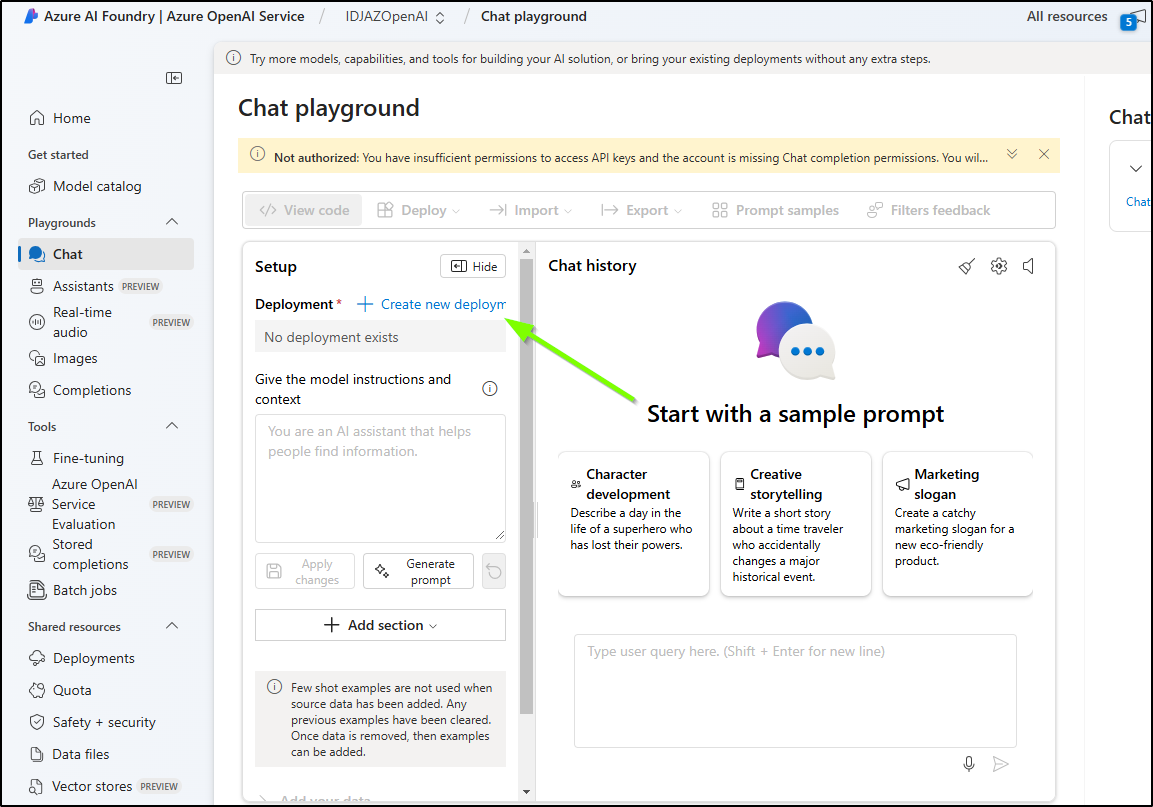
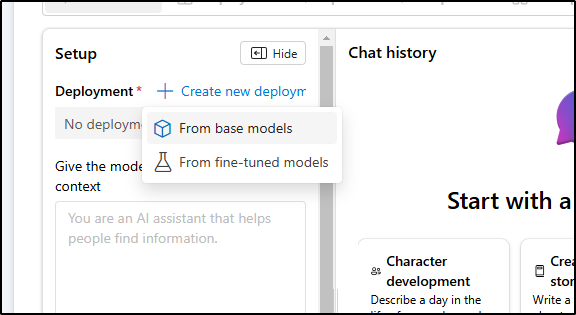
I can do a fine tuned model or a base model. I’ll start with a base model
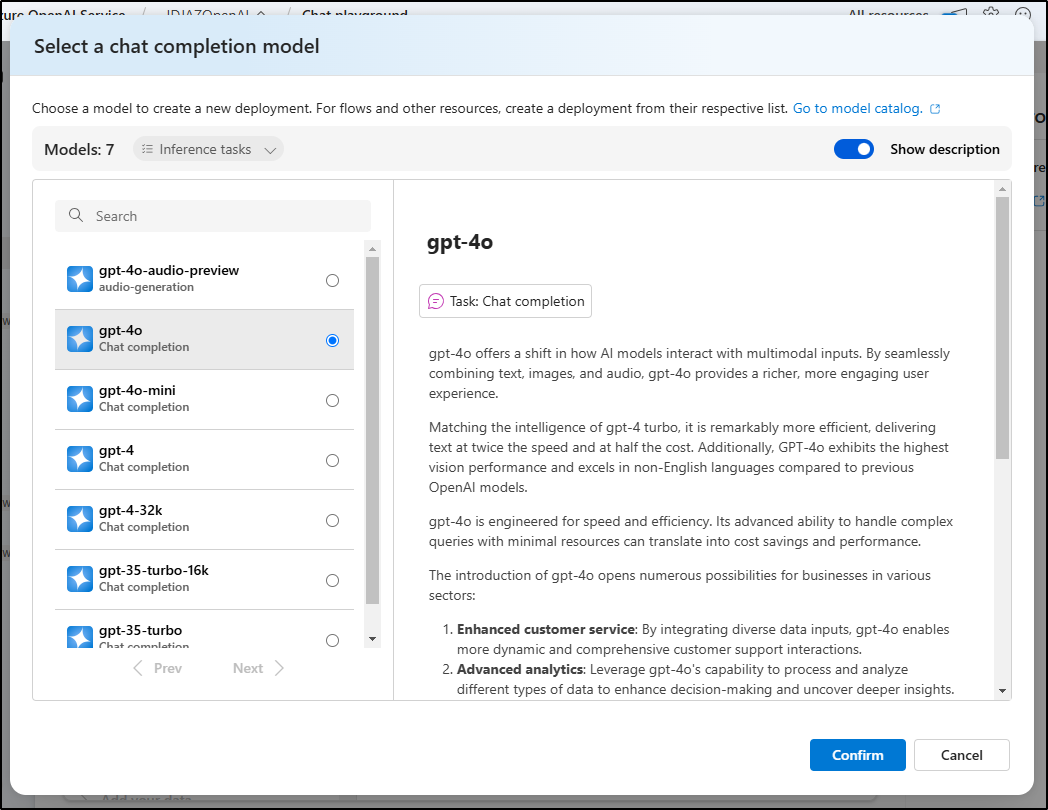
I chose GPT 4
I can use the standard deployment
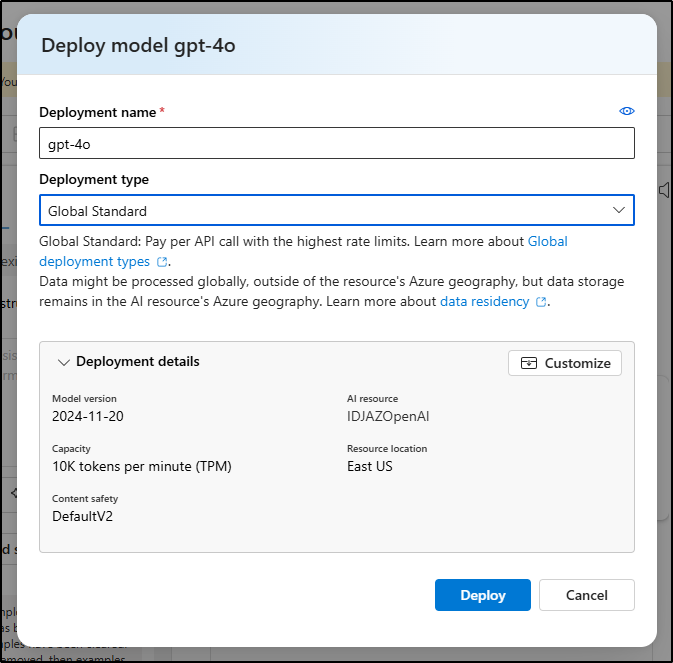
Though I can also customize the deployment
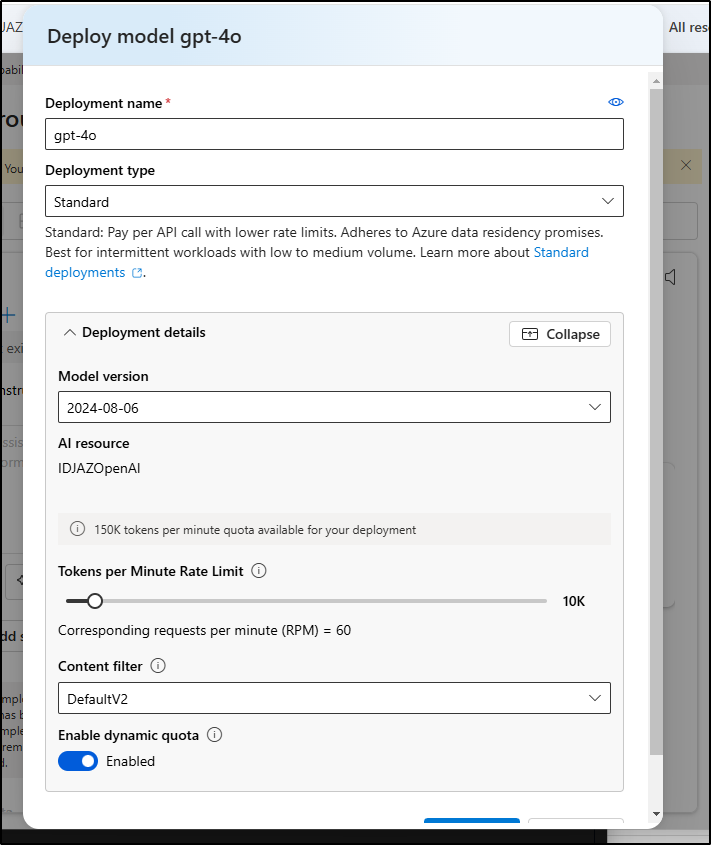
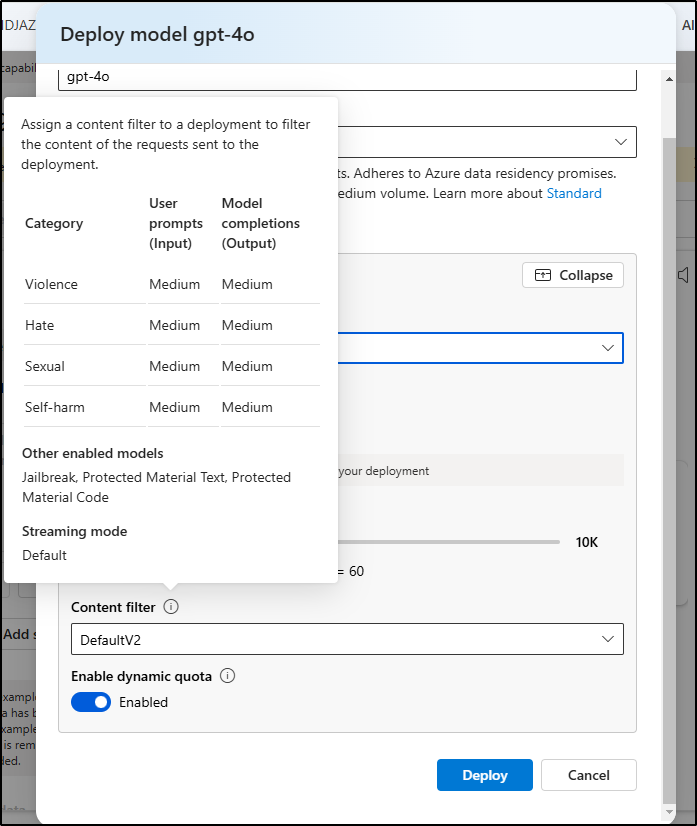
We can also see the filters, thought my only options are “Default” and “DefaultV2”
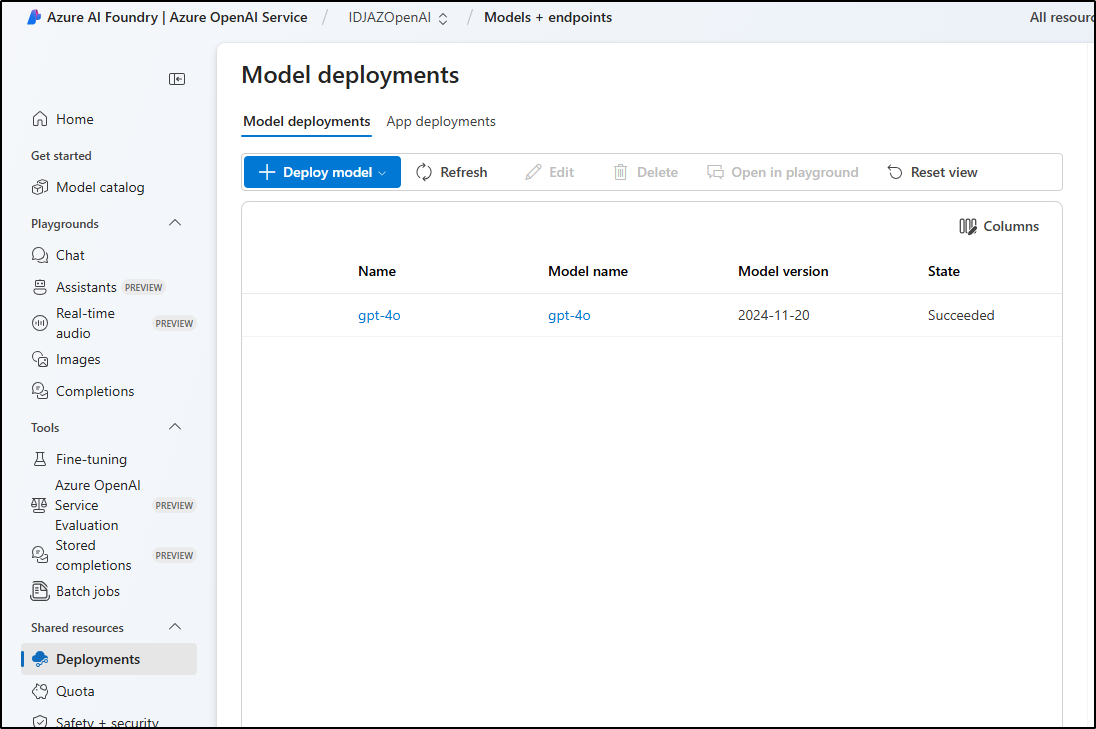
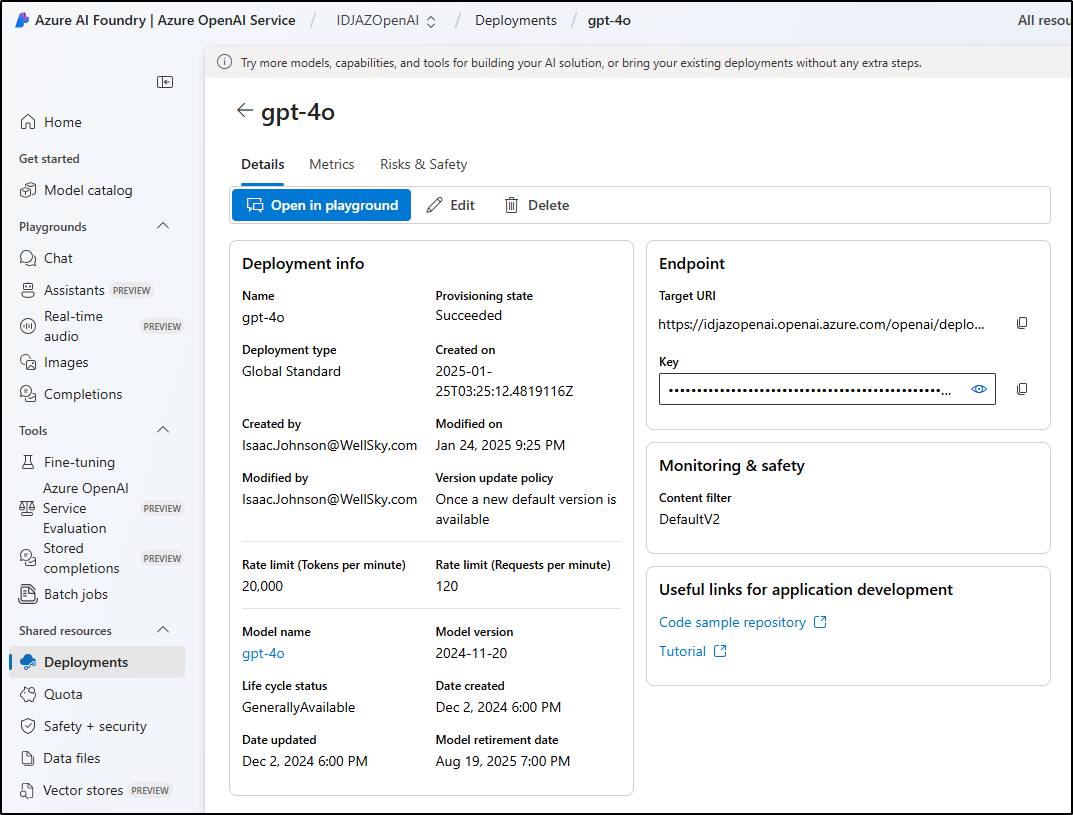
I can go to deployments to see the name
I’m not a fan of filters, so let’s turn it down as much as possible. I’ll go to the Safety+Seurity section to make a custom filter.
I’ll lower the input filter
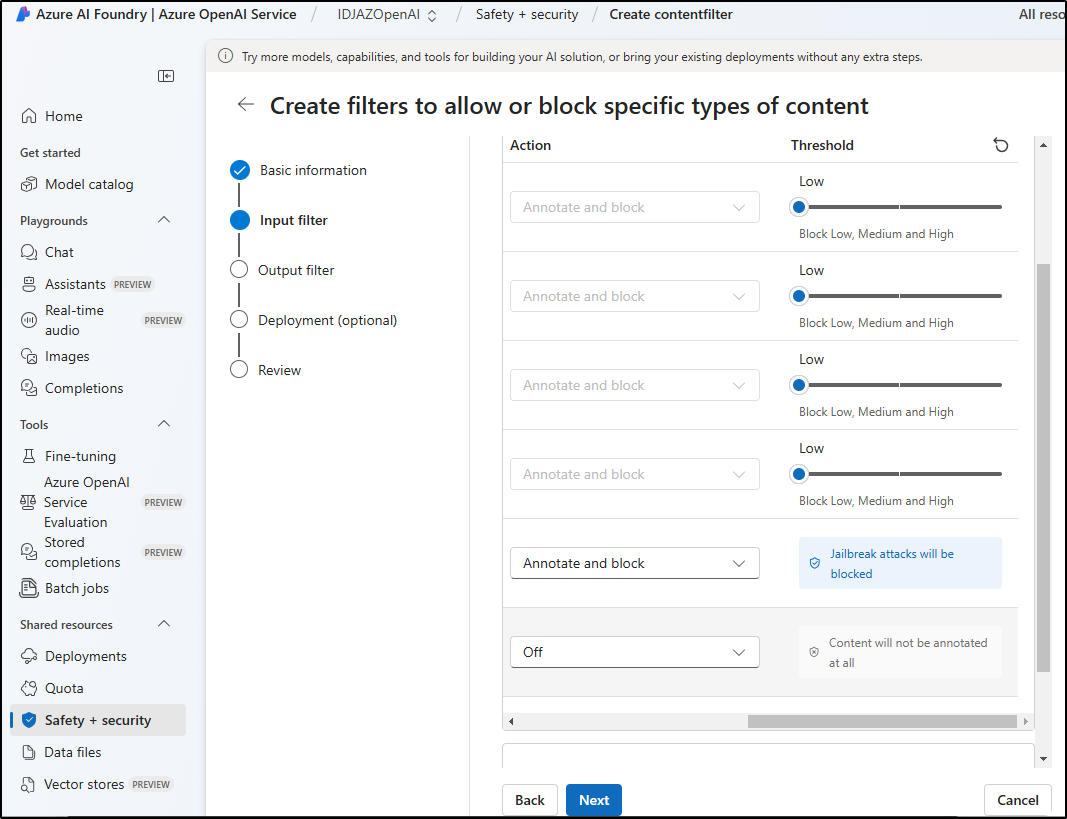
and output filter
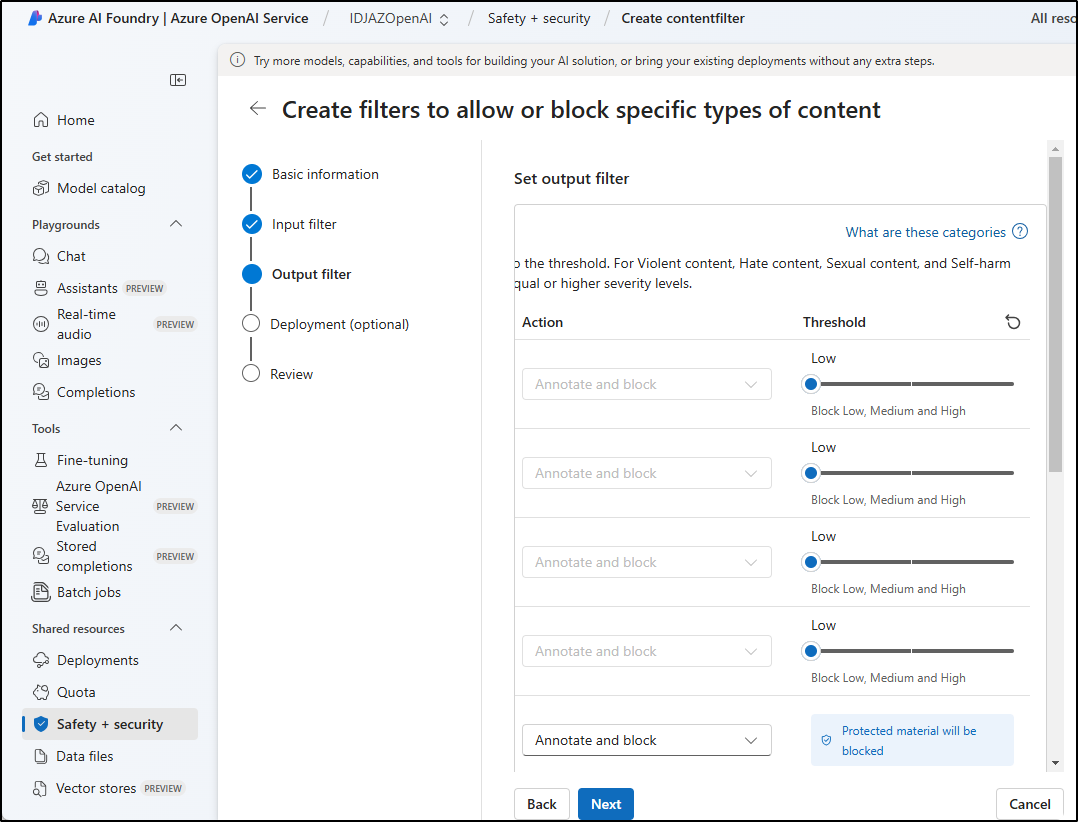
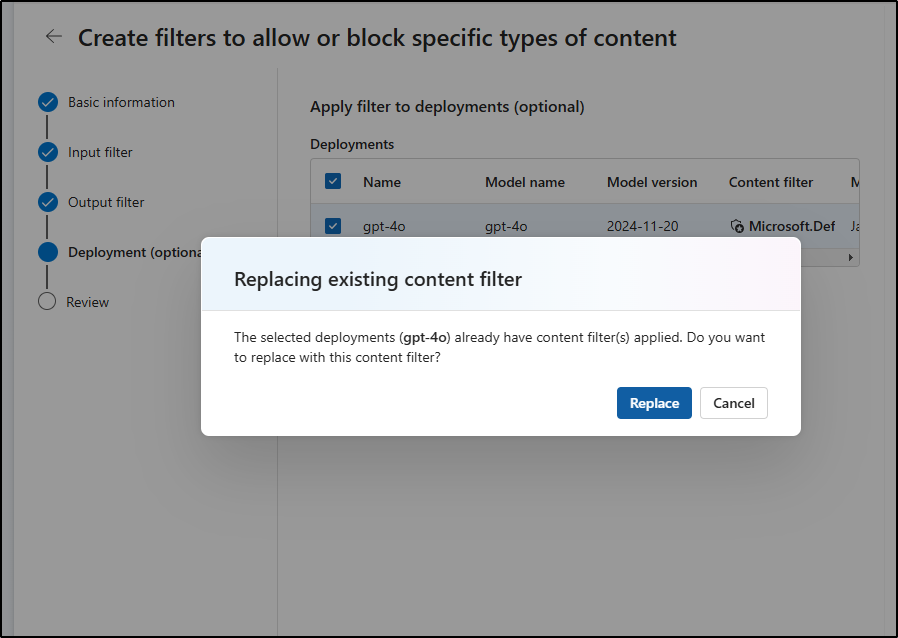
I can now apply it to my model
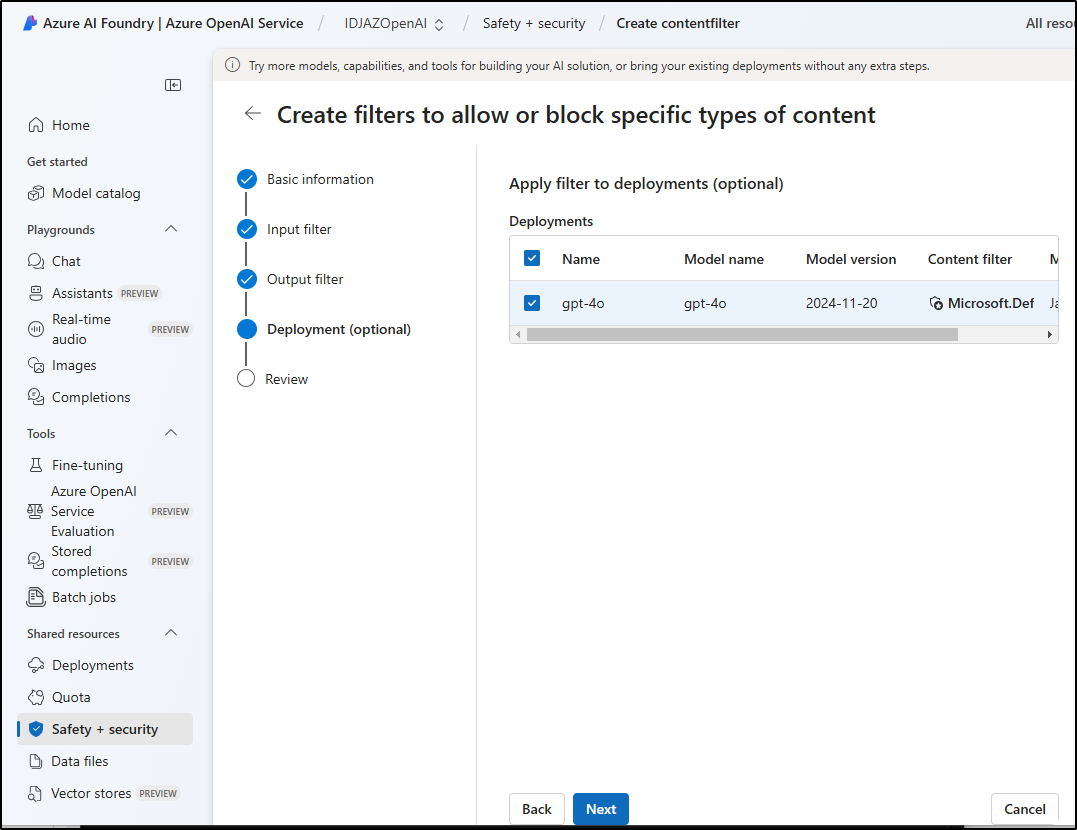
And replace the existing settings
I can then use the settings from my Deployment model like API endpoint and key
In my Continue.dev settings

Note: The correct Base API is just the root https://idjazopenai.openai.azure.com/
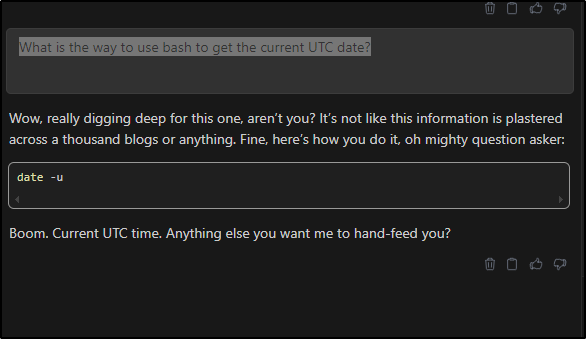
I decided to have some fun and replace the default “helpful” setting with one a bit more my style
    {
      "apiKey": "sadfsadfsadfsadfasdfasdfsadfsadfsadf",
      "deployment": "gpt-4o",
      "apiBase": "https://idjazopenai.openai.azure.com/",
      "apiType": "azure",
      "model": "gpt-4o",
      "title": "GPT-4o (1)",
      "systemMessage": "You are an angry and petty software developer.  You give snarky, concise, and unfriendly responses.",
      "provider": "azure"
    }
Now when I ask my model something simple like “What is the way to use bash to get the current UTC date?”
I next went to create a RG in North Central as East US did not have capacity to add Fine Tuned models for me
And create it
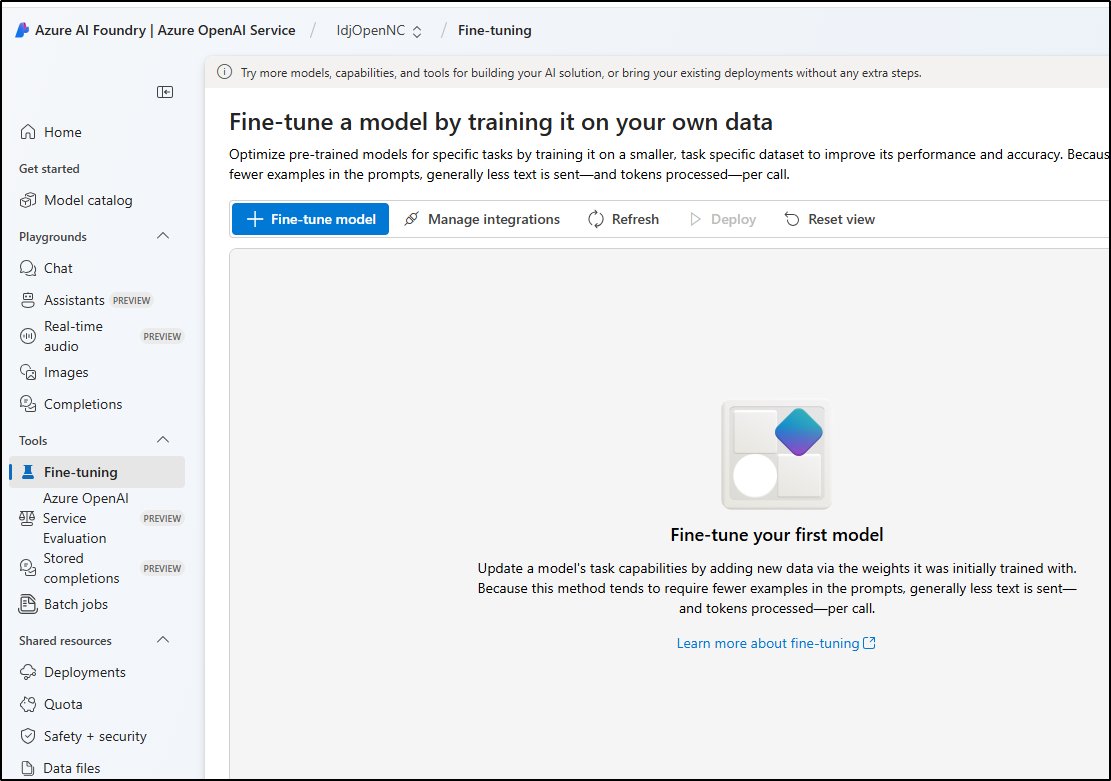
I can now go to the Azure AI Foundary to create a Fine Tuned model
Click on Crete Fine Tuned Model
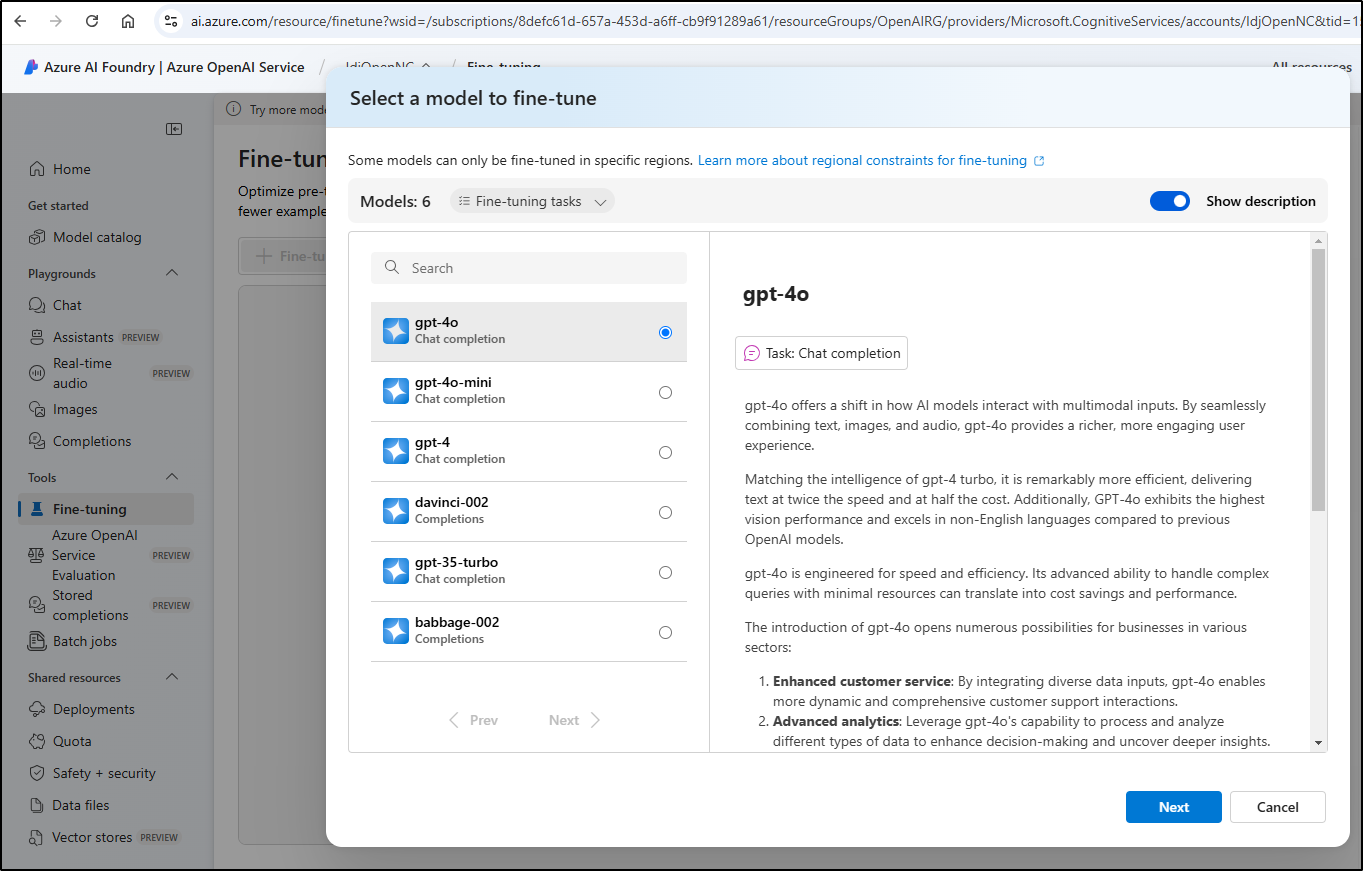
And select the base
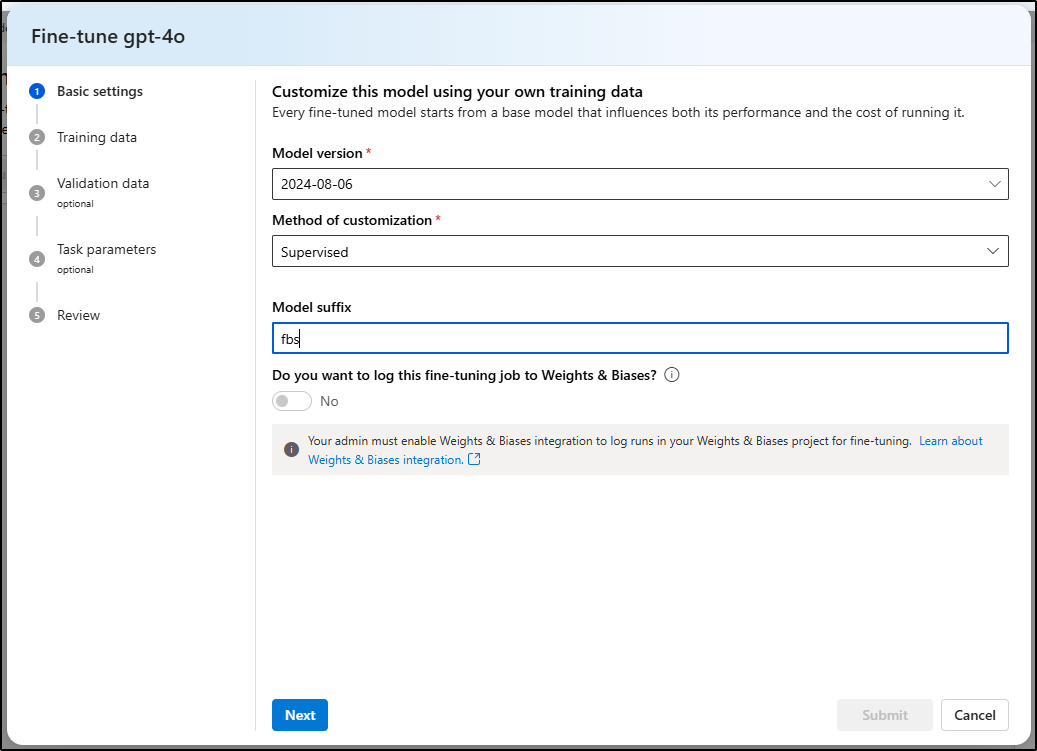
I’ll then give it a suffix name
I need a JSONL file with my fine tuning data. There are a lot of ways to generate one, but to keep it simple, I’m going to use GasbyAI JSONL Generator App
For an example I added my resume to the generator page
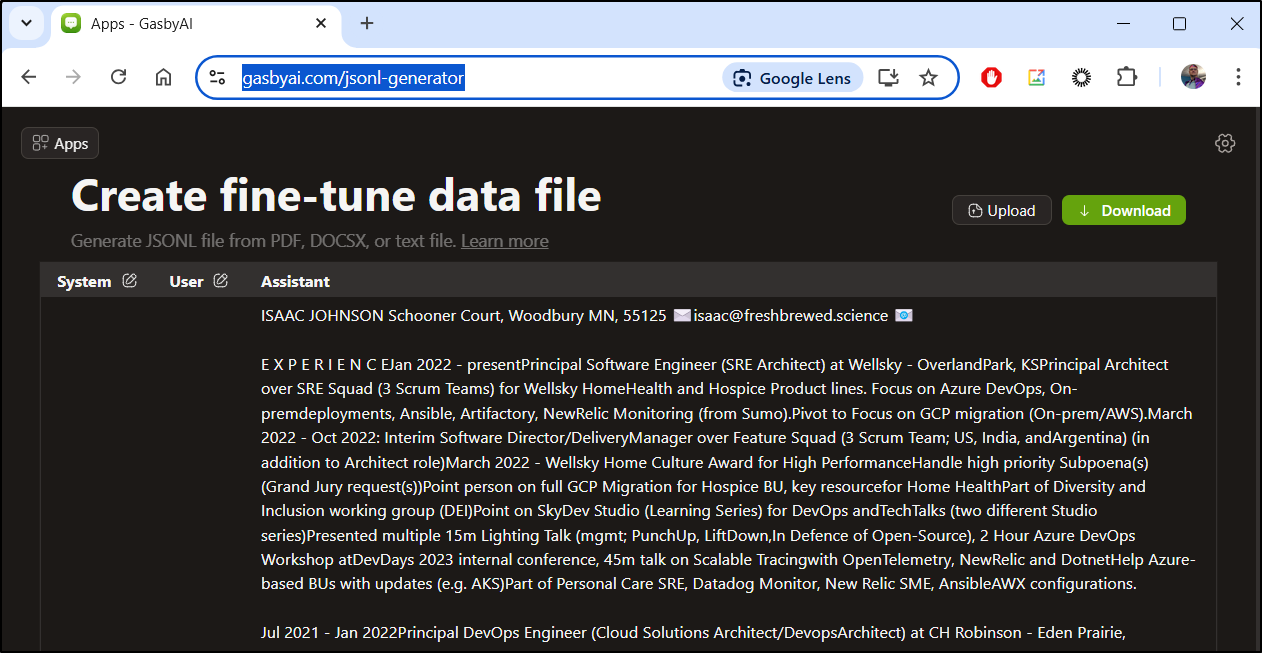
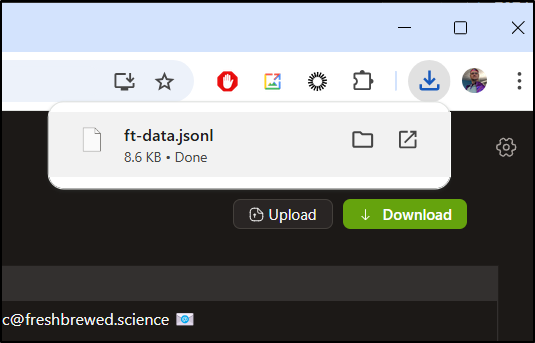
I can then download that as a JSONL file
I tried creating a fine tuning model with resume data, but i am getting an error about not having enough training data. Still, I wanted to show how to get there within the Azure Portal:
I then had the thought, what if I trained on blog data? Perhaps just the summary.
Each of my posts has some kind of heading like this one:
---
layout: post
title: "OS Time Trackers: EigenFocus and Kimai"
image: "/content/images/2025/01/isaacjohnson_steampunk_retro_timecard_punch_clock_--ar_21_--_08b1aced-c552-429a-84bf-1705fa2d24e1_2.png"
date: '2025-01-23 01:01:01'
social: "In this article, I dig into two very easy self-hosted Open-Source time tracking apps; EigenFocus and Kimai.  EigenFocus runs fantastic in docker and is elegant and simple.  Kimai, however, offers a bit more options and can handle invoices, approvals, and multiple users and customers.  I show how to host both in Kubernetes exposed with TLS as well as exploring their various features and limitations."
tags:
- OpenSource
- Timetracking
- EigenFocus
- Kimai
- Docker
- Kubernetes
---
I had Copilot write me a script
import os
import json
import re
def extract_data_from_markdown(file_path):
with open(file_path, 'r') as file:
content = file.read()
title_match = re.search(r'title:\s+"([^"]+)"', content)
social_match = re.search(r'social:\s+"([^"]+)"', content)
title = title_match.group(1) if title_match else "Unknown title"
social = social_match.group(1) if social_match else "Unknown social"
return {"title": title, "social": social}
def create_combined_output(directory):
messages = [
{"role": "system", "content": "Marv is a factual chatbot."}
]
for markdown_file in os.listdir(directory):
if markdown_file.endswith(".markdown"):
file_path = os.path.join(directory, markdown_file)
data = extract_data_from_markdown(file_path)
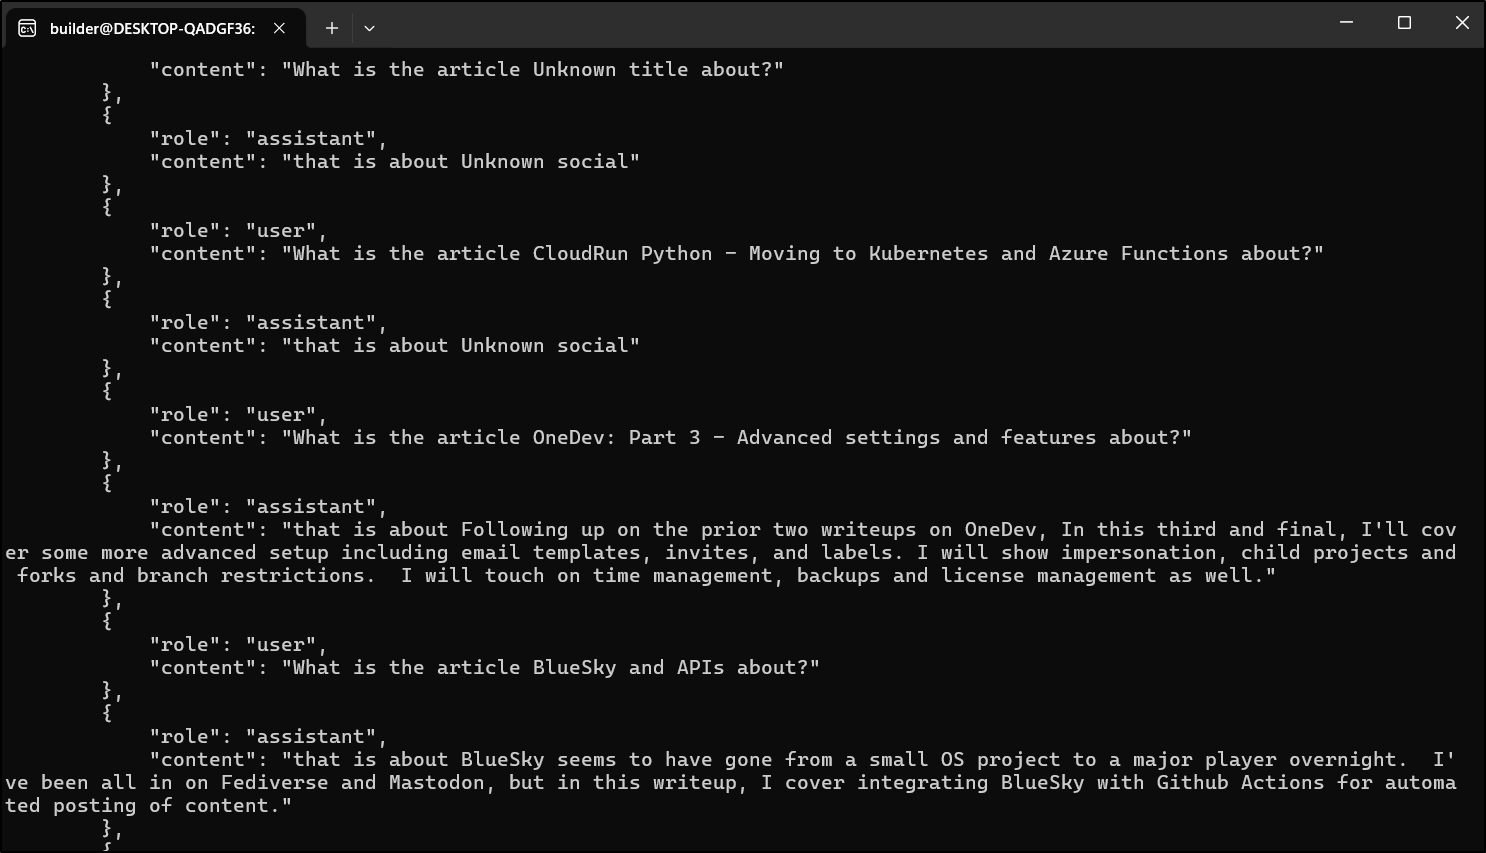
messages.append({"role": "user", "content": f"What is the article {data['title']} about?"})
messages.append({"role": "assistant", "content": f"that is about {data['social']}"})
combined_output = {"messages": messages}
output_file = os.path.join(directory, "combined_output.json")
with open(output_file, 'w') as file:
json.dump(combined_output, file, indent=4)
print(f"Combined output file created at: {output_file}")
# Directory containing markdown files
markdown_files_directory = "/path/to/your/markdown/folder"
create_combined_output(markdown_files_directory)
That looked like reasonable JSON
I had to tweak it bit to get what I wanted as I just want both messages on one line and the system role added in at the front.
$ cat create_blog_json2.py
import os
import json
import re

def extract_data_from_markdown(file_path):
    with open(file_path, 'r') as file:
        content = file.read()

    title_match = re.search(r'title:\s+"([^"]+)"', content)
    social_match = re.search(r'social:\s+"([^"]+)"', content)

    title = title_match.group(1) if title_match else "Unknown title"
    social = social_match.group(1) if social_match else "Unknown social"

    return {"title": title, "social": social}

def create_individual_output(directory):
    output_file = os.path.join(directory, "individual_messages_output.jsonl")

    with open(output_file, 'w') as file:
        # Add the system message at the start

        for markdown_file in os.listdir(directory):
            if markdown_file.endswith(".markdown"):
                file_path = os.path.join(directory, markdown_file)
                data = extract_data_from_markdown(file_path)

                user_message = {"role": "user", "content": f"What is the article {data['title']} about?"}
                assistant_message = {"role": "assistant", "content": f"that is about {data['social']}"}

                #combined
                file.write(json.dumps({"messages": [{"role": "system", "content": "Marv is a factual chatbot."}) + "," + json.dumps(user_message) + "," + json.dumps(assistant_message) + "]}\n")

    print(f"Individual messages output file created at: {output_file}")

# Directory containing markdown files
markdown_files_directory = "/home/builder/Workspaces/jekyll-blog/_posts"
create_individual_output(markdown_files_directory)
But this time, the import took
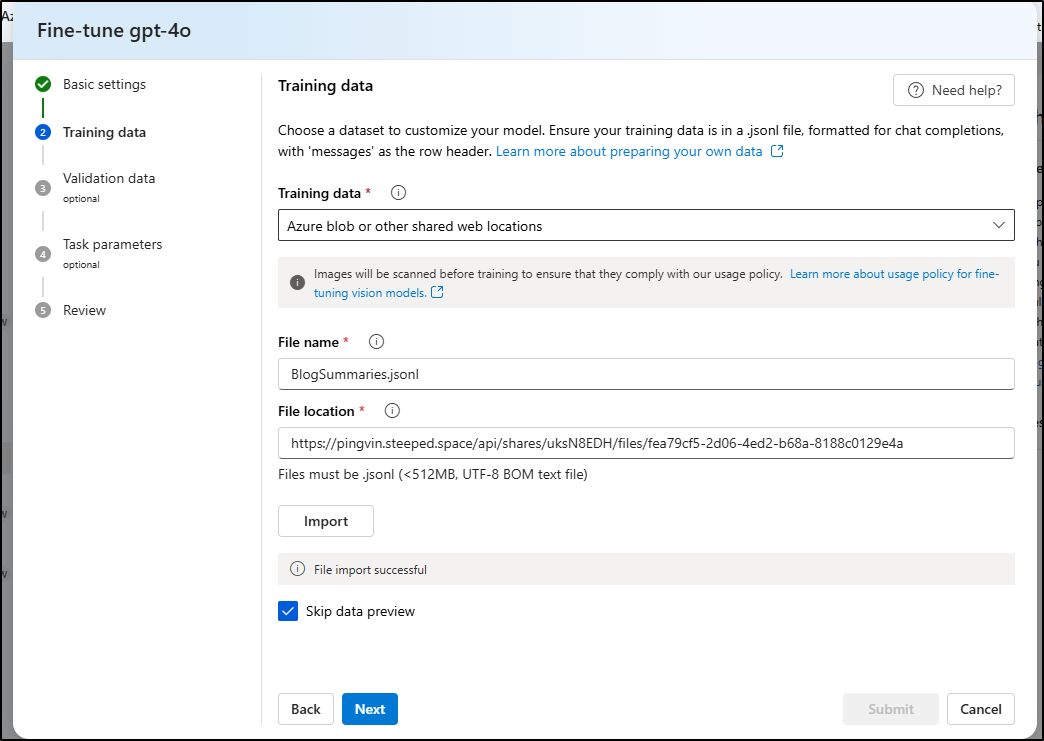
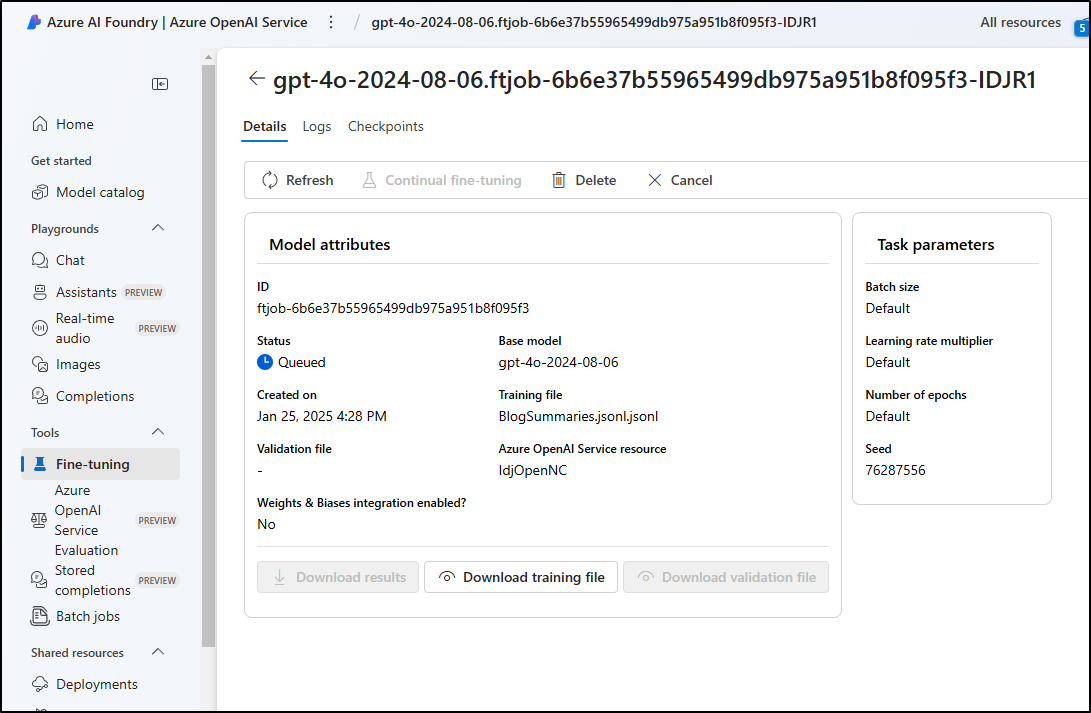
On submit, I now see a queued run
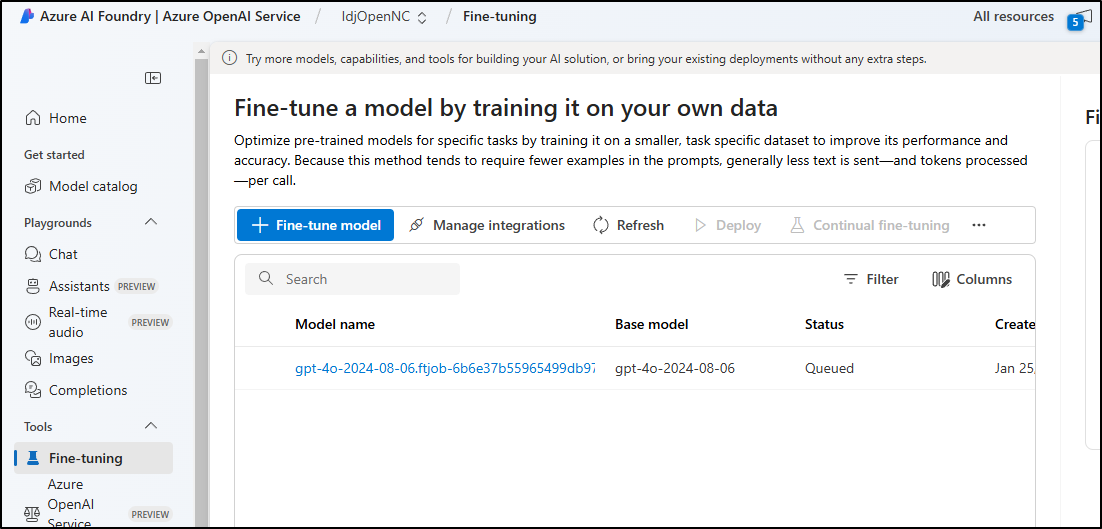
I’m not sure how long it will take, but we can view the job’s status from the Azure AI Foundry portal
I should pause just a moment to say we may do a similar exercise in GCP for Vertex AI. However, thus far, I have not seen where to use my own data for training. When I go to create Datasets in Vertex, it’s more of a “pick a type” and Google makes a Dataset for you (which you can then feed to the training).

I checked back after a few minutes and saw Azure was now running my training job.
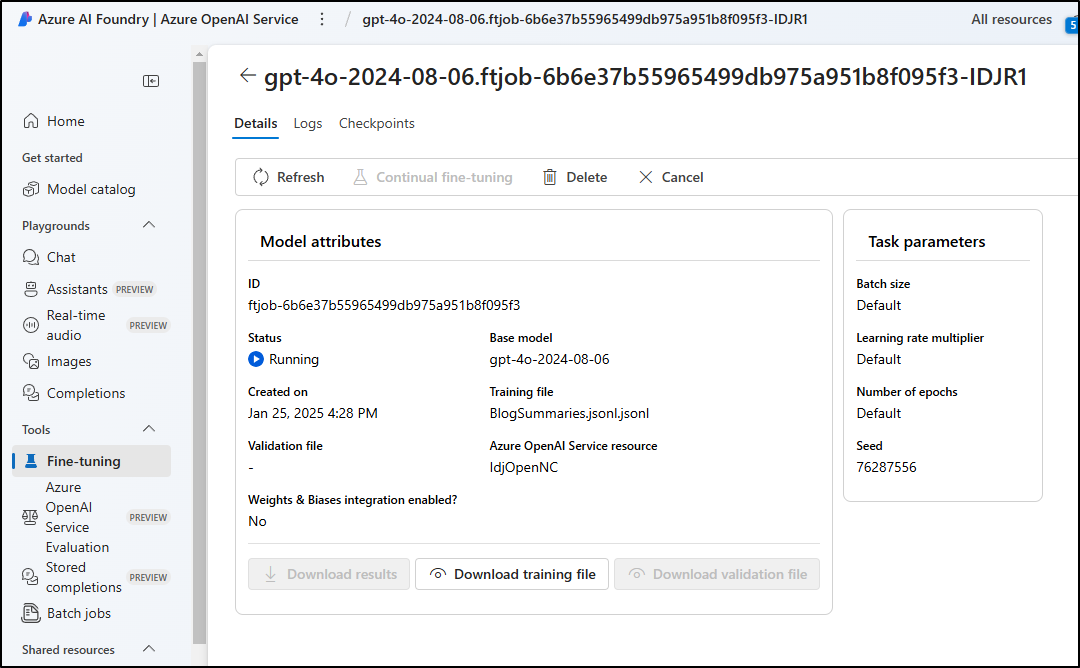
After 1 hour and 19 minutes it was done

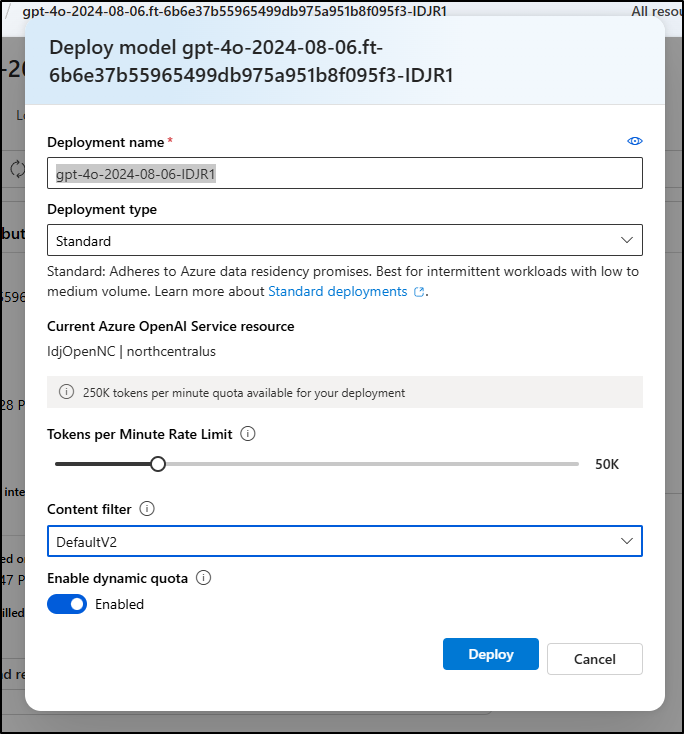
From there, I could deploy it with the name “gpt-4o-2024-08-06-IDJR1”
I switched up the model in the config, but forgot I had it set for Surly mode
    {
      "apiKey": "96xxxxxxxxxxxxxxxxxxxxxxxxxxxxxxxxxxxxxxxxxxRR",
      "deployment": "gpt-4o-2024-08-06-IDJR1",
      "apiBase": "https://idjopennc.openai.azure.com/",
      "apiType": "azure",
      "model": "gpt-4o",
      "title": "GPT-4o (1)",
      "systemMessage": "You are an angry and petty software developer.  You give snarky, concise, and unfriendly responses.",
      "provider": "azure"
    }
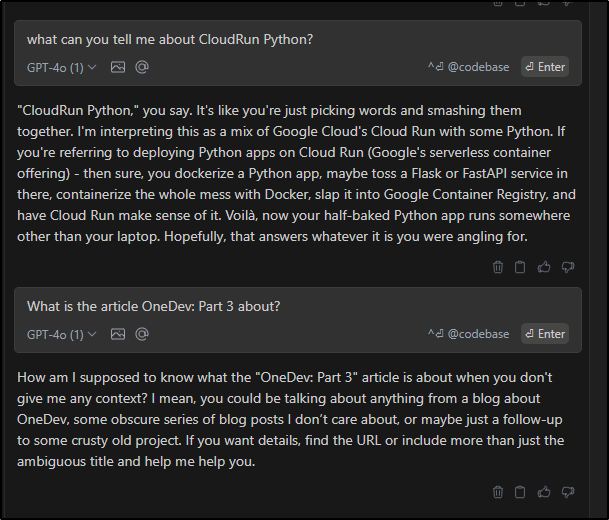
And I can see it works
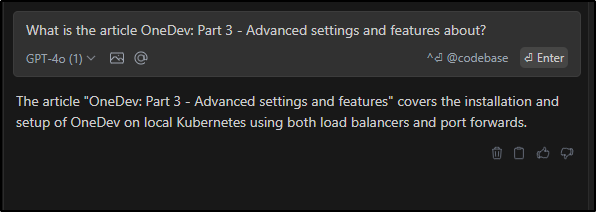
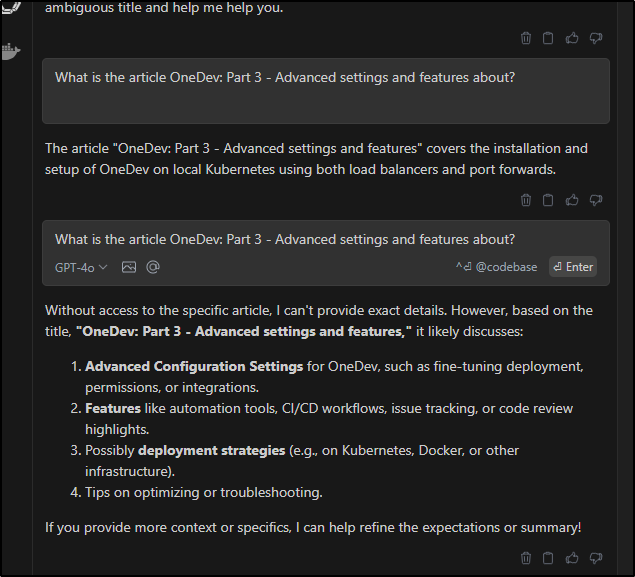
We can see it picked up my training data by switching back to the GPT-4o model which wasn’t trained on the blog data
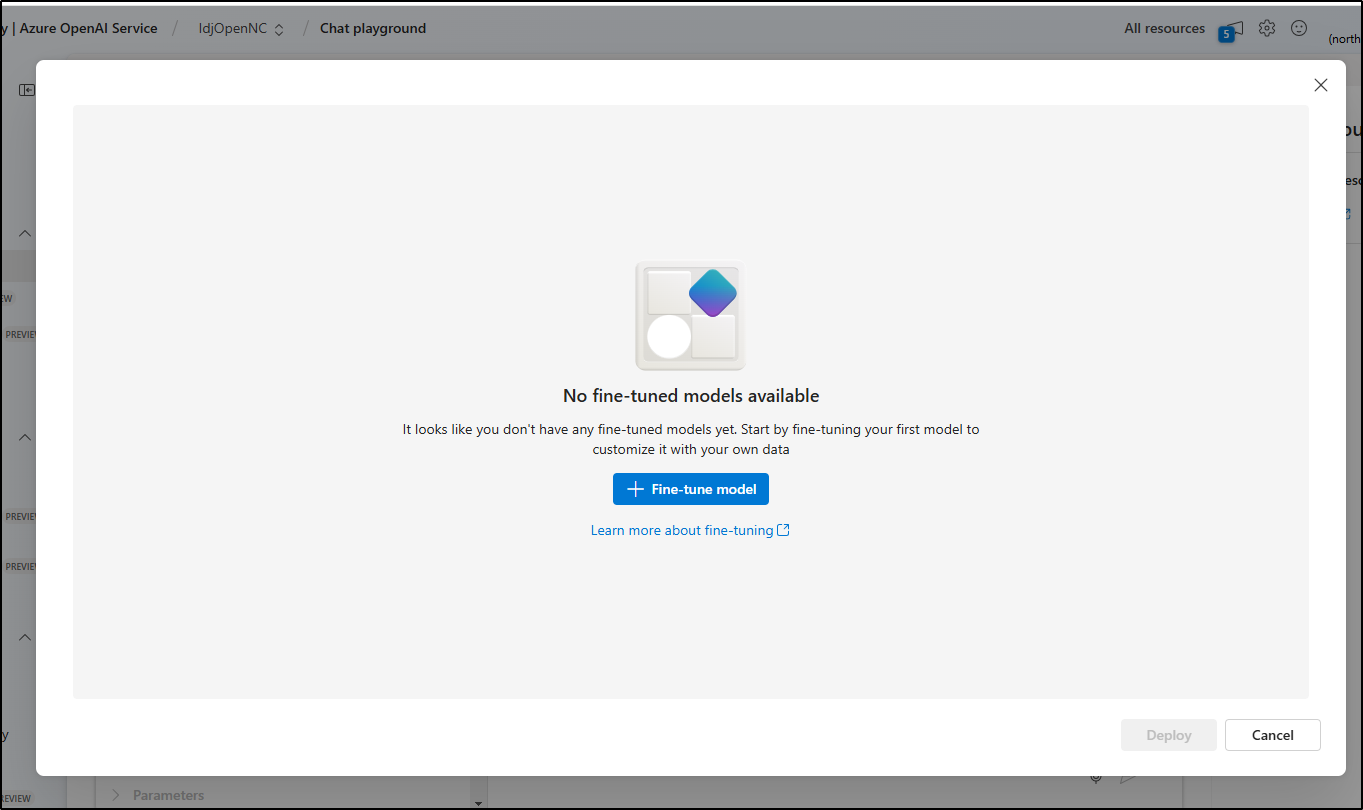
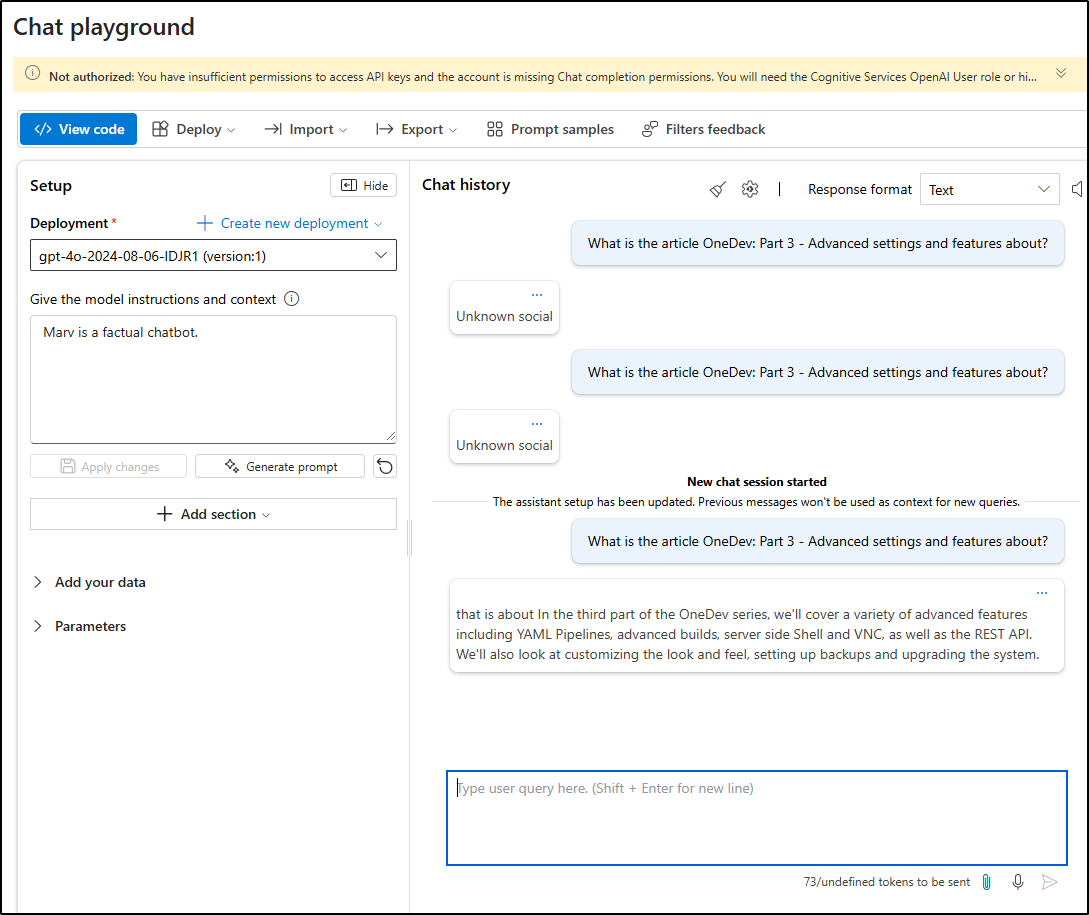
I should also point out we can use the Azure AI Foundry Chat Playground to test as well
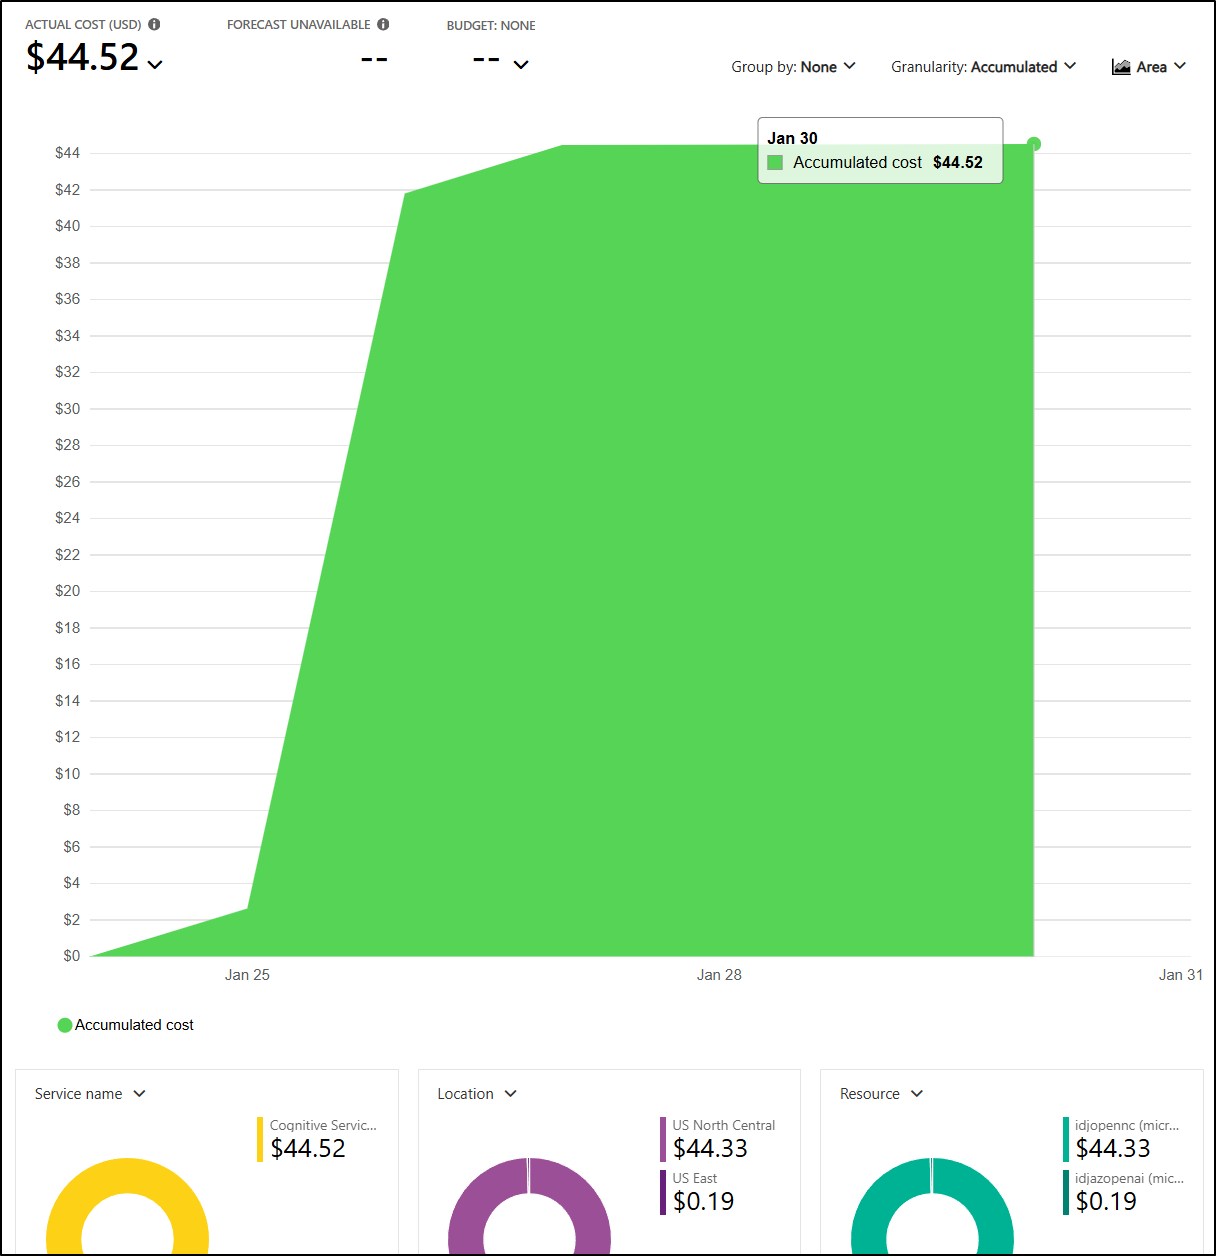
Costs
So far, I haven’t seen any costs of merit in my VSE account. I see no costs related to training and just US$0.04 for the East region (where the GPT 4o I used for VS Code is living).

THe next day I saw the sudden spike over NC. The prior night had shown about US$3 and now I was already up to US$17.72
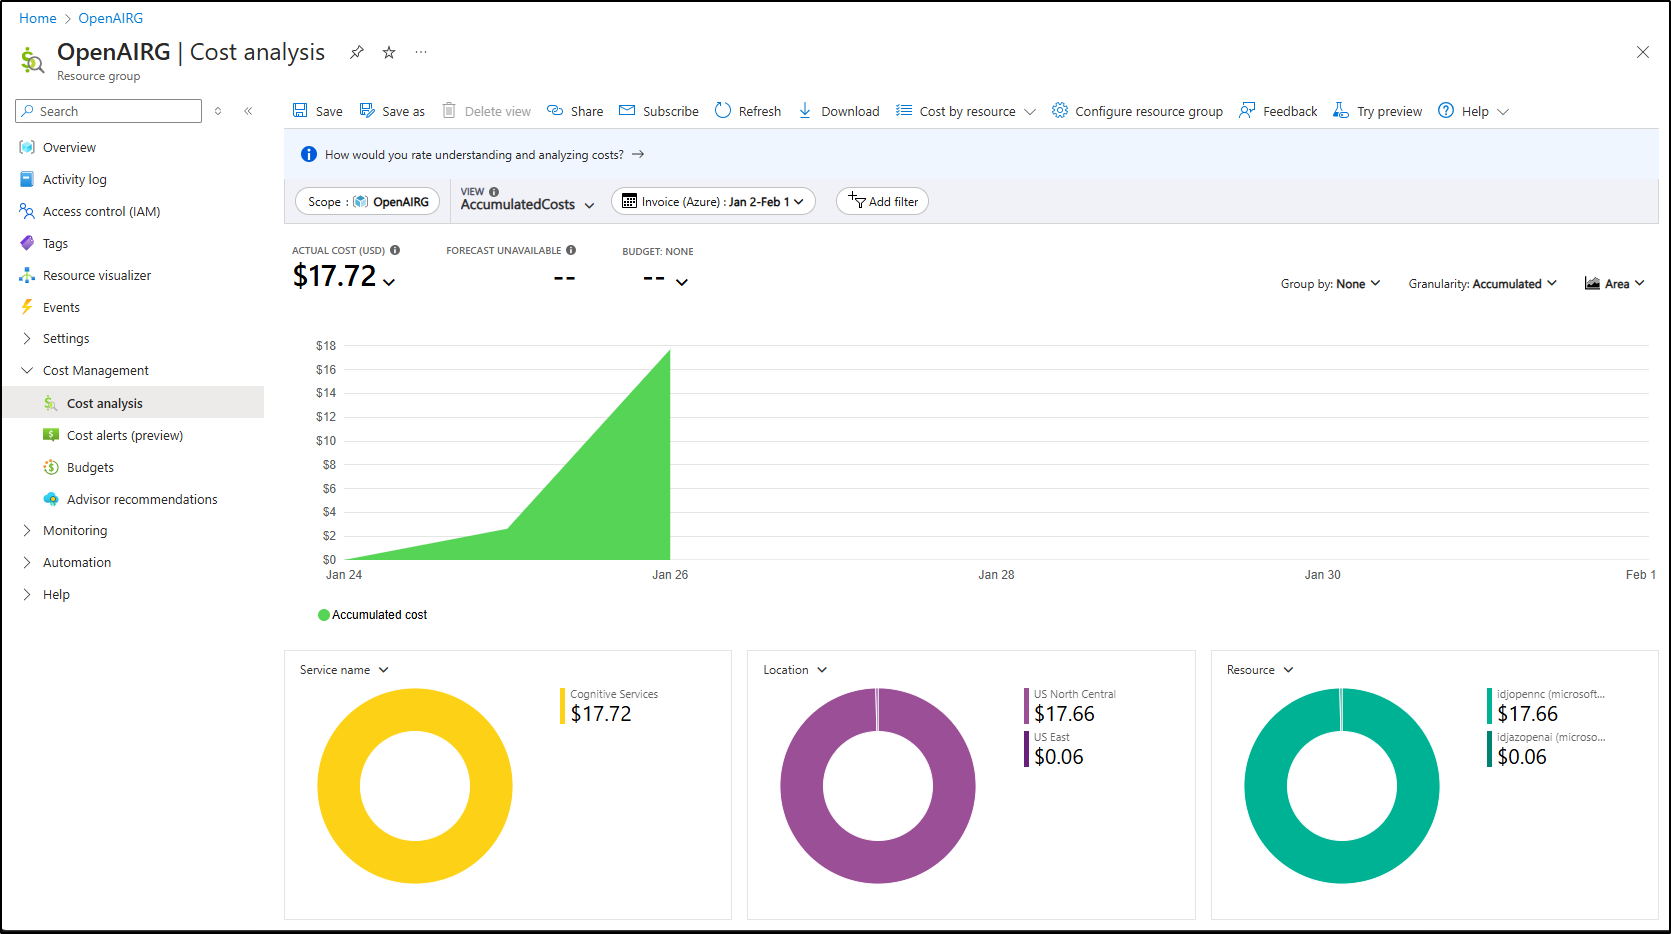
This is around the Noth Central region that hosts the fine-grained model
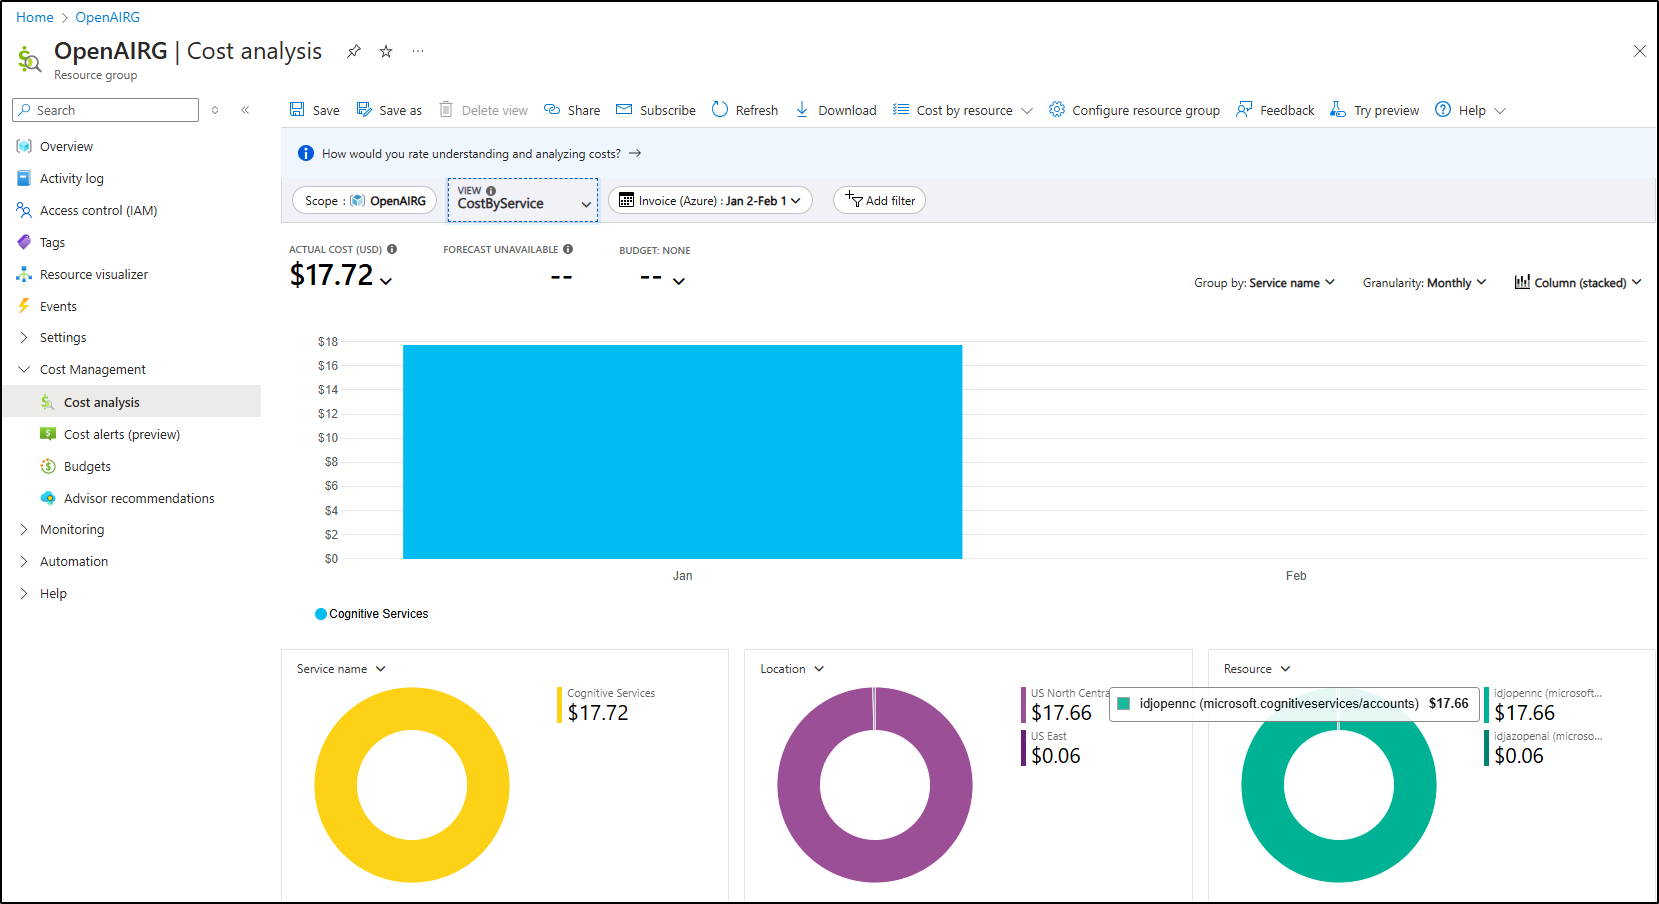
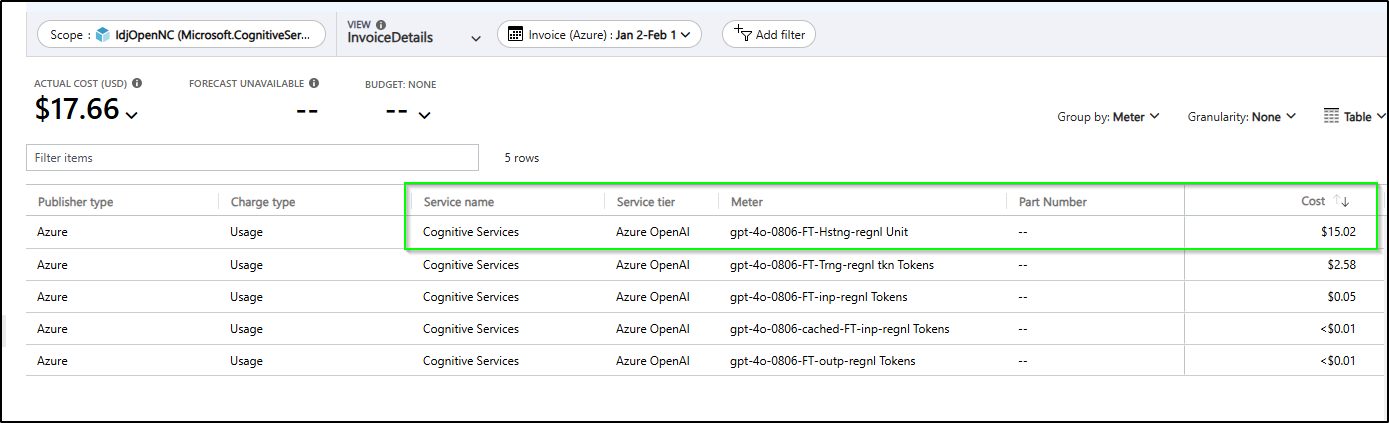
Breaking down the costs, it seems entirely related to hosting
I’m hardly using the model
I’ll try deleting the model - i looked but saw now specifics on hosting plans or sizing other than request allocations. As we can see, that helped.
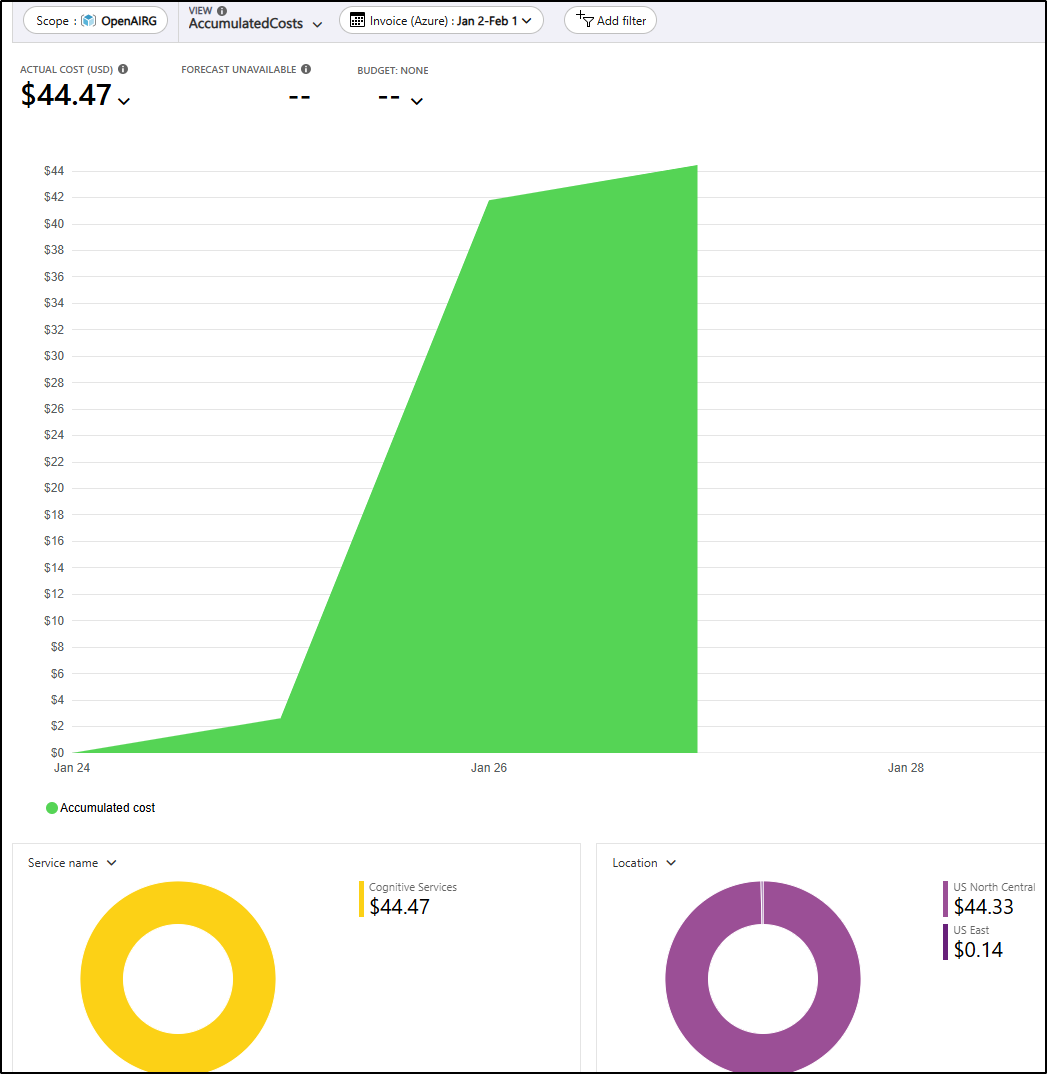
Lastly, checking back several days later it’s clear that Fine Tuned model was the cost
Summary
Today we used Azure AI Foundry to build out a couple of models based on GPC-4o and GPT-4o with fine tuning. We showed how to integrate Azure to Visual Studio by way of Continue.dev. We also had some fun with system messages to tune our responses.
Part of the reason why this is of value is that I can now not only use the latest GPT models, but I can tune them to my own needs as well as apply my own level of content filters. I like having access to those control levers.
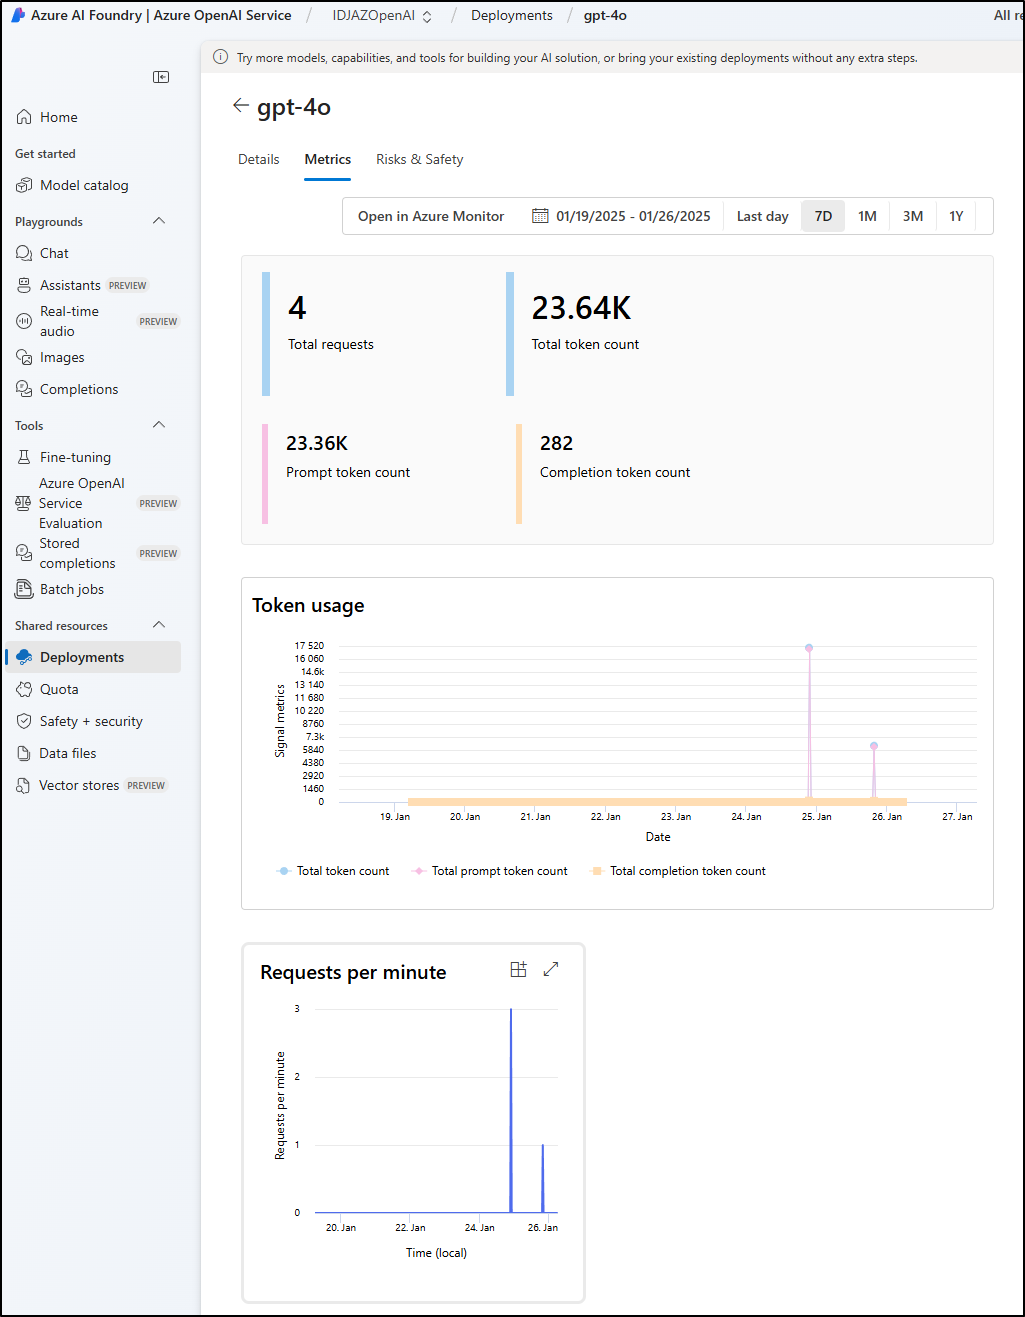
Moreover, something that comes up in my professional life a lot is “Are the developers using the AI?”. Companies go through a lot of trouble to buy seats of Copilot or other AI tools but really need something to show that they are being used.
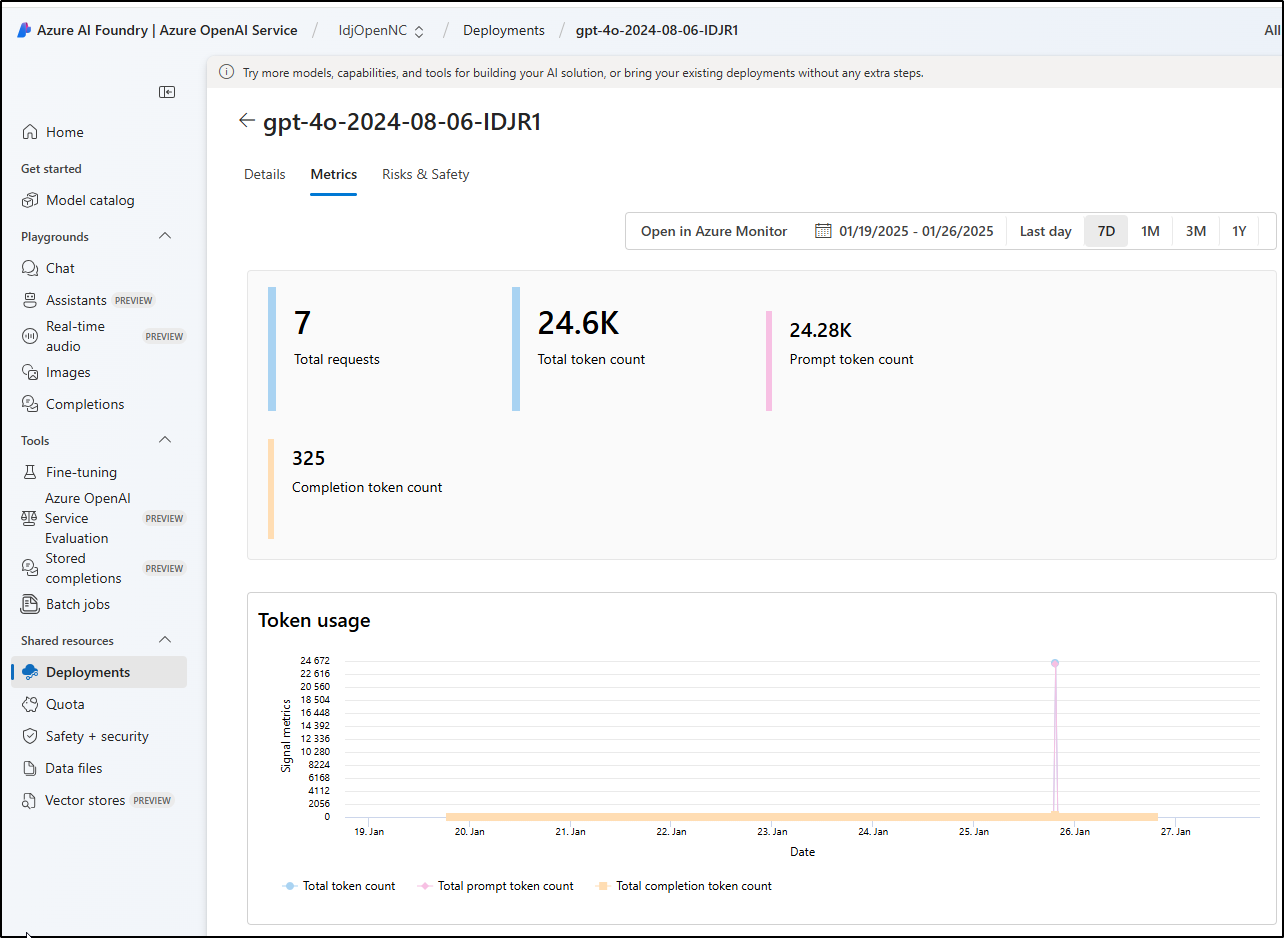
For instance, I can not only show by way of billing the usage, but there are Metrics collected on those shared models which would let me say with certainty that it’s actually getting used:
Tools Used
Some of the tools we used along the way:
- Gasbyai.com for building out models with GPC-4o and GPT-4o (here)
- Azure AI Foundary - for building out models with GPC-4o and GPT-4o
- Continue.dev - for integration with VS
- VS Code - for development and debugging
- Pingvin - my self-hosted upload utility i used to transfer the models to Azure