

Published: Jul 9, 2024 by Isaac Johnson
Recently I was at Open Source North where, in an effort to reduce Toil, it was demonstrated a tool for triggering AWX templates with webhooks.
In their talk they focused on EDA, Event-Driven Ansible. However, I came back to thinking that was just one more extra layer I wouldn’t want.
I’ve been wanting to come up with alternatives to EDA that could trigger Ansible remotely.
I came up with a rather large list so I’ll break them down into several posts with full demonstrations of each. The goal, of course, to show some kind of event driven Ansible Playbook run using a variety of tooling.
Today we’ll look at Rundeck then pivot to AWS where we will use AWS SQS with a Python Lambda function. Moving on to CICD tooling, we’ll build out an anonymous webhook driven Azure DevOps pipeline that will trigger AWX Jobs and wrap with a similar activity using a narrowly defined Github PAT with Github Action driven by a repository dispatch (webhook). Finally, we’ll show a quick example of basic security by adding a password field so we can limit who can invoke AWX from a public form.
Let’s dig in!
Rundeck
Before I move on to the ‘bake your own’, we should point out that Rundeck, now part of Pagerduty, is a tool for exposing automations, like running AWX, via reachable webhooks. It’s moving into the Pagerduty suite, but the OS Rundeck system still is available.
We could easily have an event in SQS or Pubsub go trigger a Rundeck URL that could invoke AWX.
Implementation
We will first login as an admin

Then we’ll pick a project (or create one)
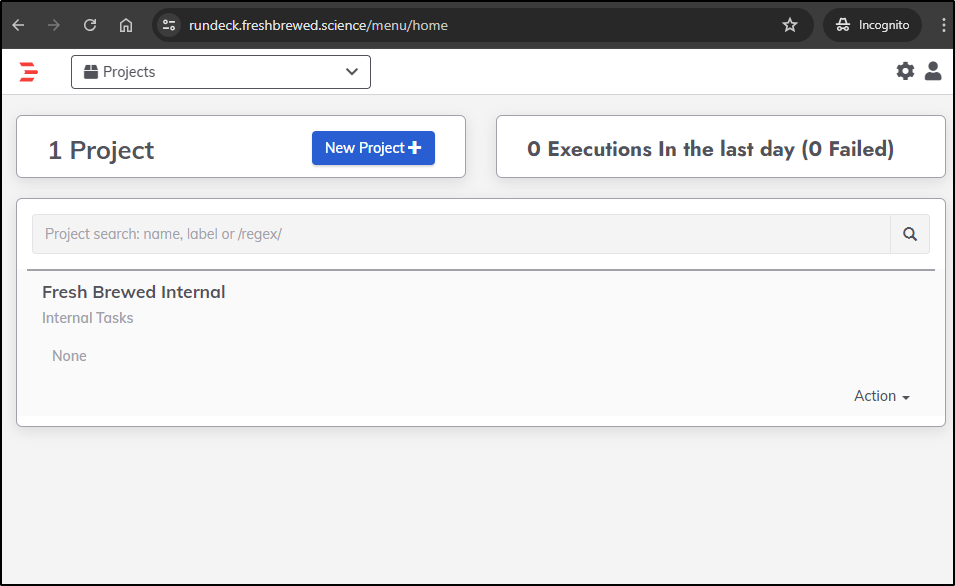
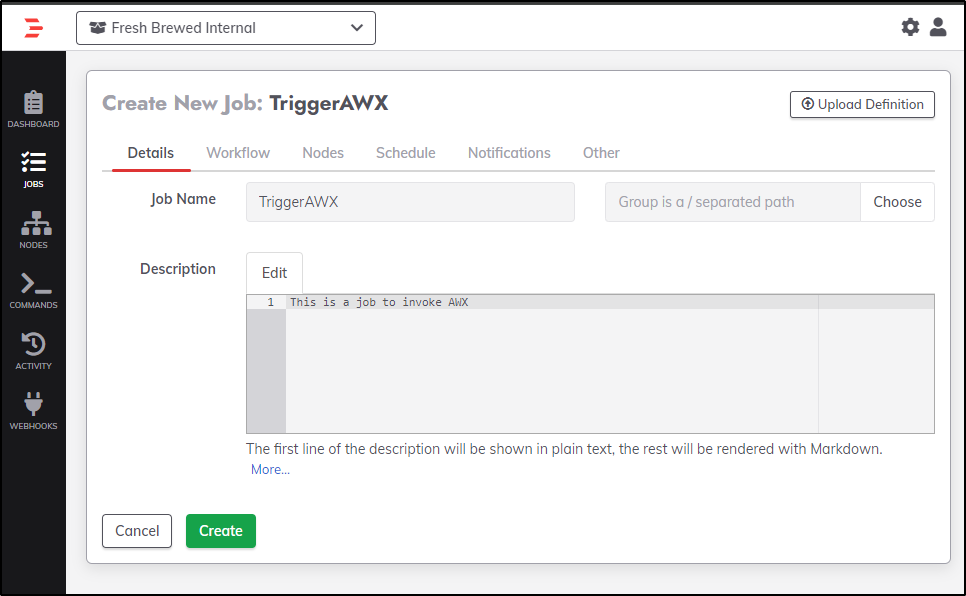
From there, I can create a job
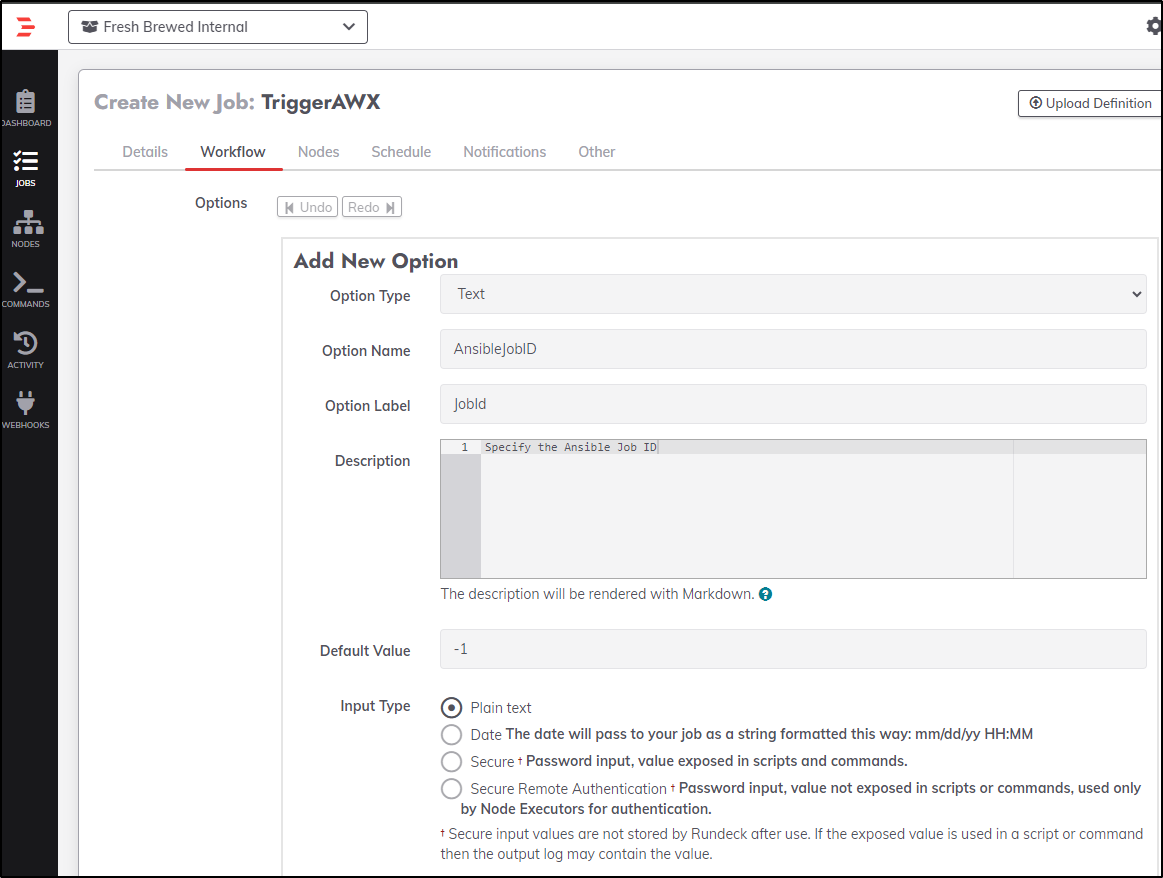
I want to make this usable for any job, so I’ll set an Option for a text field that can receive the Job ID (template ID)
I’ll ad a cmd step to use the variable
curl -X POST -u 'admin:asdfasdfasdf' https://awx.freshbrewed.science/api/v2/job_templates/${option.AnsibleJobID}/launch

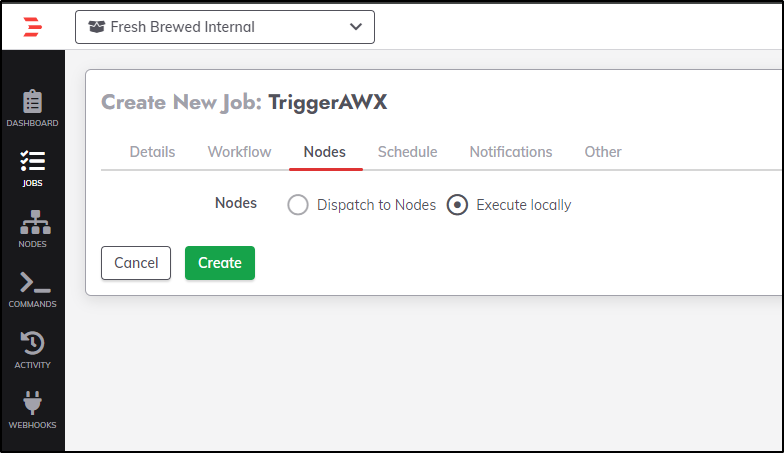
As far as nodes go, I can set it to execute locally
Now that we have jobs, we can do a test run
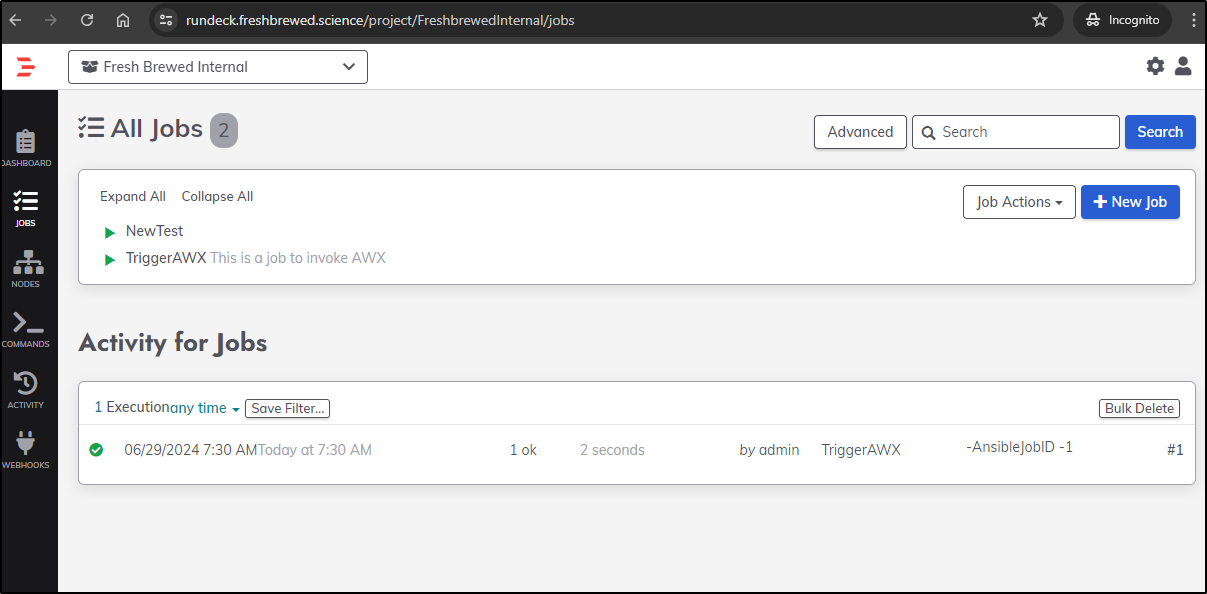
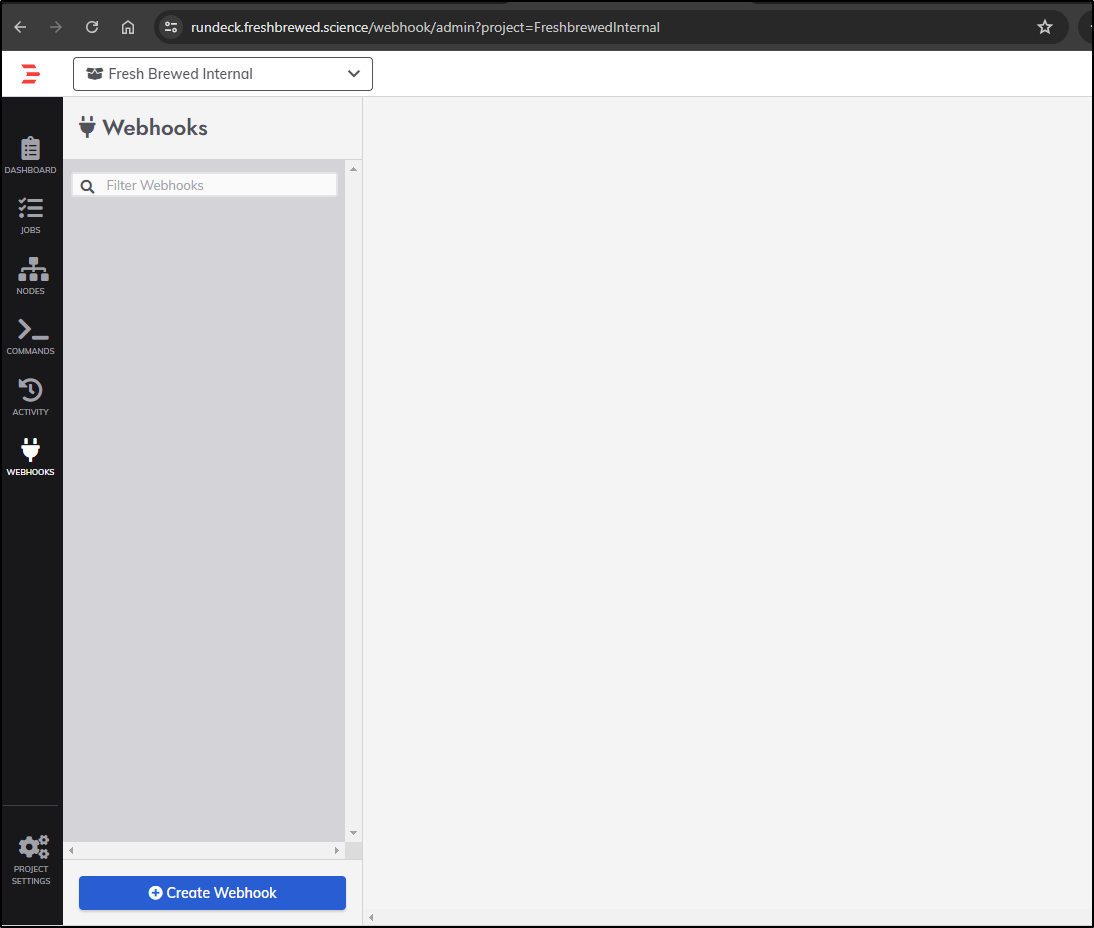
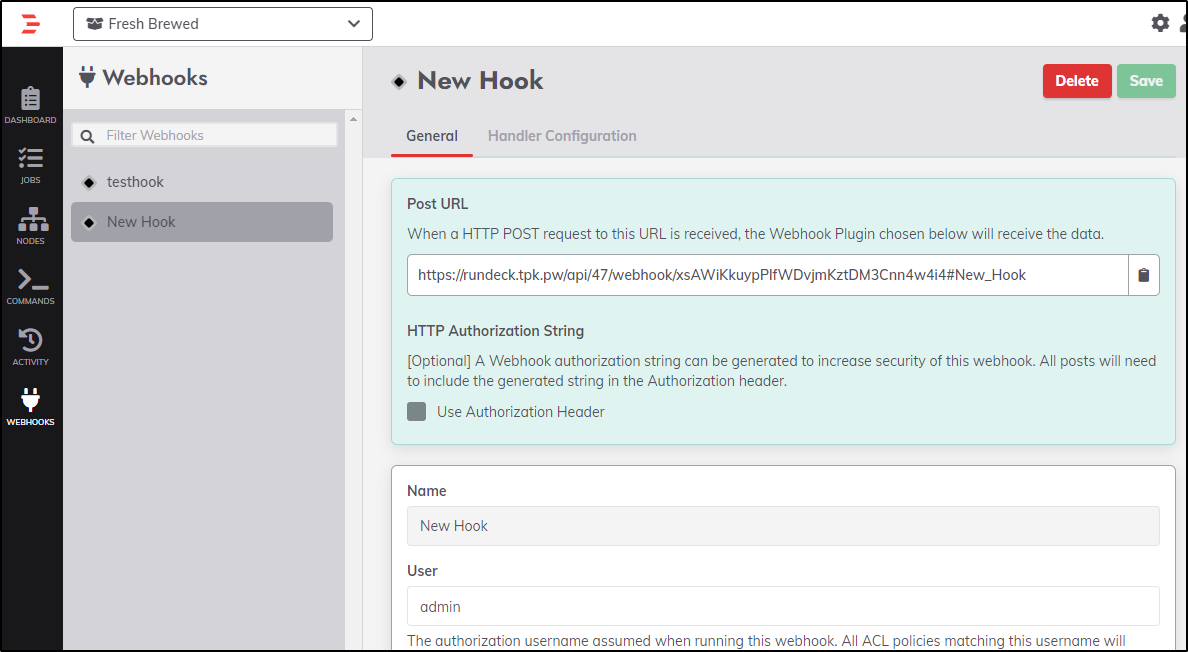
But really, we want to get to Webhooks and click Create Webhook
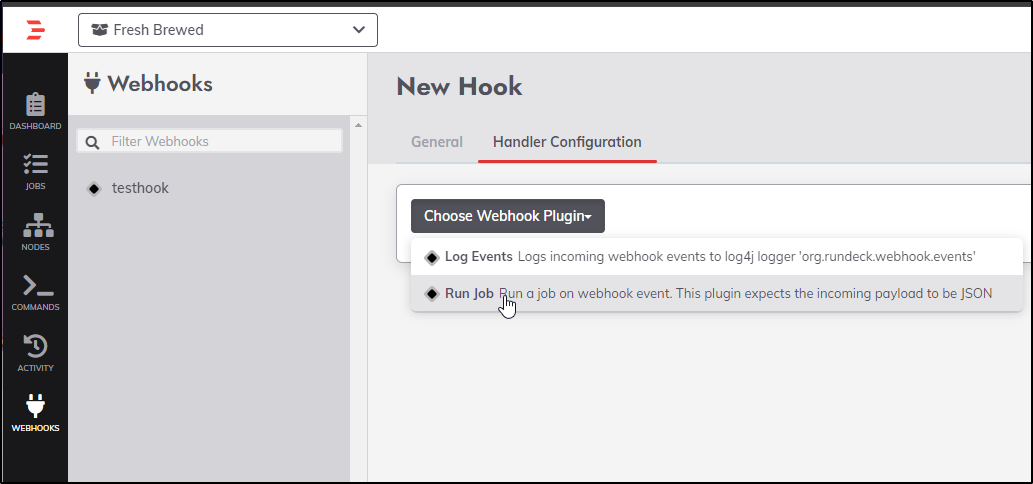
I will use the “Run Job” webhook plugin
Note: i did move to an alternate Rundeck self-hosted as the webhooks were not configured
I’ll then pick my Job
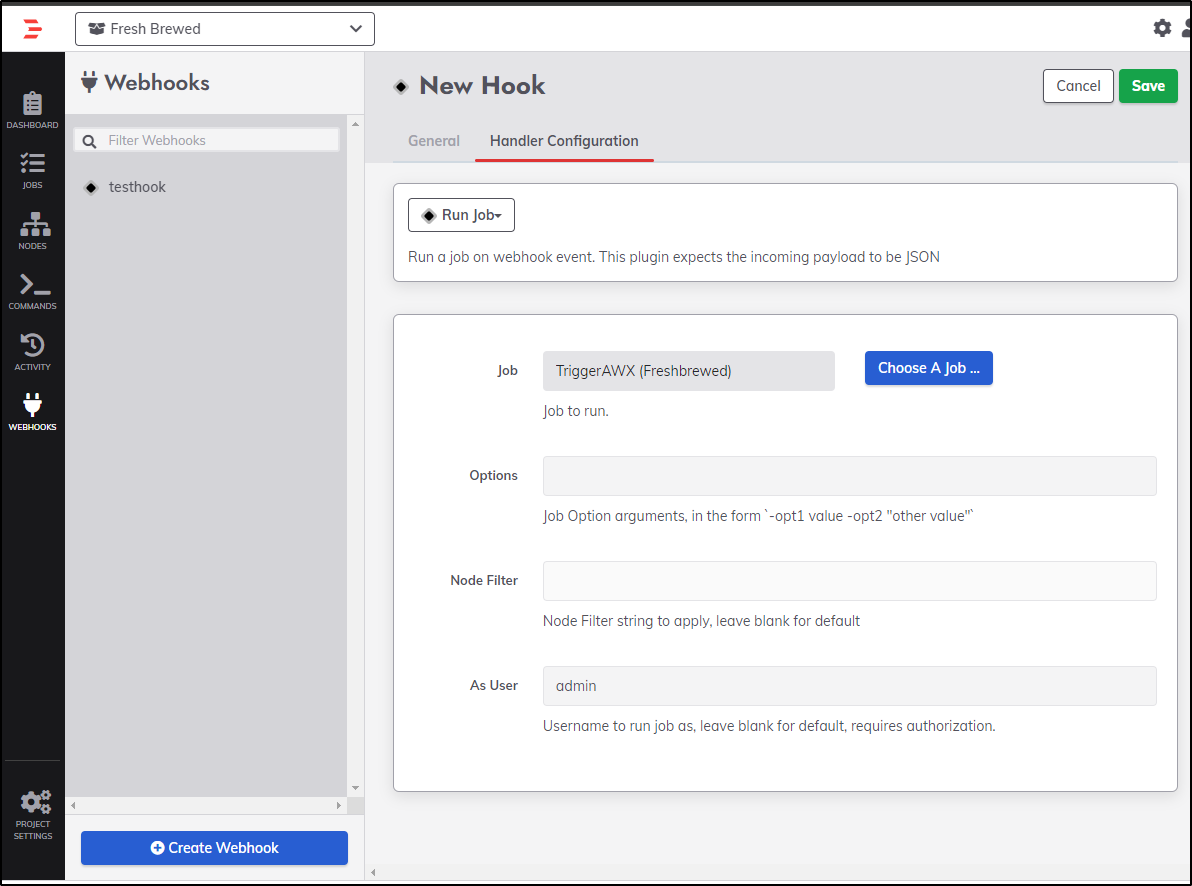
I decided to try and specify a job ID this way

Clicking save gives me a webhook id
I tested locally
$ curl -X POST https://rundeck.tpk.pw/api/47/webhook/xsAWiKkuypPlfWDvjmKztDM3Cnn4w4i4#New_Hook
{"jobId":"2d57b8bd-e57c-4c66-a43e-3d0caf6f5cdd","executionId":"101"}
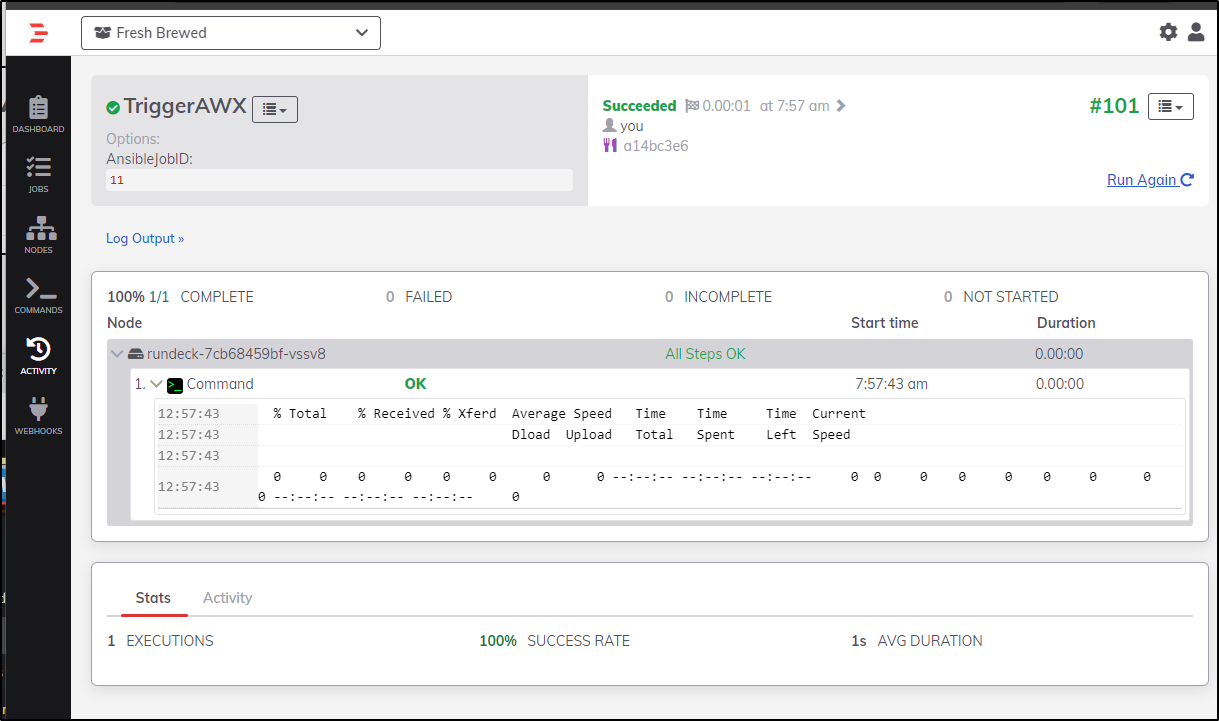
An execution took place

Which passed “11”
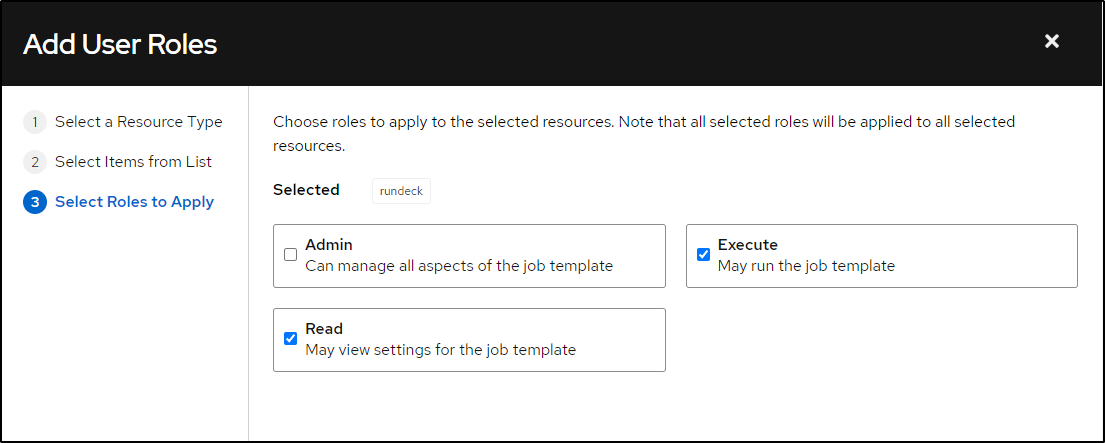
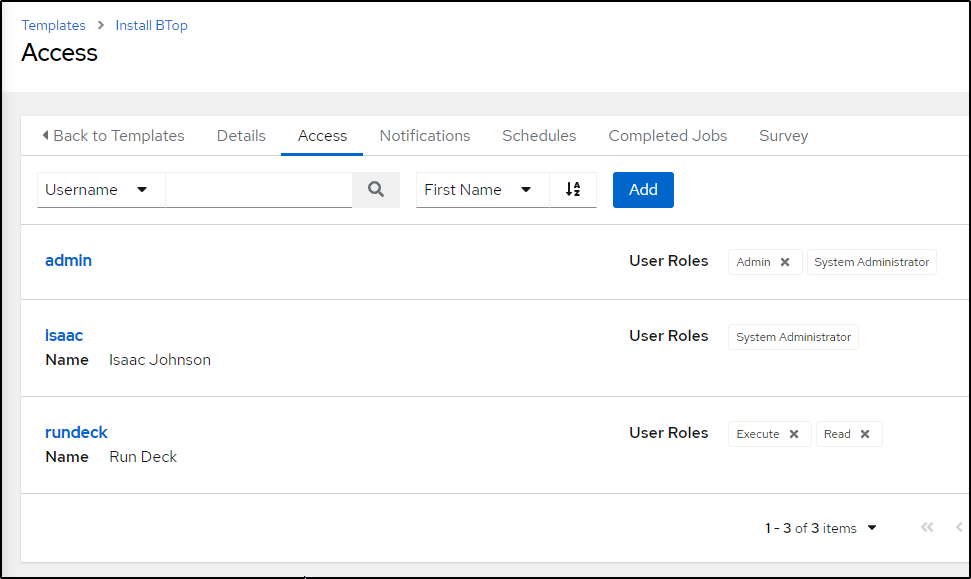
One thing I realized in testing, one needs to ensure the user engaging with AWX has access to that template. Since I was using a narrowly defined user, i needed to come back and grant access
which I can verify
With the syntax set properly
curl --silent -X POST -u "username:password" https://awx.freshbrewed.science/api/v2/job_templates/${option.AnsibleJobID}/launch/
I can now see Rundeck using an anonymous URL to trigger AWX
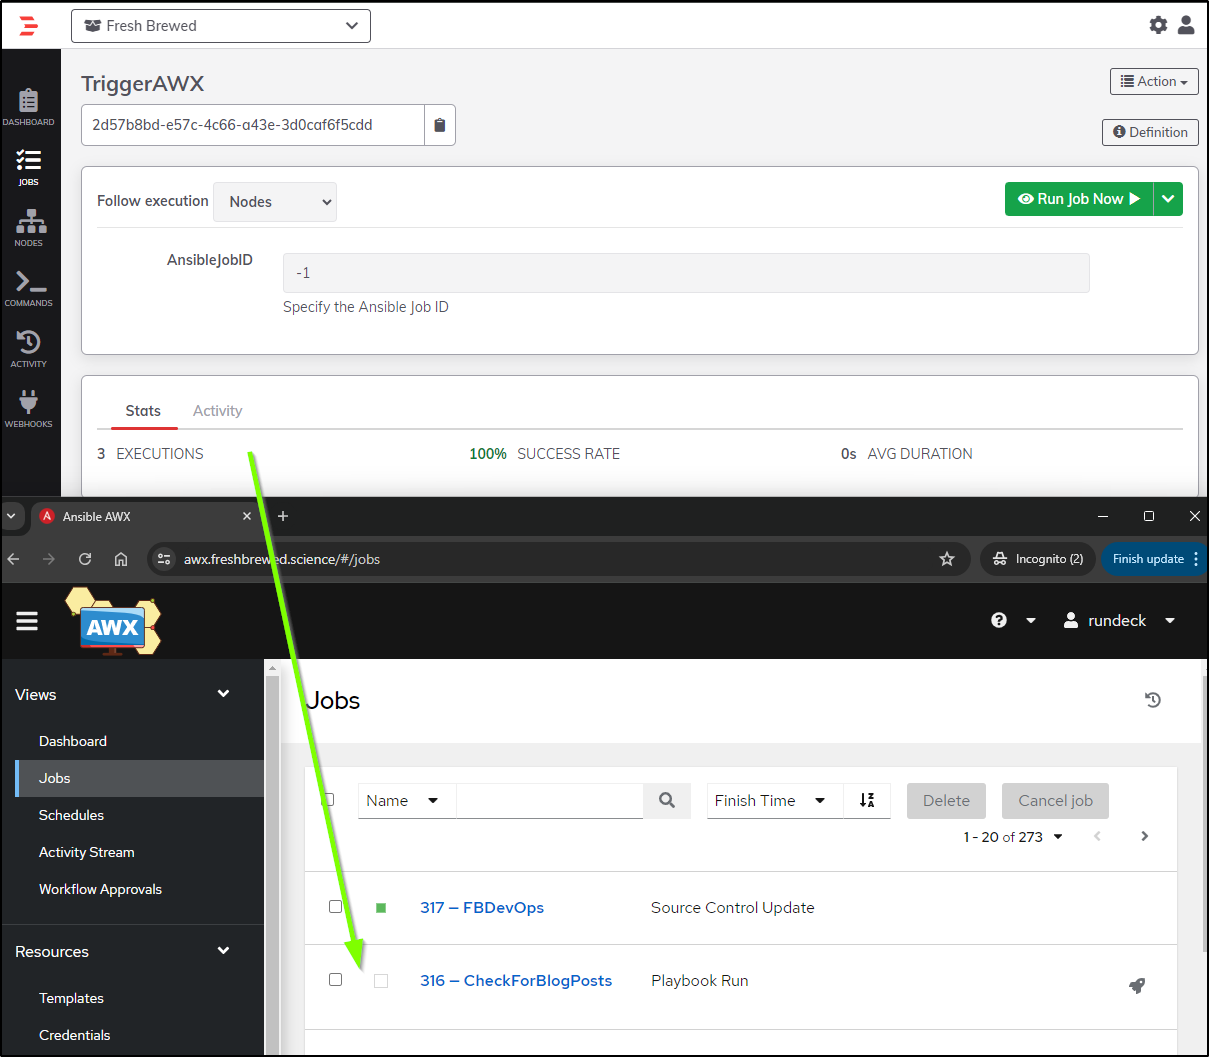
From here I could use it in my APMs.
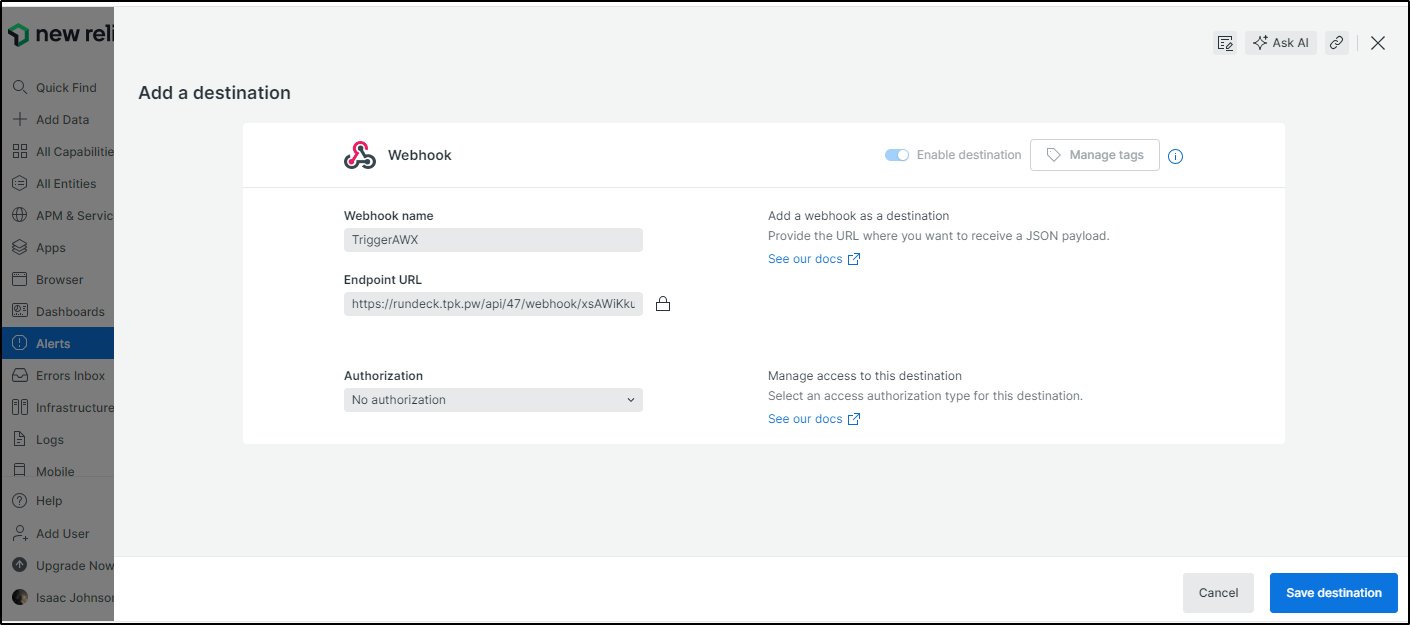
For instance, in NewRelic, I would add a new Webhook destination
Then add to a workflow
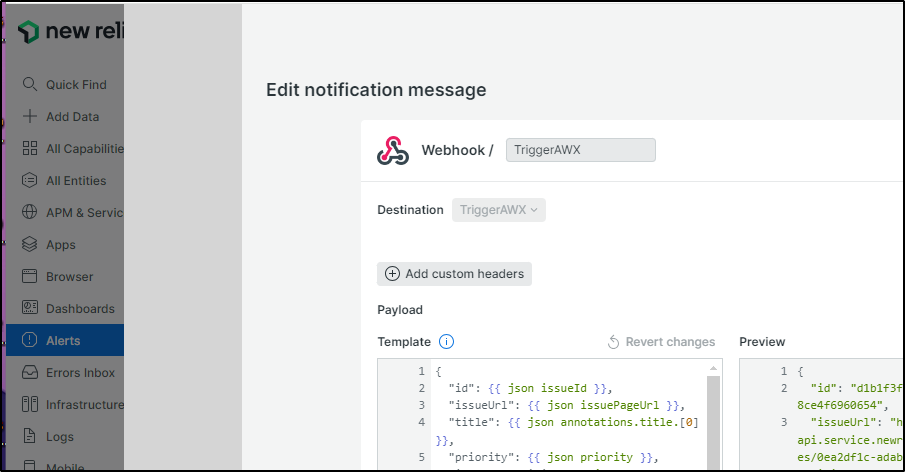
We can now see that our Kubernetes alert policy is set to email us then kick of an AWX Template Job by way of Rundeck:
AWS: SQS to Lambda to AWX
Or, if our AWX is publicly accessible, just have SQS trigger a lambda that invokes the REST API for AWX directly.
Steps
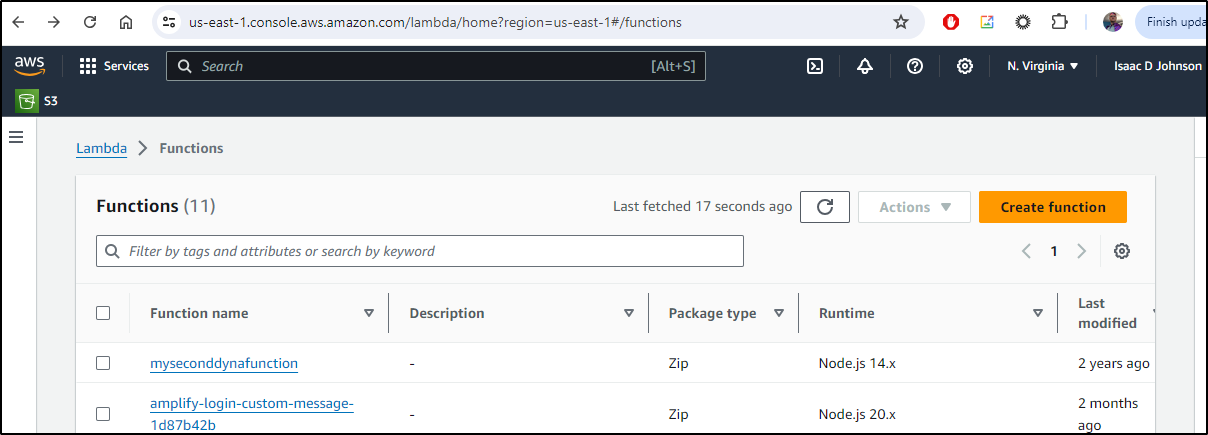
Let’s hop over the AWS Console and go to the Lambda section.
Here we can create a new function
I’m always using NodeJS, so let’s use Python this time and pick the Hello World blueprint to get started
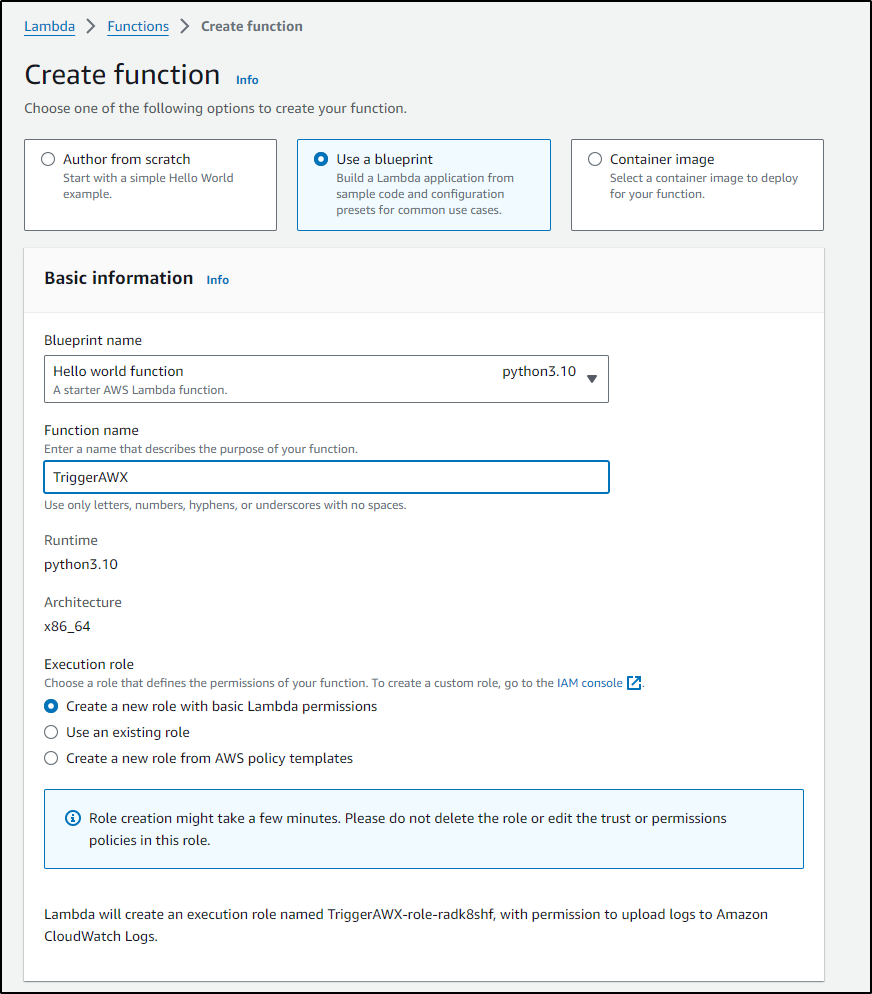
The blueprint code cannot be modified just yet. We need to save it first
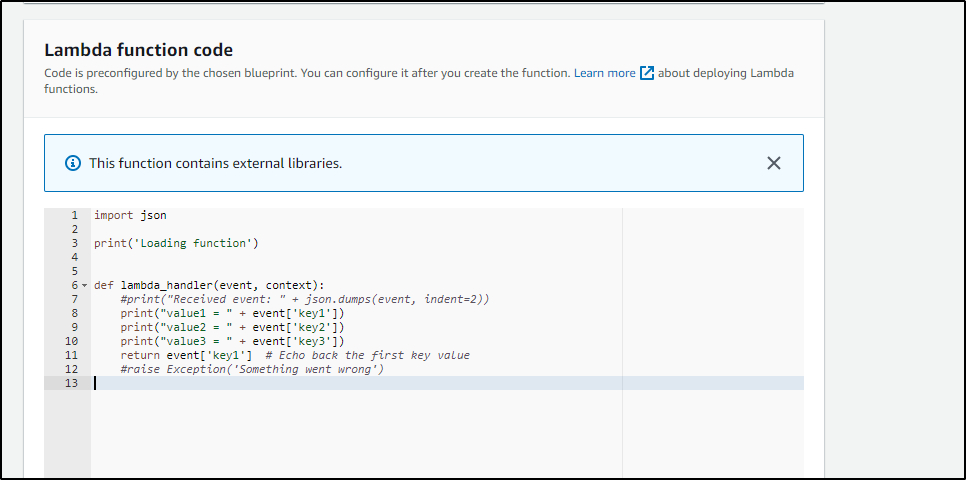
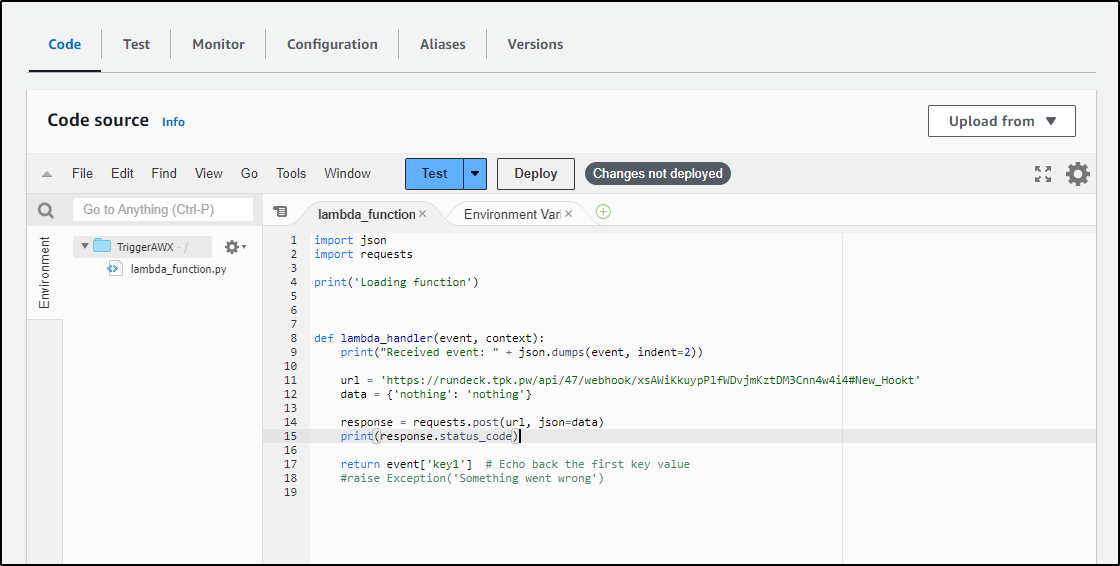
I can edit the code to import requests and send a POST out
import json
import requests

print('Loading function')

def lambda_handler(event, context):
    print("Received event: " + json.dumps(event, indent=2))

    url = 'https://rundeck.tpk.pw/api/47/webhook/xsAWiKkuypPlfWDvjmKztDM3Cnn4w4i4#New_Hookt'
    data = {'nothing': 'nothing'}

    response = requests.post(url, json=data)
    print(response.status_code)

    return event['key1']  # Echo back the first key value
    #raise Exception('Something went wrong')
It’s easy to send a test
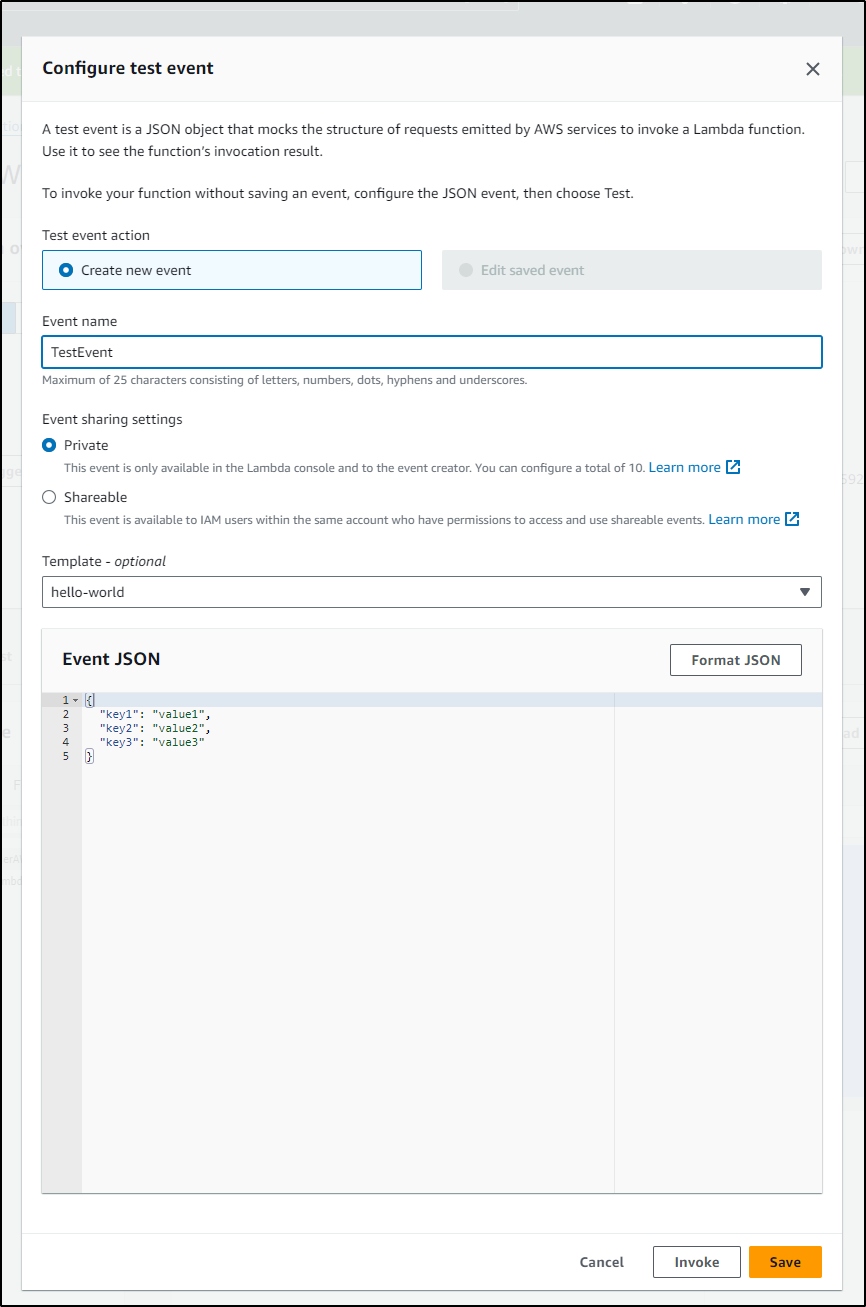
I can see the results
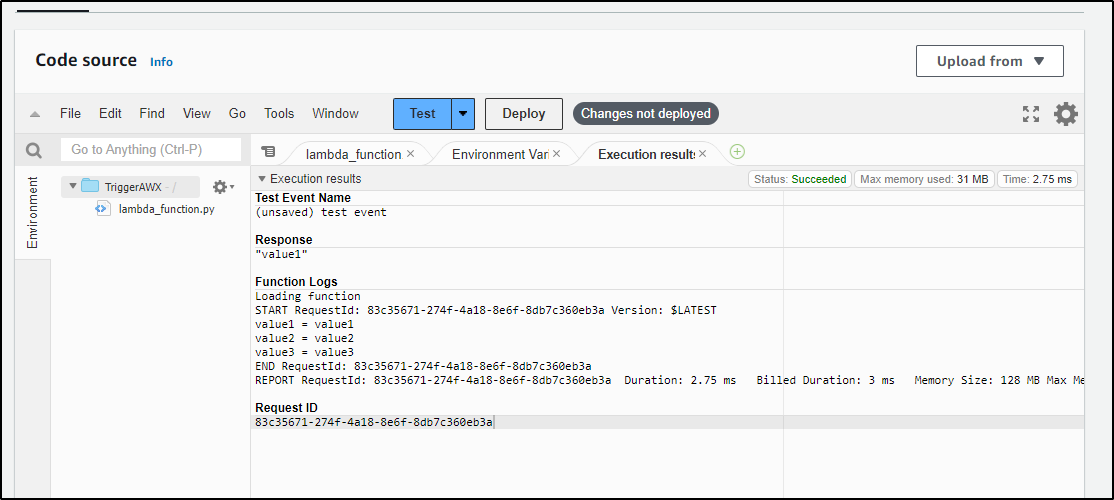
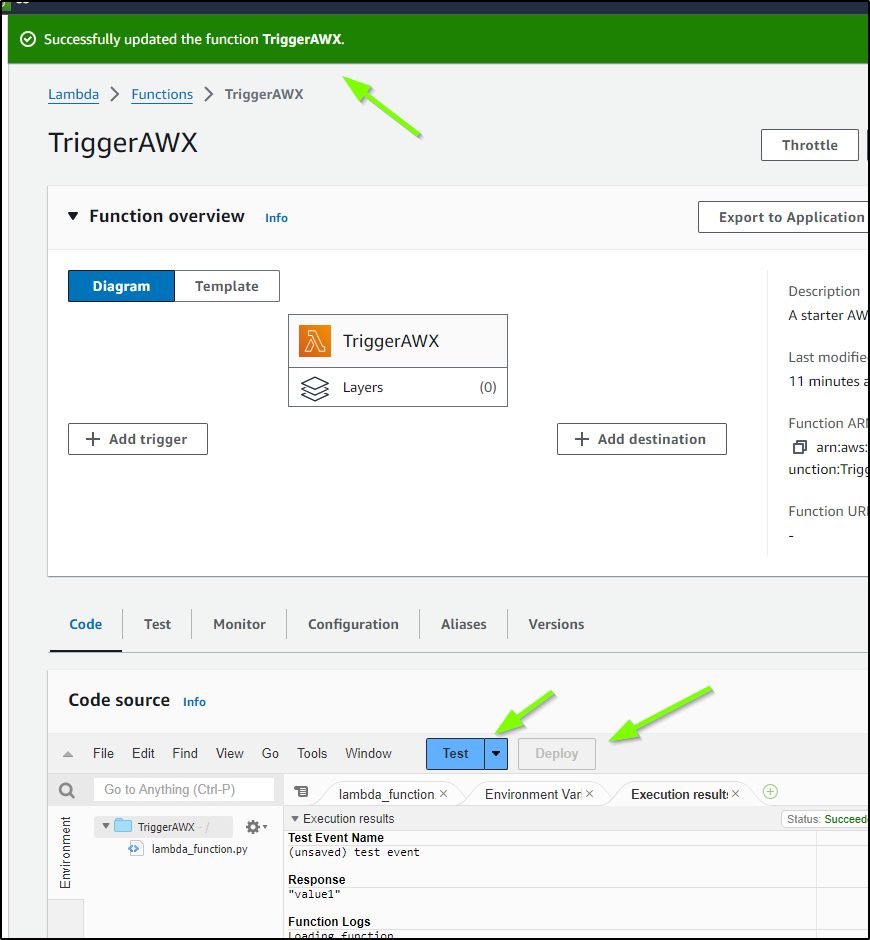
However, nothing changed - you can see the value = value there. That was because I neglected to hit deploy. I deploy then test again
SQS
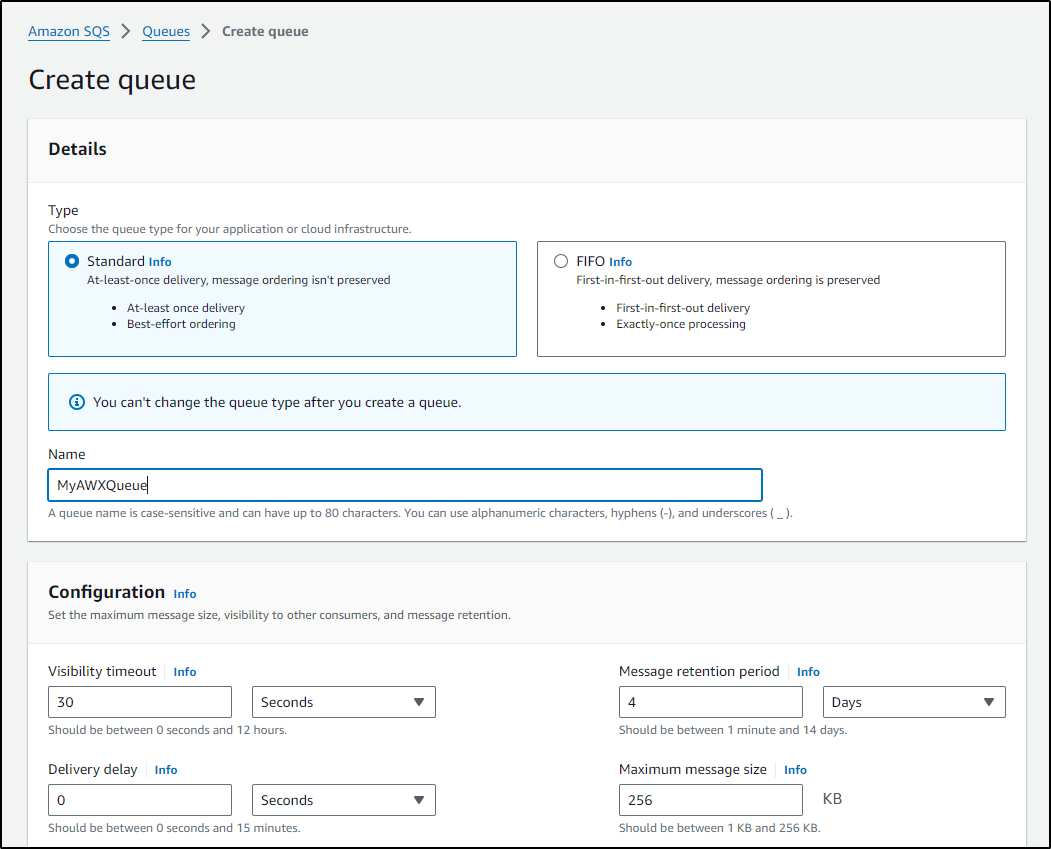
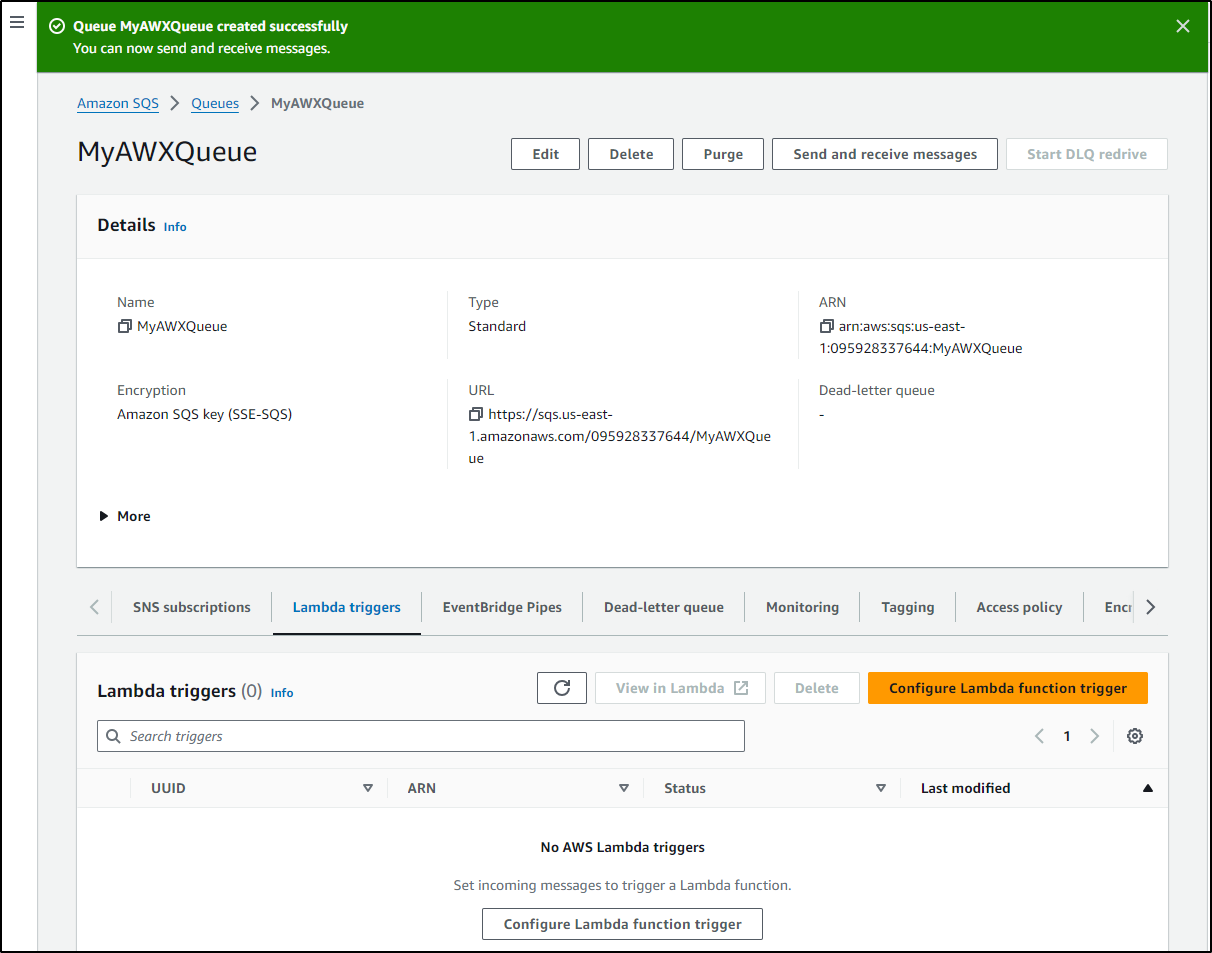
I want to trigger the lambda from SQS so let’s create a new Queue
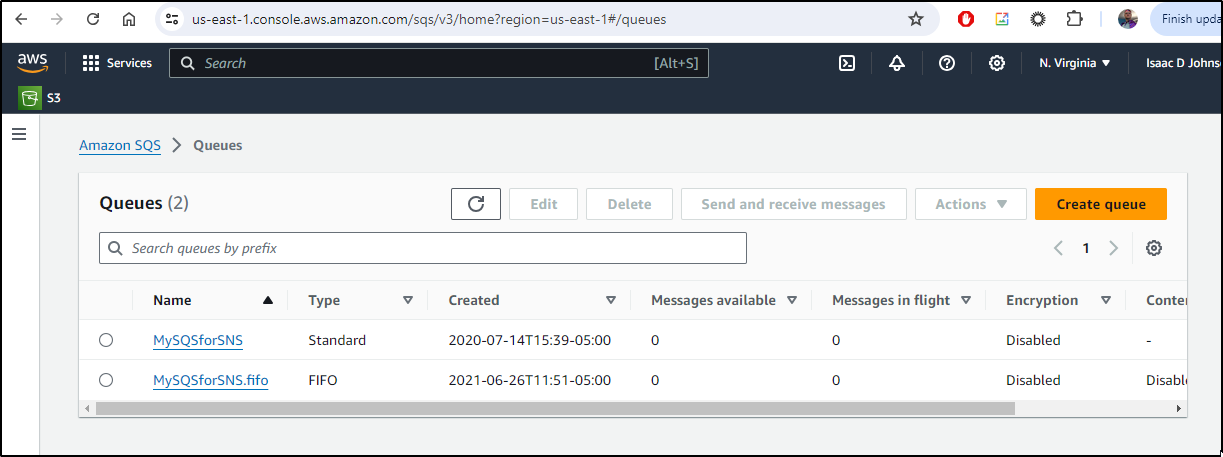
Just to KISS, all I will do at this point is give the Queue a name
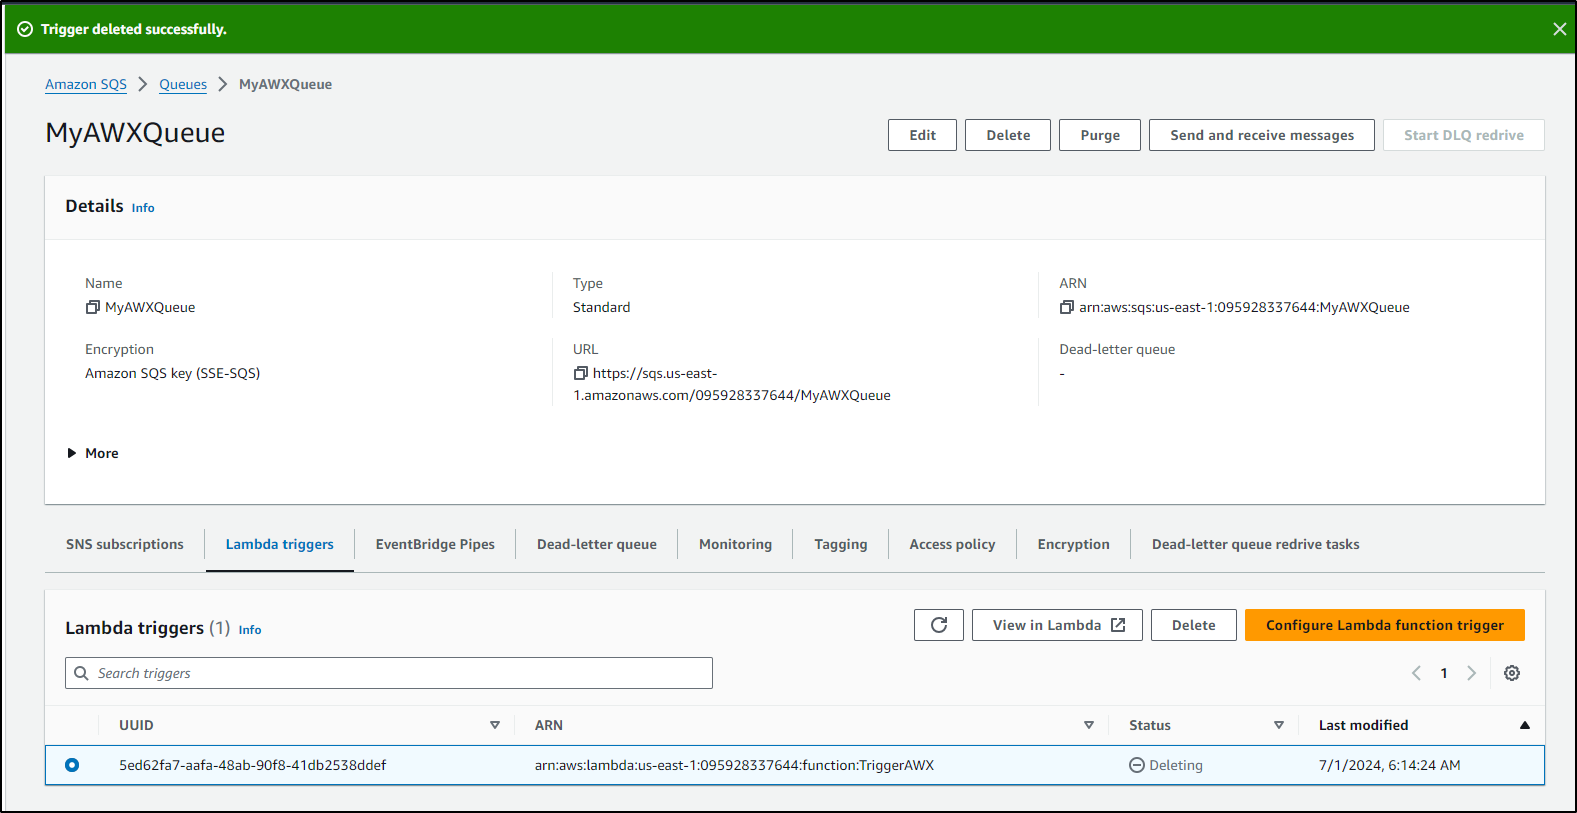
Once created, I want to go to “Lambda triggers” to define a new trigger
Before we can access this SQS with the Lambda, we need to update the access policy
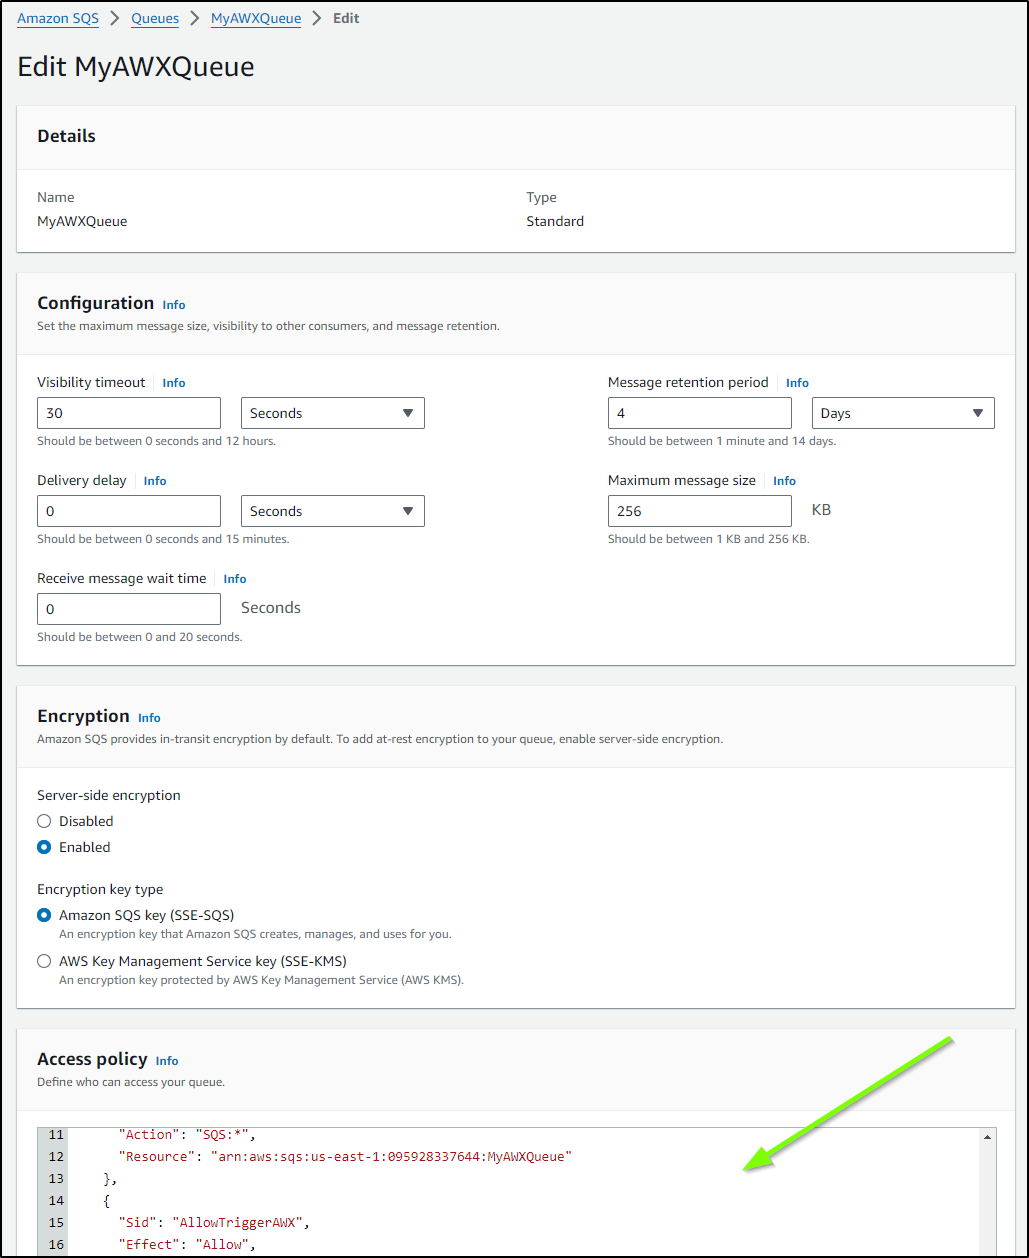
I’ll want to add a block for the Roles used by the Lambda function:
{
  "Id": "Policy1719765709337",
  "Version": "2012-10-17",
  "Statement": [
    {
      "Sid": "Stmt1719765706263",
      "Action": "sqs:*",
      "Effect": "Allow",
      "Resource": "arn:aws:sqs:us-east-1:095928337644:MyAWXQueue",
      "Principal": {
        "AWS": [
          "arn:aws:iam::095928337644:role/service-role/TriggerAWX-role-radk8shf"
        ]
      }
    }
  ]
}
This means the combined SQS Access policy looks like:
{
  "Version": "2012-10-17",
  "Id": "__default_policy_ID",
  "Statement": [
    {
      "Sid": "__owner_statement",
      "Effect": "Allow",
      "Principal": {
        "AWS": "arn:aws:iam::095928337644:root"
      },
      "Action": "SQS:*",
      "Resource": "arn:aws:sqs:us-east-1:095928337644:MyAWXQueue"
    },
    {
      "Sid": "Stmt1719765706263",
      "Effect": "Allow",
      "Principal": {
        "AWS": "arn:aws:iam::095928337644:role/service-role/TriggerAWX-role-radk8shf"
      },
      "Action": "sqs:*",
      "Resource": "arn:aws:sqs:us-east-1:095928337644:MyAWXQueue"
    }
  ]
}
I’ll pick our Lambda to trigger
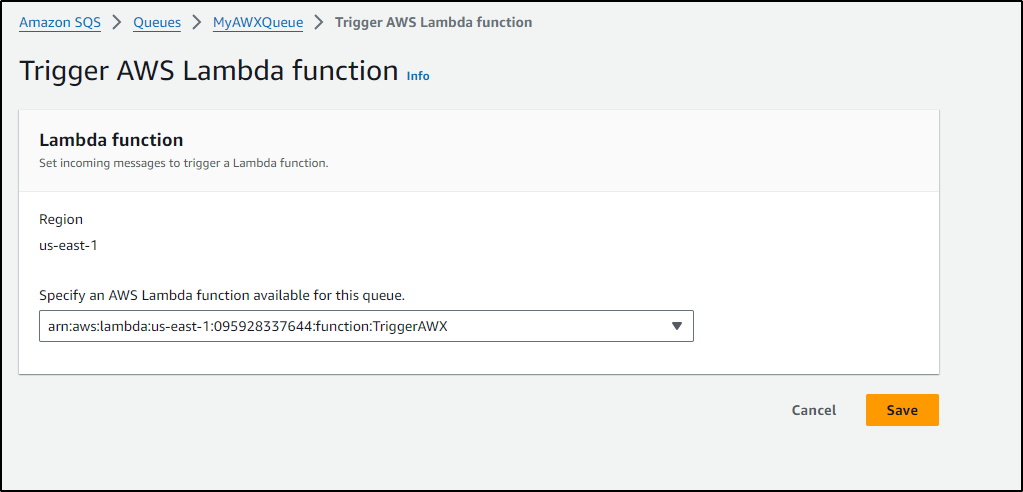
Once saved, we should see the Lambda enabled on the queue

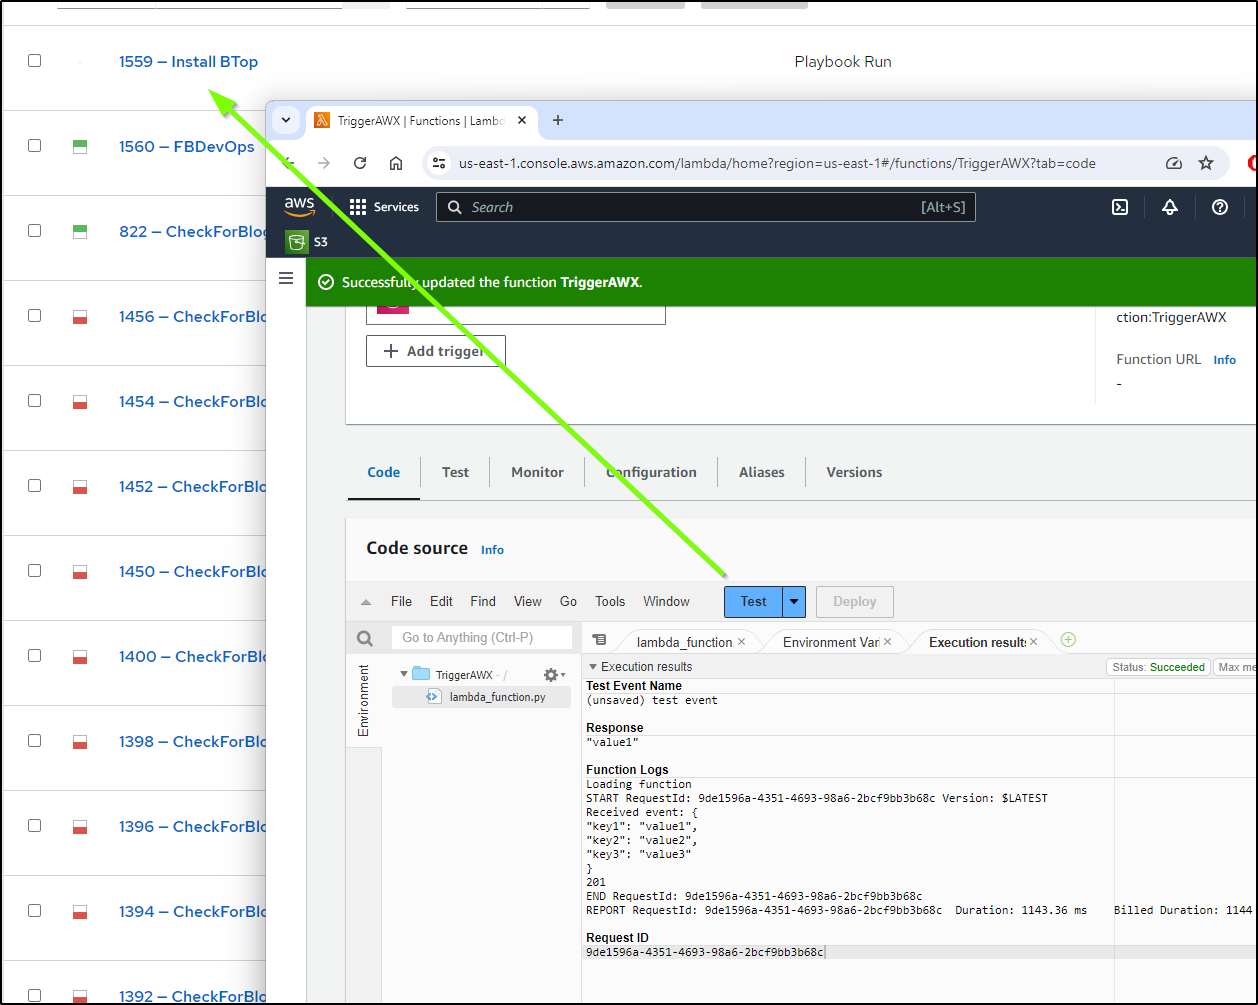
We can now see the whole flow in action: SQS message triggering a Lambda which in turn calls RunDeck to trigger AWX
While invoking Rundeck to trigger AWX works
import json
import urllib3

print('Loading function')


def lambda_handler(event, context):
    print("Received event: " + json.dumps(event, indent=2))

    http = urllib3.PoolManager()

    url = 'https://rundeck.tpk.pw/api/47/webhook/xsAWiKkuypPlfWDvjmKztDM3Cnn4w4i4#New_Hookt'
    data = {'nothing': 'nothing'}

    response = http.request('POST',
                        url,
                        body = json.dumps(data),
                        headers = {'Content-Type': 'application/json'},
                        retries = False)
    print(response.status)

    return event['key1']  # Echo back the first key value
    #raise Exception('Something went wrong')
I do not need Rundeck. We could accomplish the same by setting the authorization header, provided my AWX was publically accessible.
import json
import urllib3

print('Loading function')

def lambda_handler(event, context):
    print("Received event: " + json.dumps(event, indent=2))

    http = urllib3.PoolManager()

    url = 'https://awx.freshbrewed.science/api/v2/job_templates/11/launch/'
    data = {'nothing': 'nothing'}
    username = 'rundeck'
    password = 'ThisIsTheRundeckUserPassword'

    # Encode the username and password in an Authorization header
    headers = urllib3.make_headers(basic_auth=f'{username}:{password}')
    headers['Content-Type'] = 'application/json'

    response = http.request('POST',
                        url,
                        body = json.dumps(data),
                        headers = headers,
                        retries = False)
    print(response.status)

    return event['key1']
Which also worked
Note
I found SQS kept triggering my Lambda endlessly. I’ll have to figure out why, but it spewed way too many jobs in AWX for me so i deleted the trigger
I think my mistake was using the “Lambda Trigger” which invokes lambda to propegate the queue instead of the other way around. I should have set up SQS to trigger Lambda using:
$ aws lambda create-event-source-mapping --function-name TriggerAWX  --batch-size 1 \
--event-source-arn arn:aws:sqs:us-east-1:095928337644:MyAWXQueue
AzDO Webhook to AWX
In the past, I would use an anonymous public webhook for AzDO to trigger an agent job to populate Azure Work Items, JIRA and the rest.
We could follow this pattern to invoke AWX. Using a self-hosted agent, we could even invoke to an AWX that was not publicly accessible.
Example
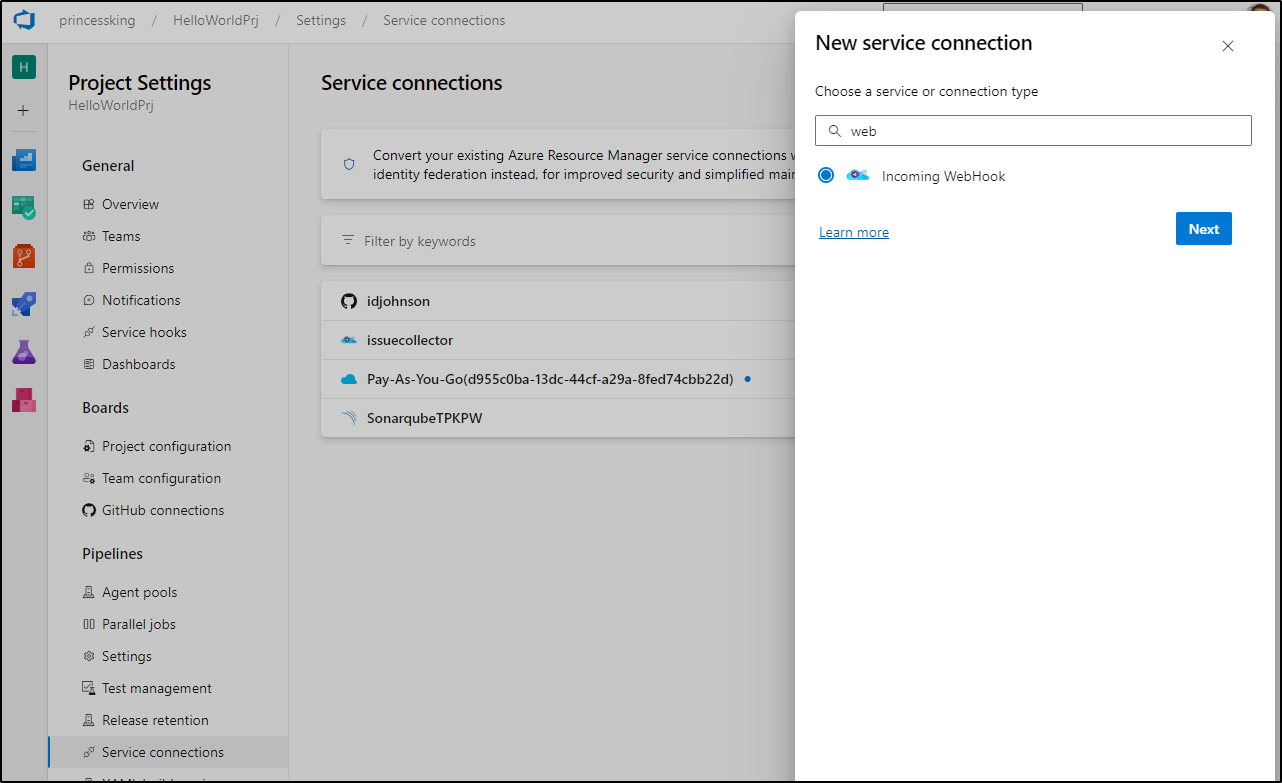
We want to setup a new service connection of type webhook. We can find this in Project Settings under “Service connections”
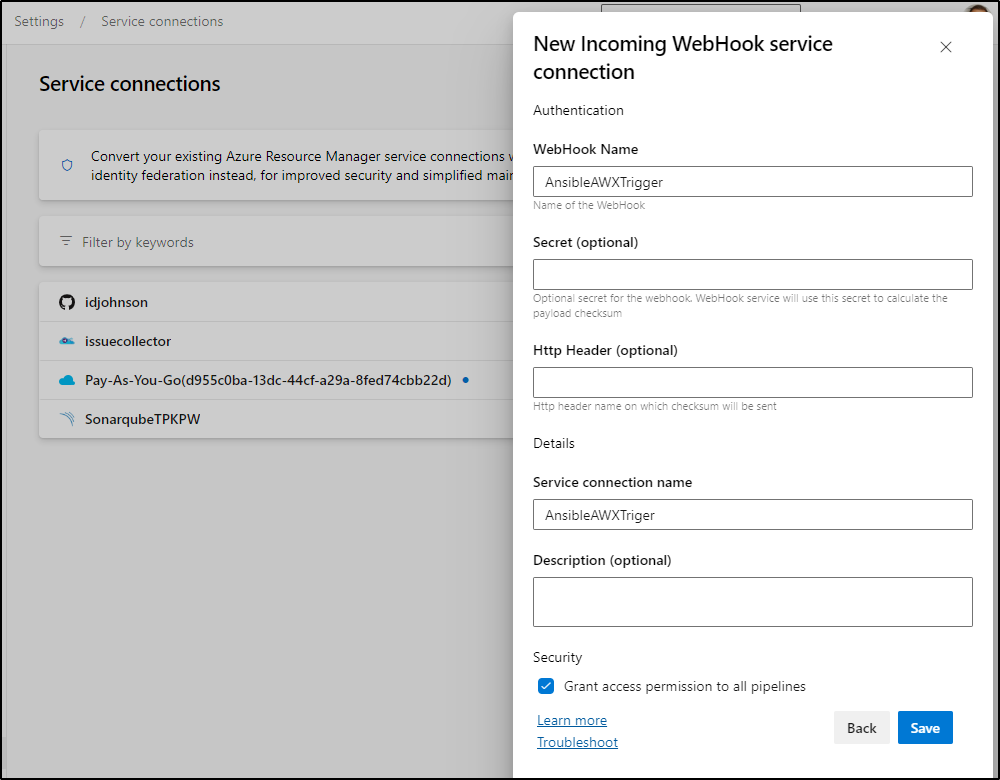
I can optionally give it a header secret name and value that will create a checksum. Otherwise, just a webhook name is required
Next, I can create a new YAML pipeline in a Repo that will trigger off the webhook.
To test, I’ll leave the boilerplate code, but set the resources/webhook block to match my incoming webhook name
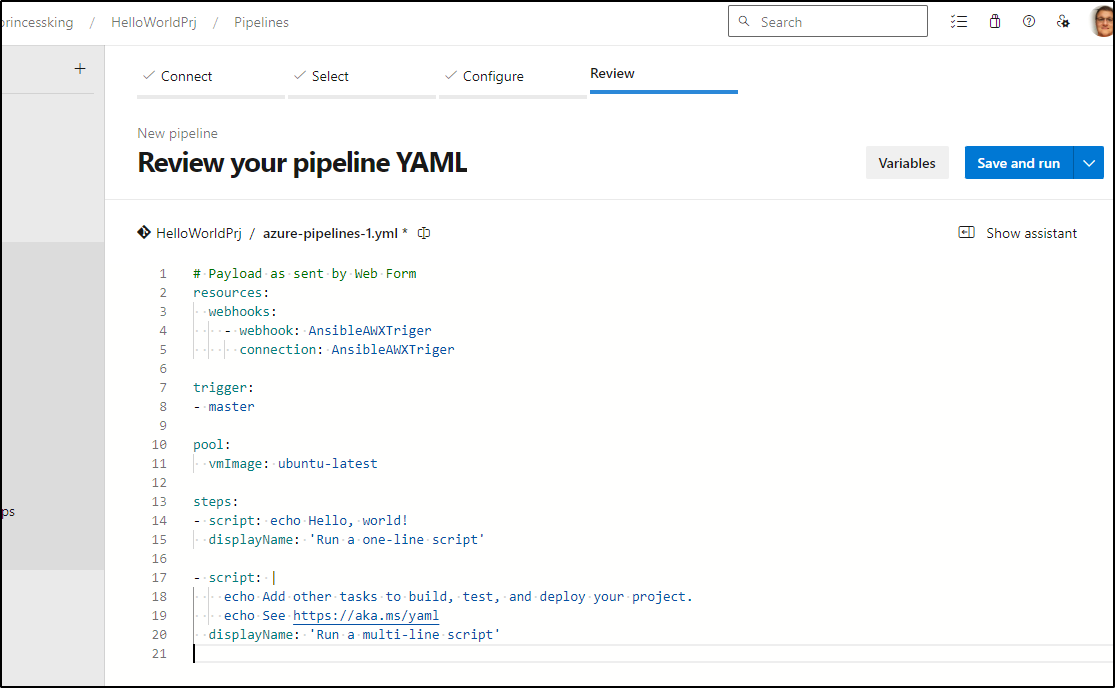
I will, however, put it into its own branch (awxrunner)
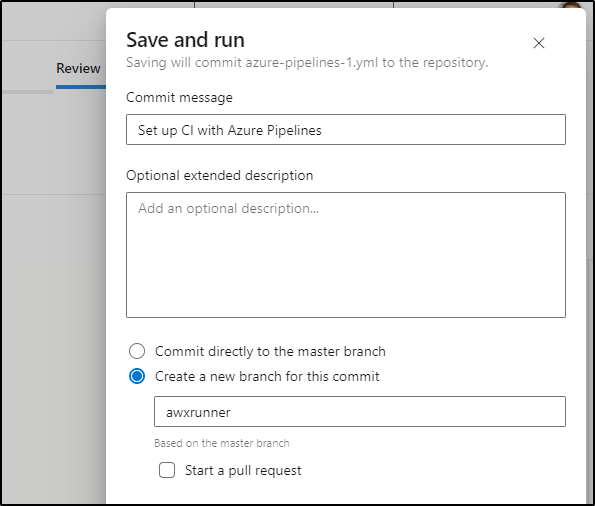
The quick test ran
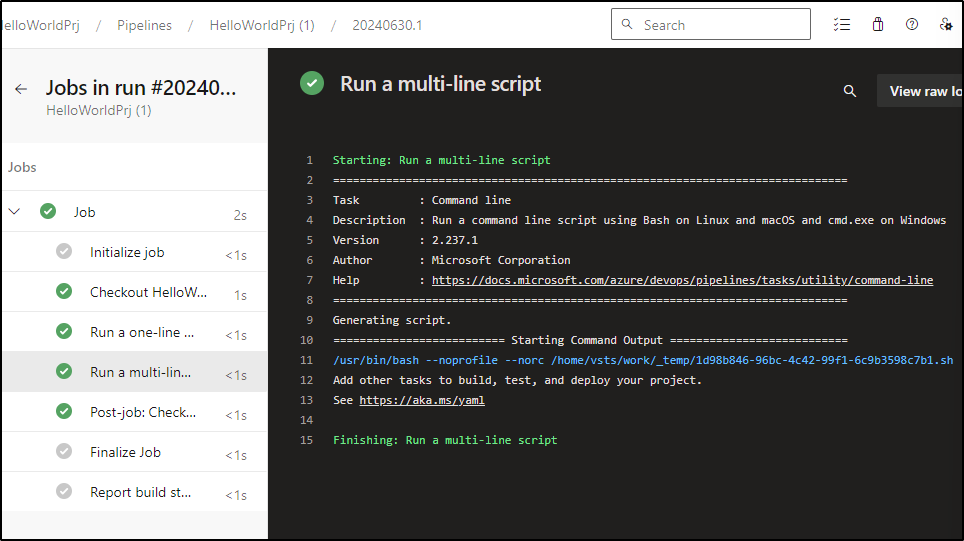
I should now be able to trigger this with my webhook
https://dev.azure.com/princessking/_apis/public/distributedtask/webhooks/AnsibleAWXTriger?api-version=6.0-preview
A quick test
$ curl -X POST -H "Content-Type: application/json" 'https://dev.azure.com/princessking/_apis/public/distributedtask/webhooks/AnsibleAWXTriger?api-version=6.0-preview' --data "{'nothing':'nothing'}"
{"$id":"1","innerException":null,"message":"Cannot find webhook for the given webHookId AnsibleAWXTriger. Try enabling CD trigger for this artifact.","typeName":"Microsoft.TeamFoundation.DistributedTask.Pipelines.Artifacts.WebHooks.WebHookException, Microsoft.TeamFoundation.DistributedTask.Orchestration.Server","typeKey":"WebHookException","errorCode":0,"eventId":3000}
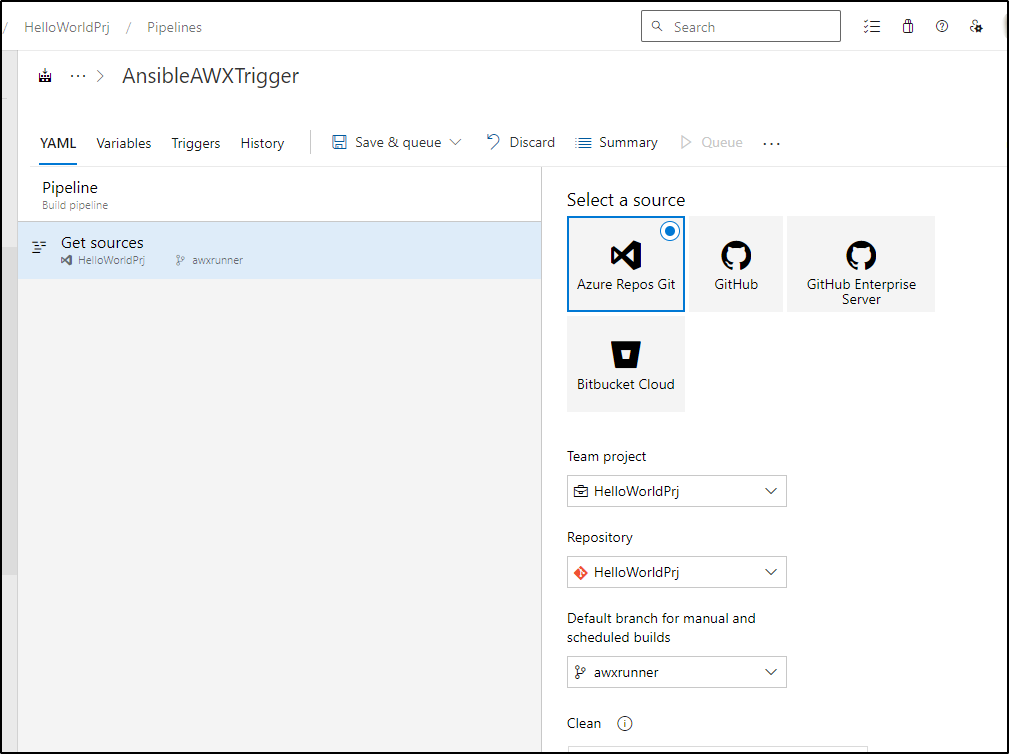
This didn’t work because I typo’ed “Triger” and “Trigger”. I fixed that as well as renamed the pipeline and set the default branch from ‘main’ to ‘awxrunner’
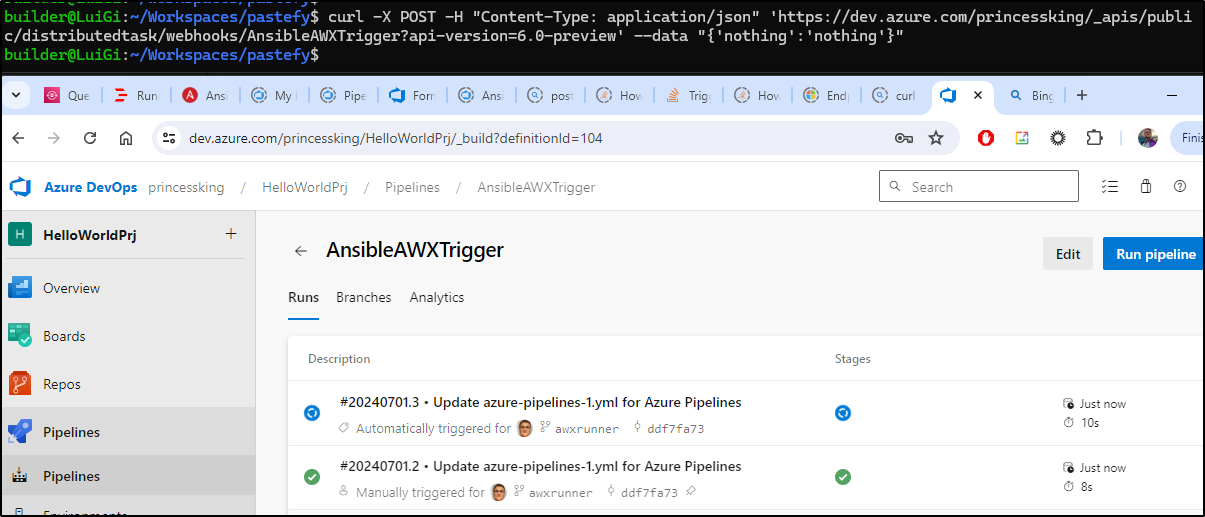
Now a quick post works
$ curl -X POST -H "Content-Type: application/json" 'https://dev.azure.com/princessking/_apis/public/distributedtask/webhooks/AnsibleAWXTrigger?api-version=6.0-preview' --data "{'nothing':'nothing'}"
I made a few changes. Namely I added an awxuser and awxpass variable to the job:
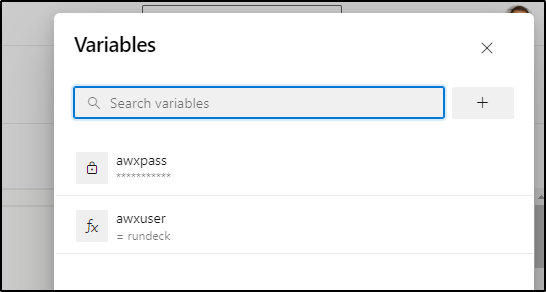
Then I update the YAML to use those vars as well as parse out some expected parameters like the “from” and “awxjob” value so we know who called this and what job to invoke.
# Payload as sent by Web Form
resources:
  webhooks:
    - webhook: AnsibleAWXTrigger
      connection: AnsibleAWXTrigger

pool:
  vmImage: ubuntu-latest

steps:

- script: |
    echo "Source: $"
    echo "AWX Job: $"
  displayName: 'From submission'

- script: |
    set +x
    if [ -z "$" ]; then
       echo "yes on z"
      echo "##vso[task.setvariable variable=EMPTYJOB]TRUE" > t.o
    else
      echo "no on z"
      echo "##vso[task.setvariable variable=EMPTYJOB]FALSE" > t.o
    fi
    set -x
    cat t.o
  displayName: 'set empty check'

- script: |
    set -x
    echo "Invoking: $ for $"
    curl -v -X POST -u "$(awxuser):$(awxpass)" "https://awx.freshbrewed.science/api/v2/job_templates/$/launch/"
  displayName: 'invoke awx'
  condition: eq(variables['EMPTYJOB'], 'FALSE')
Test
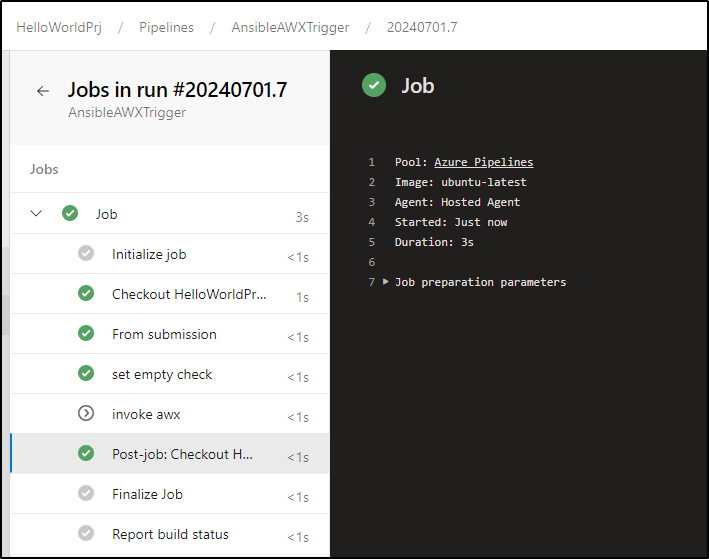
When I save (and run), this shows our check on required job works because it skipped (appropriately) the awxjob step
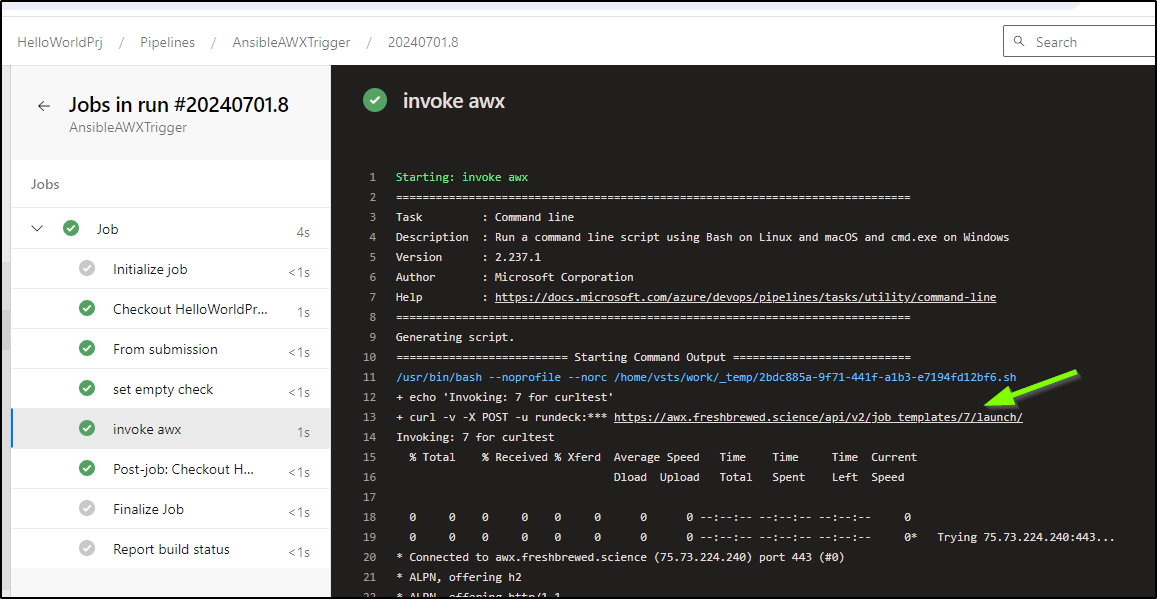
If I run on the command line and pass the variables it works:
$ curl -X POST -H "Content-Type: application/json" 'https://dev.azure.com/princessking/_apis/public/distributedtask/webhooks/AnsibleAWXTrigger?api-version=6.0-preview' --data "{'from':'curltest','awxjob':'7'}"
I would like a basic static form I can use to trigger a job.
<html>

<head>
    <meta charset="UTF-8">
    <meta name="viewport" content="width=device-width, initial-scale=1.0">
    <title>AWX Job Form</title>
    <style>
        body {
            font-family: Arial, sans-serif;
            background-color: #f2f2f2;
            display: flex;
            justify-content: center;
            align-items: center;
            height: 100vh;
            margin: 0;
        }
        .form-container {
            background-color: #fff;
            padding: 20px;
            border-radius: 8px;
            box-shadow: 0 0 10px rgba(0, 0, 0, 0.1);
            width: 300px;
        }
        .form-container h2 {
            margin-bottom: 20px;
            color: #333;
        }
        .form-container input[type="text"],
        .form-container input[type="password"],
        .form-container input[type="email"] {
            width: 100%;
            padding: 10px;
            margin: 10px 0;
            border: 1px solid #ccc;
            border-radius: 4px;
        }
        .form-container input[type="submit"] {
            width: 100%;
            padding: 10px;
            background-color: #4CAF50;
            color: white;
            border: none;
            border-radius: 4px;
            cursor: pointer;
        }
        .form-container input[type="submit"]:hover {
            background-color: #45a049;
        }
    </style>
</head>

<body>
  <div class="form-container">
  <form action="https://dev.azure.com/princessking/_apis/public/distributedtask/webhooks/AnsibleAWXTrigger?api-version=6.0-preview" method="POST" name="myForm">
    <p><label for="from">Job Submission Requestor:</label>
      <input type="text" name="from" id="from"></p>

    <p><label for="awxjob">AWX Job ID:</label>
      <input type="text" name="awxjob" id="awxjob"></p>

    <input value="Submit" type="submit">
    </form>
  </div>
  </body>
<script>
	/**
 * Helper function for POSTing data as JSON with fetch.
 *
 * @param {Object} options
 * @param {string} options.url - URL to POST data to
 * @param {FormData} options.formData - `FormData` instance
 * @return {Object} - Response body from URL that was POSTed to
 */
var postFormDataAsJson = async({
  url,
  formData
}) => {
  const plainFormData = Object.fromEntries(formData.entries());
  const formDataJsonString = JSON.stringify(plainFormData);

  const fetchOptions = {
    method: "POST",
    headers: {
      "Content-Type": "application/json",
      Accept: "application/json",
    },
    body: formDataJsonString,
  };


  alert("about to post" + formDataJsonString)
  const response = await fetch(url, fetchOptions);

  if (!response.ok) {
    const errorMessage = await response.text();
    throw new Error(errorMessage);
  }

  return response.json();
}
/**
 * Event handler for a form submit event.
 * @see https://developer.mozilla.org/en-US/docs/Web/API/HTMLFormElement/submit_event
 * @example const exampleForm = document.getElementById("example-form");
 *          exampleForm.addEventListener("submit", handleFormSubmit);
 * @param {SubmitEvent} event
 */
var handleFormSubmit = async(event) => {
  event.preventDefault();
  const form = event.currentTarget;
  const url = form.action;

  try {
    const formData = new FormData(form);
    const responseData = await postFormDataAsJson({
      url,
      formData
    });
    console.log({
      responseData
    });
  } catch (error) {
    console.error(error);
  }
}

document.querySelector("form[name='myForm']")
  .addEventListener("submit", handleFormSubmit)
</script>
  </html>
Let’s see it all together where we can see a web form submit to Azure Pipelines (Azure DevOps) through to AWX:
Github Pipeline to AWX
We can use a webhook (repository dispatch) to trigger a Github workflows that could in turn reach AWX. If we used a private agent, we could reach AWX inside our network as well.
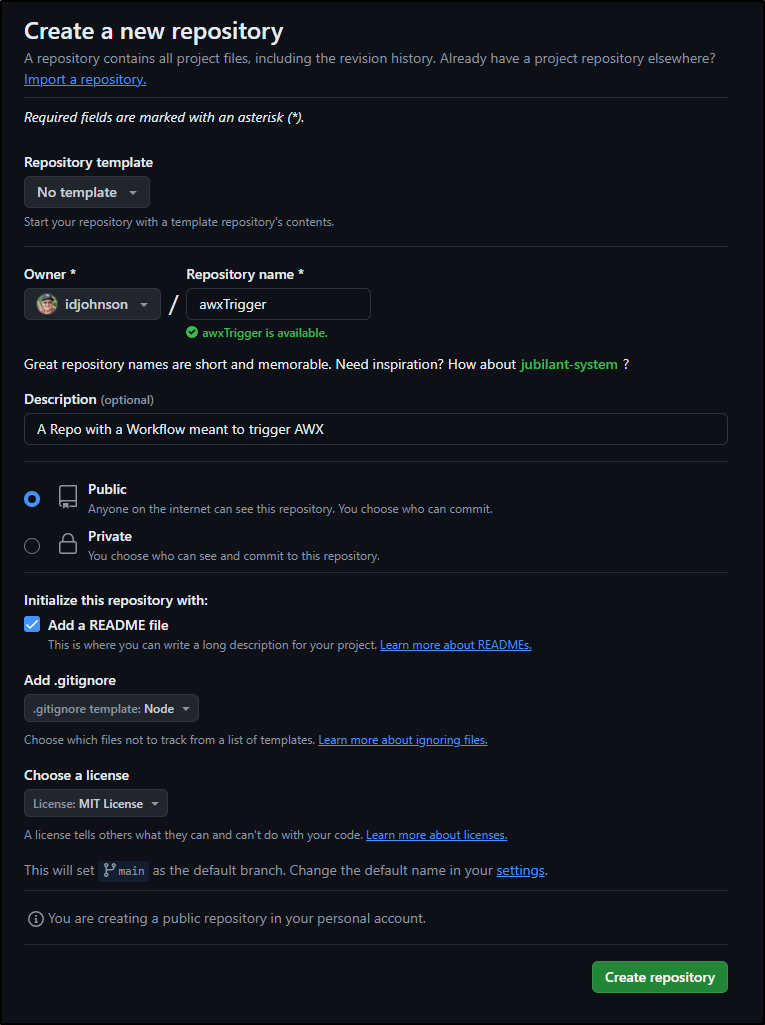
Let’s start with a fresh repo for this.
I’ll need a fine-grained PAT to use, so we’ll go to Developer settings and click on Fine-grained tokens
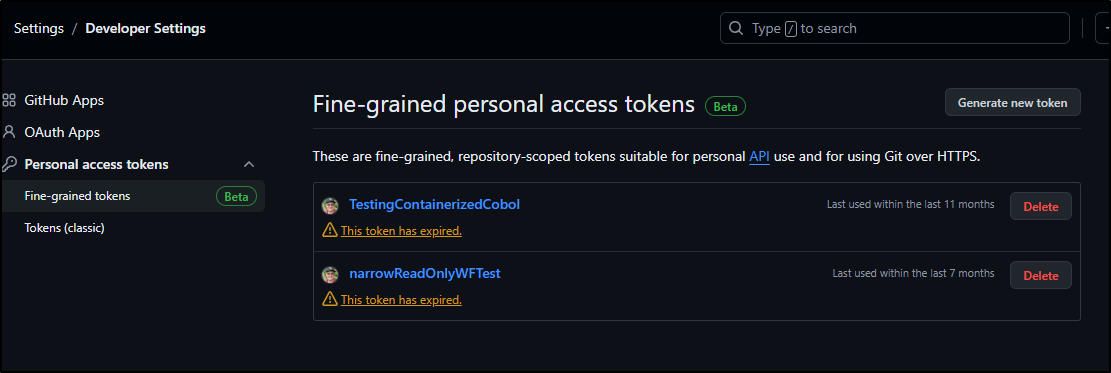
I’ll click “Generate new token”.
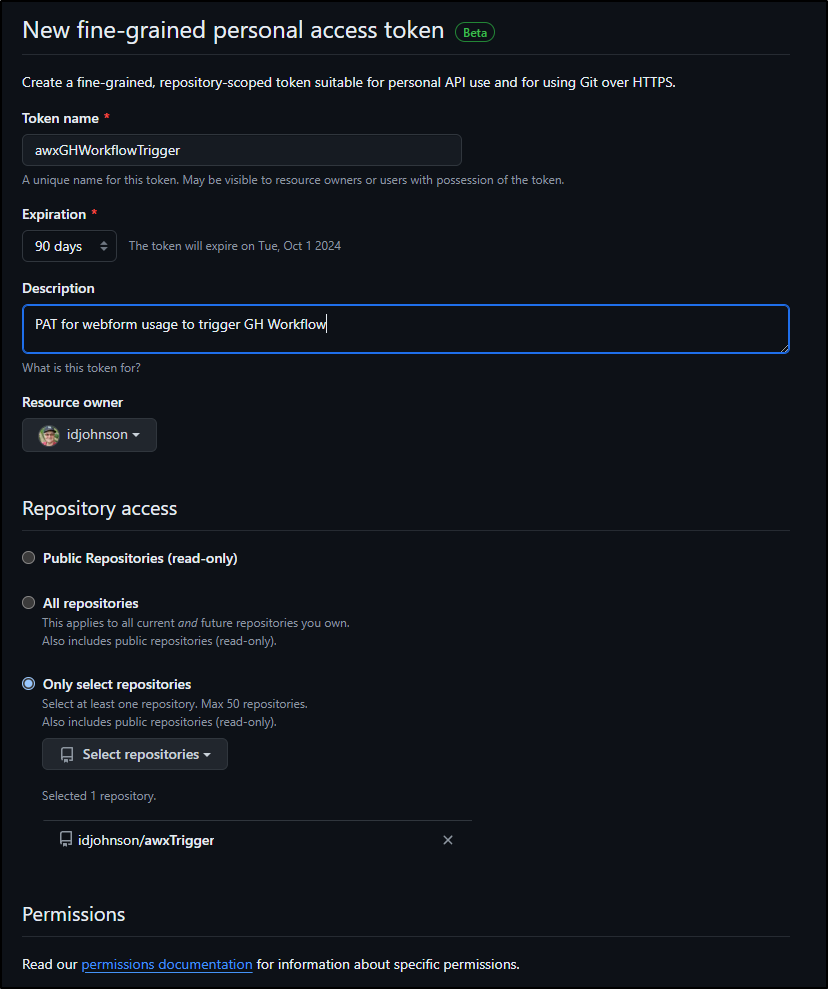
I’ll set a name and select that this only applies to the one WF repo we are using
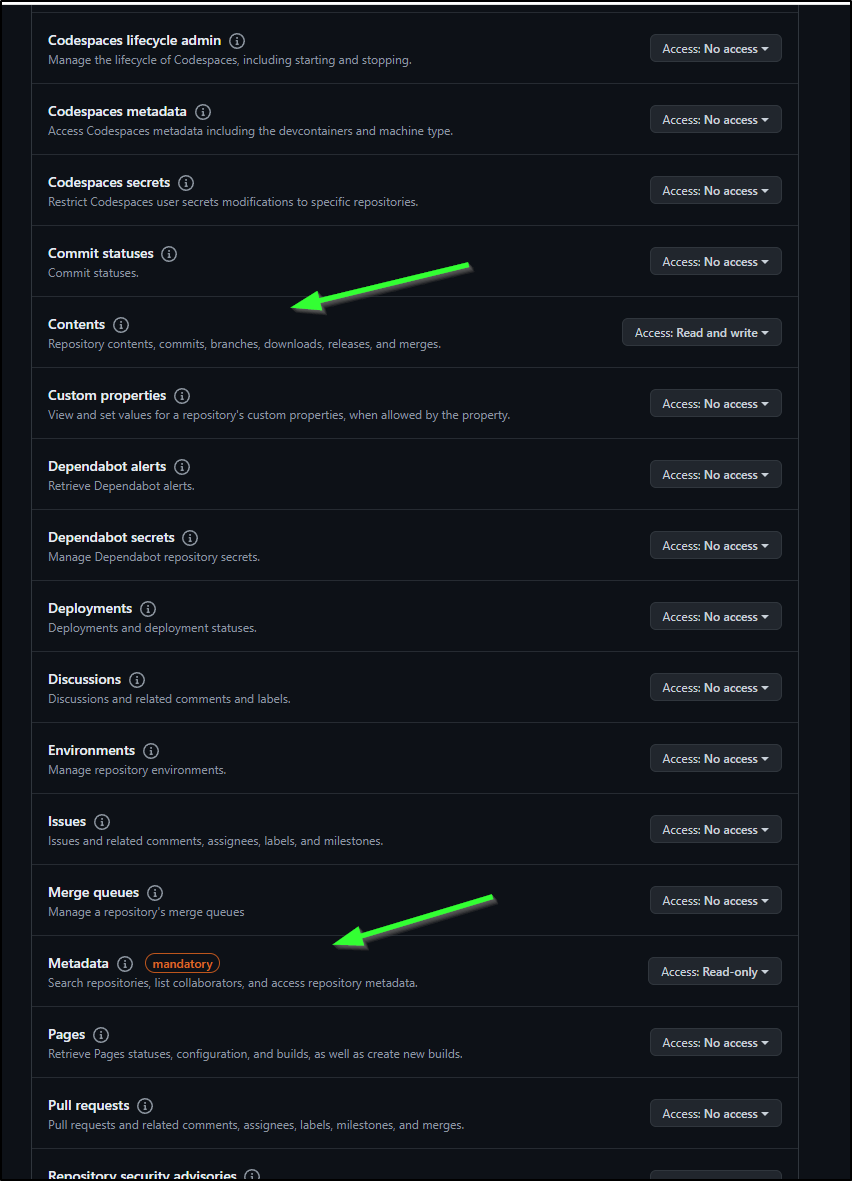
In permissions, Metadata should already be set, but we need to add “Read and write” permission for Contents
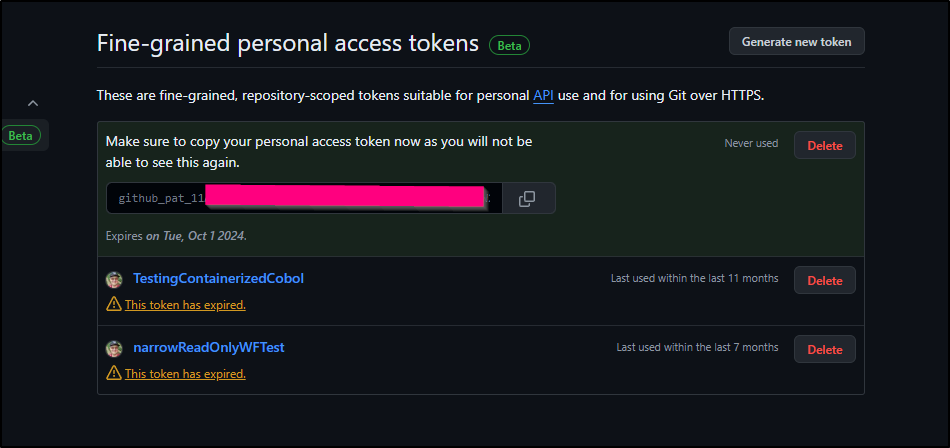
Then click “Generate PAT” to see the PAT (Which will just be shown once)
It’s a bit easier for me to code the rest locally, so I’ll pull down the repo and open it in VS Code
builder@DESKTOP-QADGF36:~/Workspaces$ git clone https://github.com/idjohnson/awxTrigger.git
Cloning into 'awxTrigger'...
remote: Enumerating objects: 5, done.
remote: Counting objects: 100% (5/5), done.
remote: Compressing objects: 100% (5/5), done.
remote: Total 5 (delta 0), reused 0 (delta 0), pack-reused 0
Unpacking objects: 100% (5/5), 2.50 KiB | 1.25 MiB/s, done.
builder@DESKTOP-QADGF36:~/Workspaces$ cd awxTrigger/
builder@DESKTOP-QADGF36:~/Workspaces/awxTrigger$ code .
I had planned to try using the Github Workflow extension, but VS Code seems rather stuck at authing to Github (even ran an update and restarted vs code).
followup: I had a powered off third monitor the GH auth pages were opening into and didn’t see it - user error
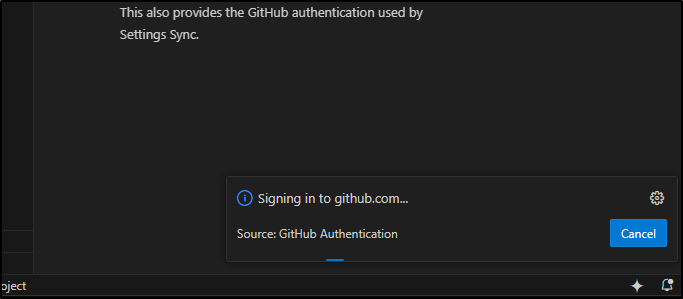
Eventually it let me use a device code which worked.
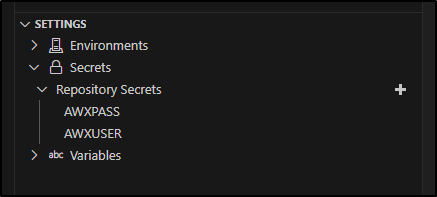
This gives us a handy shortcut to add things like environments and secrets
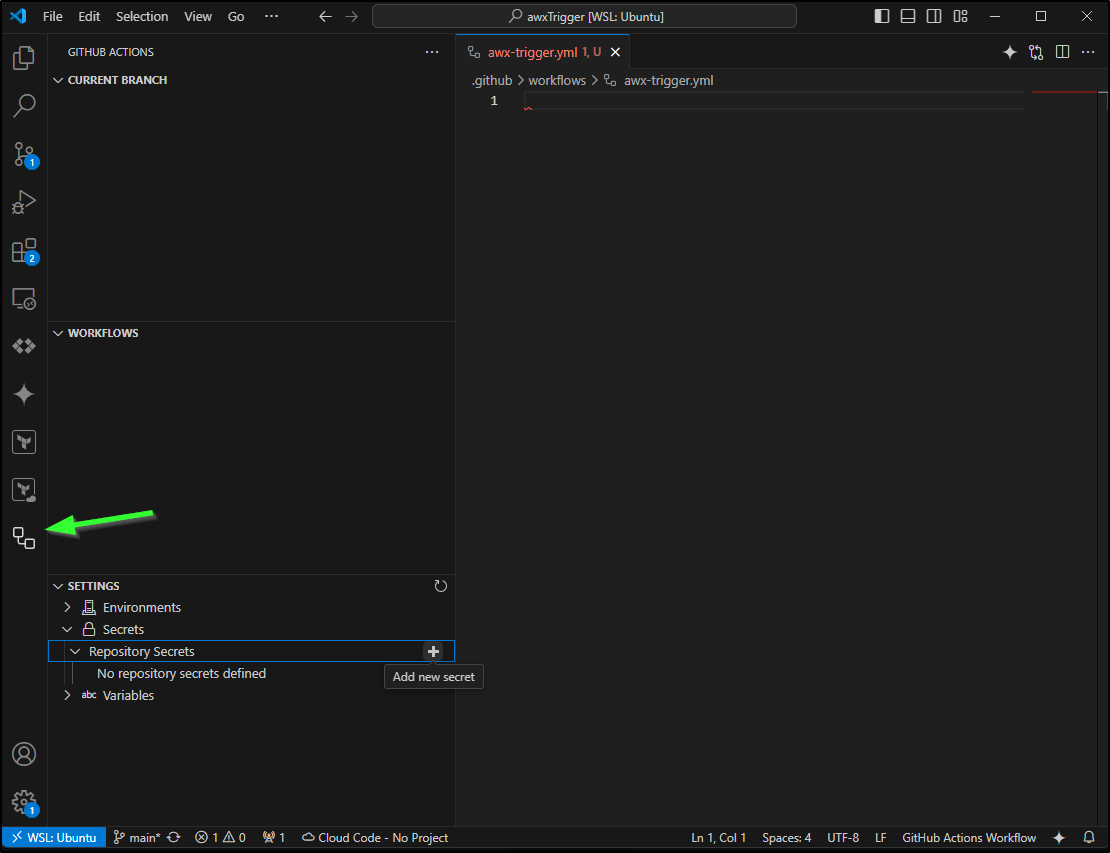
I’m going to use that to create a couple of secrets, namely the AWX User and Password
My first pass will be to keep it simple and just trigger the job as passed in
on:
    repository_dispatch:
      types: [on-demand-payload]

  permissions:
     id-token: write
     contents: read

  jobs:
    run_if_payload:
      if: $
      runs-on: ubuntu-latest
      steps:
        - run: |
            set -x
            export
        - env:
            MESSAGE: $
          run: echo $MESSAGE
        - env:
            MESSAGE: $
          run: echo $MESSAGE
        - name: 'AWX Run'
          run: |
             curl -X POST -u "$:$" https://awx.freshbrewed.science/api/v2/job_templates/$/launch

    run_if_failure:
      runs-on: ubuntu-latest
      needs: run_if_payload
      if: always() && (needs.run_if_payload.result == 'failure')
      steps:
        - run: |
            echo "FAILED"
            echo "FROM: $"
            echo "JOB: $"
        - env:
            MESSAGE: $
          run: echo $MESSAGE
        - env:
            MESSAGE: $
          run: echo $MESSAGE
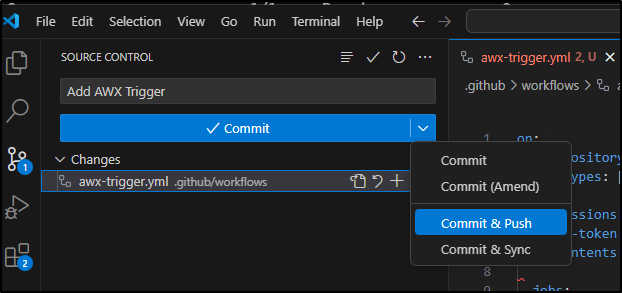
I usually use the terminal to commit and push, but I’ll be wild and try the UI this time
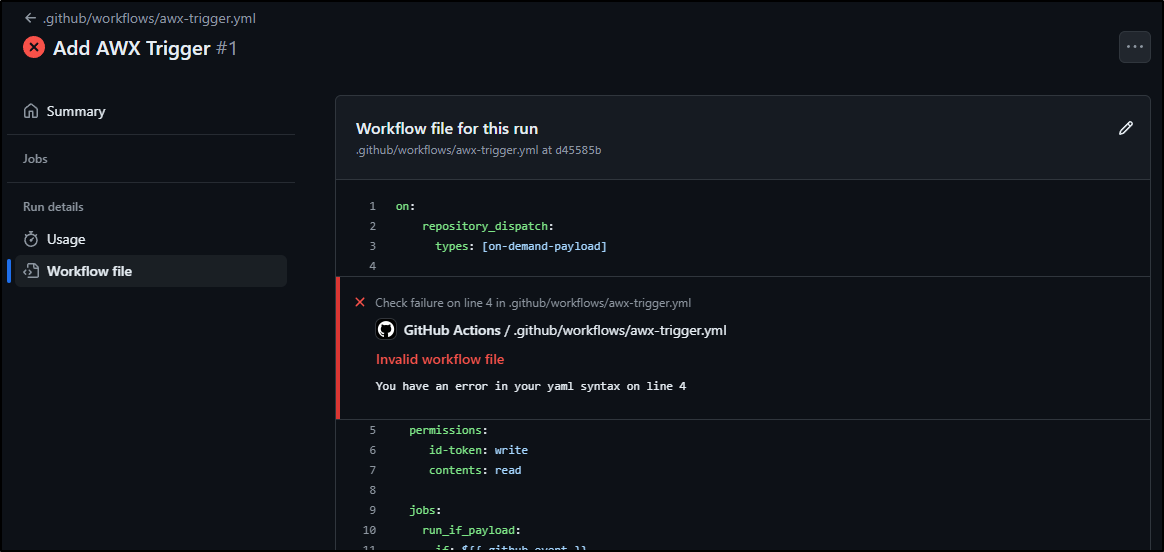
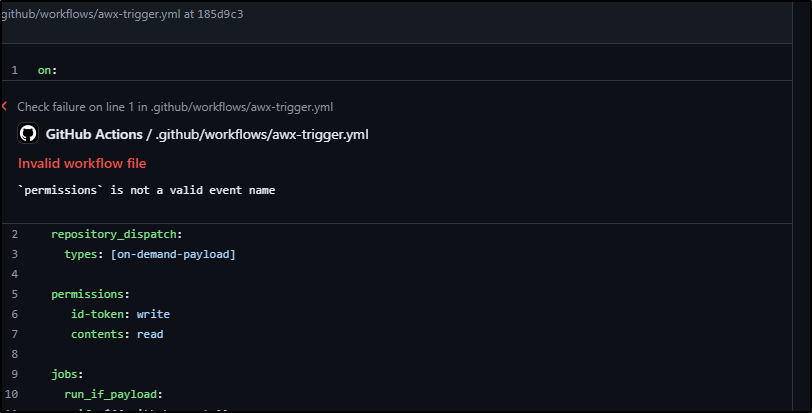
I could see it immediately built (and failed)
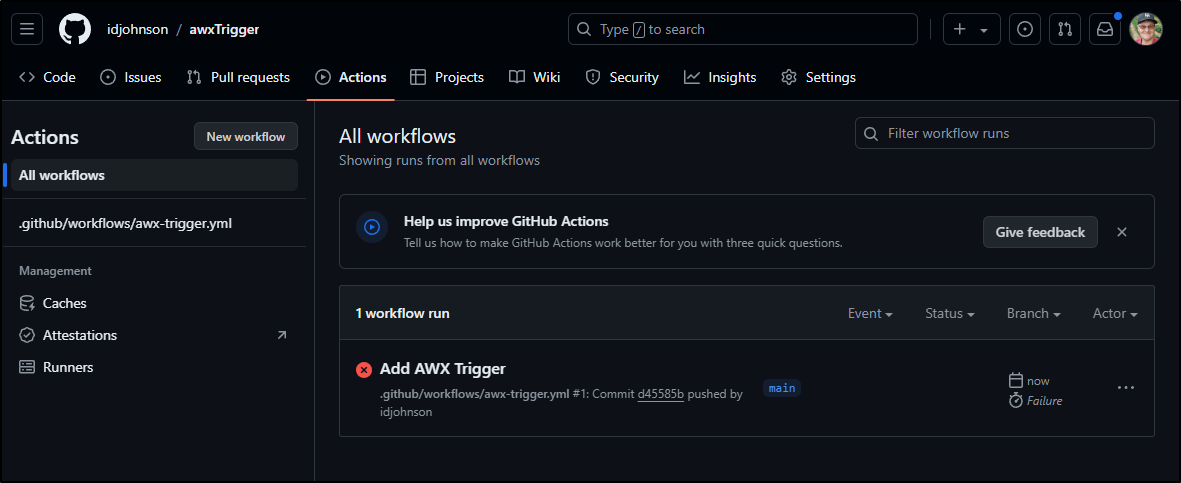
My eyes are not seeing exactly what it does not like with my YAML file
I’ll try just manually replacing tabs with spaces there and pushing
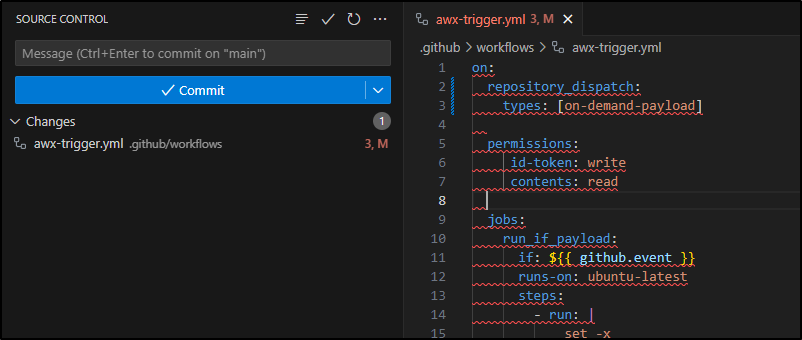
The next error reminded me the whole file needed to shift left
I iterated till I got it formatting right
on:
  repository_dispatch:
    types: [on-demand-payload]

permissions:
    id-token: write
    contents: read

jobs:
  run_if_payload:
    if: $
    runs-on: ubuntu-latest
    steps:
    - run: |
        set -x
        export
    - env:
        MESSAGE: $
      run: echo $MESSAGE
    - env:
        MESSAGE: $
      run: echo $MESSAGE
    - name: 'AWX Run'
      run: |
        set -x
        curl -v -X POST -u "$:$" https://awx.freshbrewed.science/api/v2/job_templates/$/launch/

  run_if_failure:
    runs-on: ubuntu-latest
    needs: run_if_payload
    if: always() && (needs.run_if_payload.result == 'failure')
    steps:
    - run: |
        echo "FAILED"
        echo "FROM: $"
        echo "JOB: $"
    - env:
        MESSAGE: $
      run: echo $MESSAGE
    - env:
        MESSAGE: $
      run: echo $MESSAGE
On the last save, I did not see anything run.
Let’s push a local test before we work out a form
$ curl -X POST -H "Accept: application/vnd.github+json" -H "Authorization: Bearer github_pat_11sdfasdfasdfasdfasdfasdfasdfasdfasdfasdfanl" -H "X-GitHub-Api-Version: 2022-11-28" https://api.github.com/repos/idjohnson/awxTrigger/dispatches -d '{"event_type":"on-demand-payload","client_payload":{"from":"Command Line Test","awxjob":"7"}}'
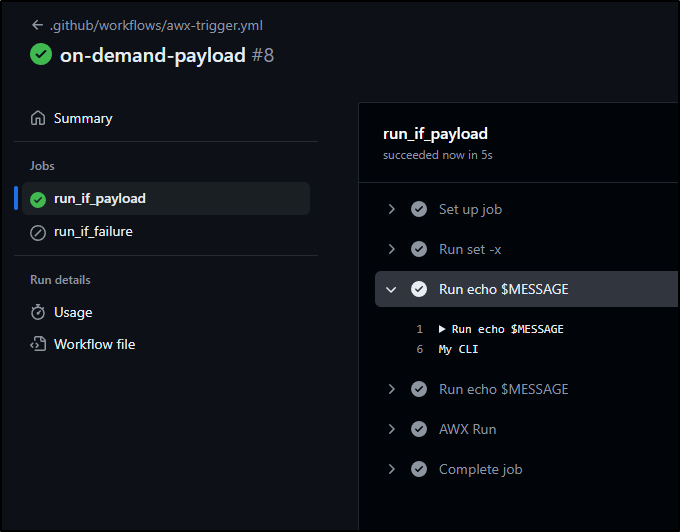
After a couple seconds, the Workflow triggered
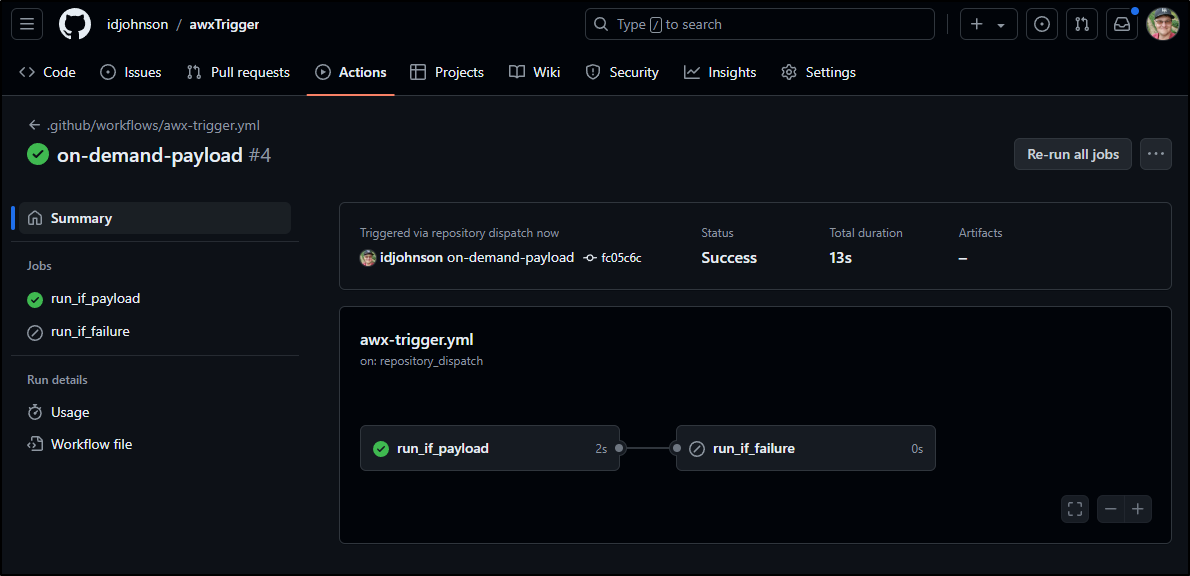
I can see that it ran and executed a launch to AWX
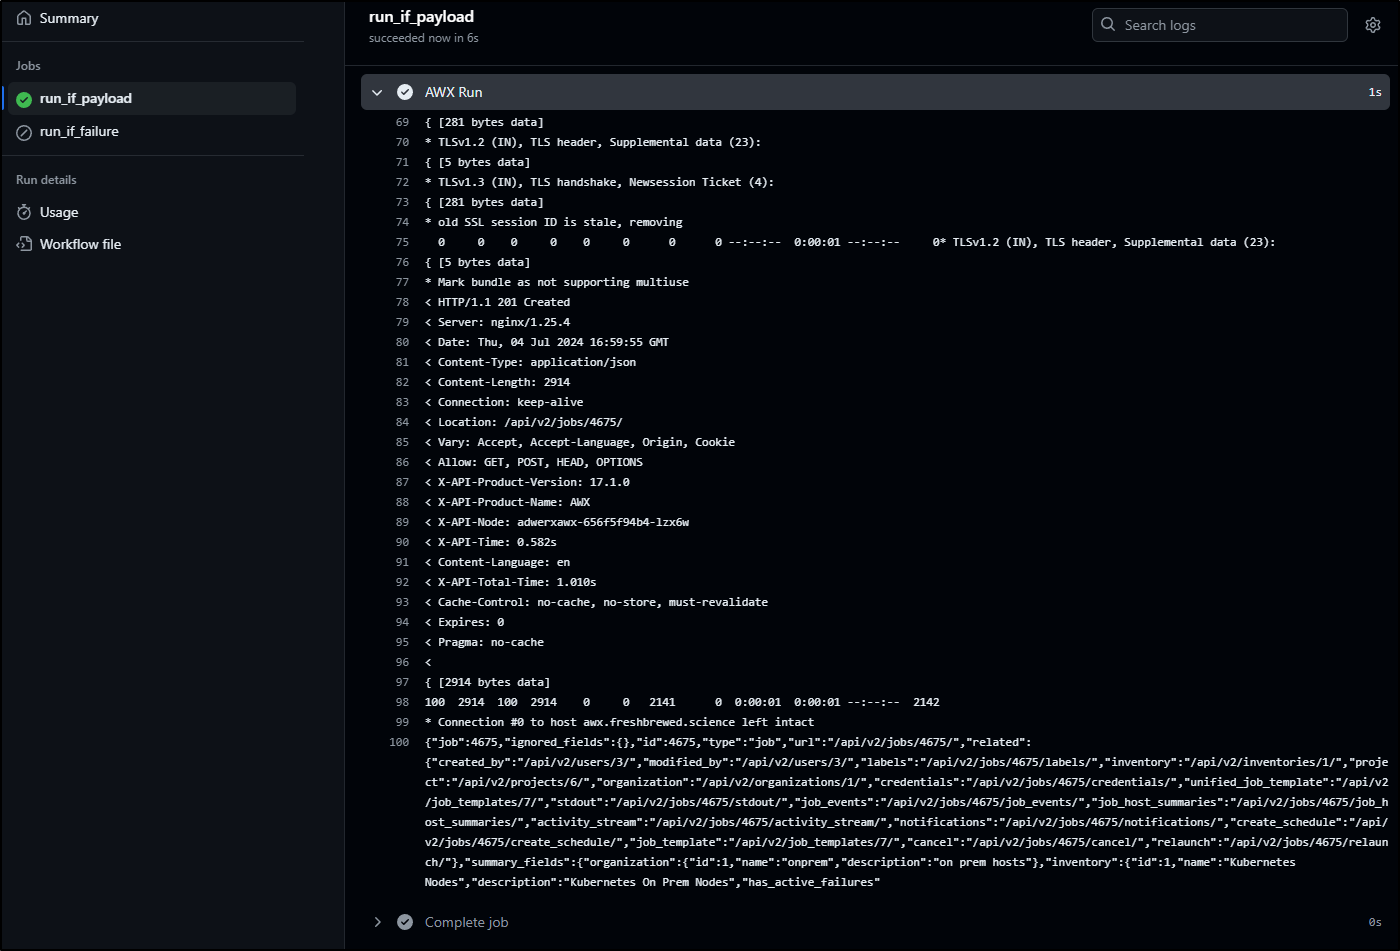
Which queued a job to AWX.
Let’s assume we want to expose with a form as we did with AzDO.
In a similar fashion, I’ll make a HTML page. I have to tweak the headers for the Bearer token as well as pack the form data into a nested JSON block
<html>

<head>
    <meta charset="UTF-8">
    <meta name="viewport" content="width=device-width, initial-scale=1.0">
    <title>AWX Job Form</title>
    <style>
        body {
            font-family: Arial, sans-serif;
            background-color: #f2f2f2;
            display: flex;
            justify-content: center;
            align-items: center;
            height: 100vh;
            margin: 0;
        }
        .form-container {
            background-color: #fff;
            padding: 20px;
            border-radius: 8px;
            box-shadow: 0 0 10px rgba(0, 0, 0, 0.1);
            width: 300px;
        }
        .form-container h2 {
            margin-bottom: 20px;
            color: #333;
        }
        .form-container input[type="text"],
        .form-container input[type="password"],
        .form-container input[type="email"] {
            width: 100%;
            padding: 10px;
            margin: 10px 0;
            border: 1px solid #ccc;
            border-radius: 4px;
        }
        .form-container input[type="submit"] {
            width: 100%;
            padding: 10px;
            background-color: #4CAF50;
            color: white;
            border: none;
            border-radius: 4px;
            cursor: pointer;
        }
        .form-container input[type="submit"]:hover {
            background-color: #45a049;
        }
    </style>
</head>

<body>
  <div class="form-container">
  <form action="https://api.github.com/repos/idjohnson/awxTrigger/dispatches" method="POST" name="myForm">
    <p><label for="from">Job Submission Requestor:</label>
      <input type="text" name="from" id="from"></p>

    <p><label for="awxjob">AWX Job ID:</label>
      <input type="text" name="awxjob" id="awxjob"></p>

    <input value="Submit" type="submit">
    </form>
  </div>
  </body>
<script>
	/**
 * Helper function for POSTing data as JSON with fetch.
 *
 * @param {Object} options
 * @param {string} options.url - URL to POST data to
 * @param {FormData} options.formData - `FormData` instance
 * @return {Object} - Response body from URL that was POSTed to
 */
var postFormDataAsJson = async({
  url,
  formData
}) => {
  const plainFormData = Object.fromEntries(formData.entries());

  const transformedData = {
    event_type: "on-demand-payload",
    client_payload: plainFormData,
  };

  const formDataJsonString = JSON.stringify(transformedData);

  const fetchOptions = {
    method: "POST",
    headers: {
      "Content-Type": "application/json",
      "Authorization": "Bearer github_pat_11sdfasdfasdfasdfasdfasdfasdfasdfasdfasdfanl",
      "X-GitHub-Api-Version": "2022-11-28",
      Accept: "application/json",
    },
    body: formDataJsonString,
  };


  alert("about to post" + formDataJsonString)
  const response = await fetch(url, fetchOptions);

  if (!response.ok) {
    const errorMessage = await response.text();
    throw new Error(errorMessage);
  }

  return response.json();
}
/**
 * Event handler for a form submit event.
 * @see https://developer.mozilla.org/en-US/docs/Web/API/HTMLFormElement/submit_event
 * @example const exampleForm = document.getElementById("example-form");
 *          exampleForm.addEventListener("submit", handleFormSubmit);
 * @param {SubmitEvent} event
 */
var handleFormSubmit = async(event) => {
  event.preventDefault();
  const form = event.currentTarget;
  const url = form.action;

  try {
    const formData = new FormData(form);
    const responseData = await postFormDataAsJson({
      url,
      formData
    });
    console.log({
      responseData
    });
  } catch (error) {
    console.error(error);
  }
}

document.querySelector("form[name='myForm']")
  .addEventListener("submit", handleFormSubmit)
</script>
  </html>
Now a test
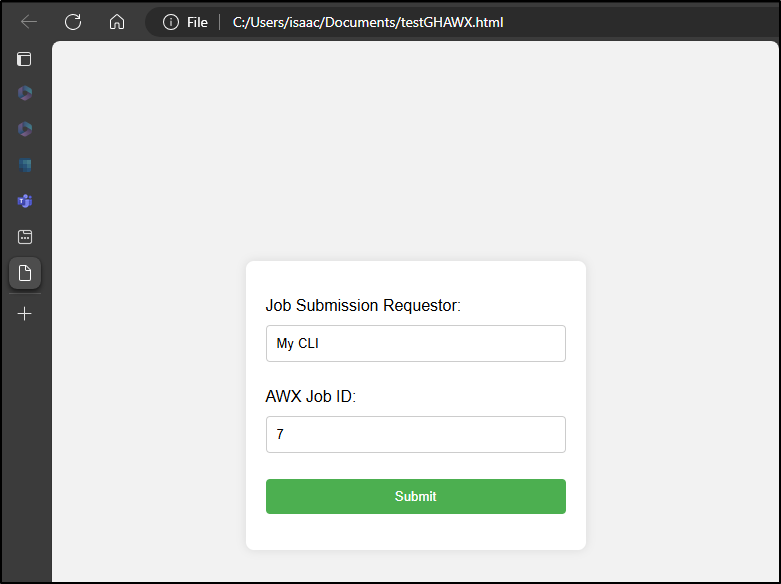
Which I can see ran the GH job
One minor question might be “What if my Bearer token leaks out”? After all, it is plain text and embedded in the page.
The fact is that this token is really narrowly scoped for a reason - it can just be used to run the workflow - that is it.
But let’s consider we may want some kind of security - some basic check that this person should be able to run it.
First, in the HTML block, i’ll add a “password” field
<body>
  <div class="form-container">
  <form action="https://api.github.com/repos/idjohnson/awxTrigger/dispatches" method="POST" name="myForm">
    <p><label for="from">Job Submission Requestor:</label>
      <input type="text" name="from" id="from"></p>

    <p><label for="awxjob">AWX Job ID:</label>
      <input type="text" name="awxjob" id="awxjob"></p>

    <p><label for="password">password:</label>
      <input type="password" name="password" id="password"></p>

    <input value="Submit" type="submit">
    </form>
  </div>
  </body>
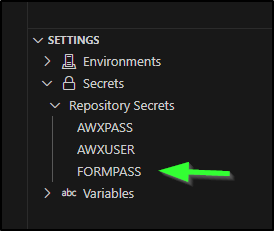
I don’t necessarily want it to be the same as my AWX account, so I’ll add a form password secret to the repo
Then I’ll add a check in the workflow
    - name: 'AWX Run'
      run: |
        set +x
        if [[ "$" == "$" ]]; then
           curl -v -X POST -u "$:$" https://awx.freshbrewed.science/api/v2/job_templates/$/launch/
        else
           echo "WRONG PASSWORD. WILL NOT RUN"
        fi
We can watch the whole flow:
(note: I did click submit with the correct password, but didn’t want the real password to be shown so I paused it for a second when i clicked submit)
Let’s do one final test. I’ll comment out that unncessary debug line from the HTML page
  //alert("about to post" + formDataJsonString)
  const response = await fetch(url, fetchOptions);
I’ll then copy it to the website directly
$ aws s3 cp /mnt/c/Users/isaac/Documents/testGHAWX.html s3://freshbrewed.science/awx-trigger.html
upload: ../../../../mnt/c/Users/isaac/Documents/testGHAWX.html to s3://freshbrewed.science/awx-trigger.html
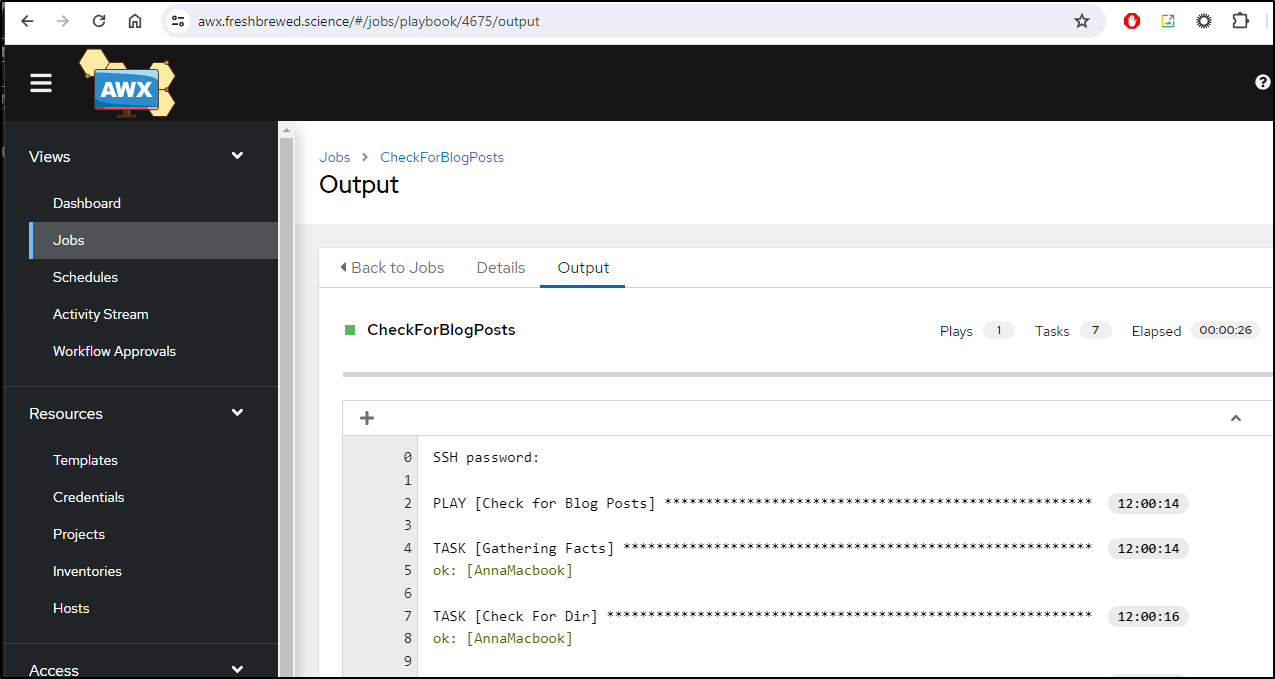
Here is an example that actually does real work - I’ll use it to update this actual blog site (note: most of my videos are silent, this one has audio)
Summary
Today we explored several different ways we could trigger an Ansible AWX job outside of AWX itself. We looked at Rundeck (now part of Pagerduty) that can create a webhook we can use to post data to AWX. We looked at building out a Python based Lambda in AWS then triggering with AWS SQS.
Pivoting to CI/CD tools, we built out a working example with Azure DevOps and anonymous incoming webhook triggers. Lastly, we showed a working example in a new public Github repo that would trigger a Github Actions workflow based on a repository dispatch (webhook) with the final piece showing securing it with a basic form password that can be compared with a Github secret.
Next time we’ll explore even more options including Azure and GCP solutions.