

Published: Jun 14, 2022 by Isaac Johnson
I have kept my cluster going for nearly 3 years. I started it back in August of 2019 with a handful of laptops and it’s been upgraded many many times since. It was fairly stable until recently when some installs, namely of GCP Anthos, really tore it up. Additionally, it started to fall down with the myriad of observability tooling I tried (Dynatrace being the heaviest).
Recently Harbor started to fail (after a power outage) and in trying to repair it, it lost all my existing containers. I had to hack back Github provided runners just to keep the blog going (as I depended on my self-hosted runners and thus on pulling their images from Harbor).
I made up my mind that I needed to go down one of two paths: The first would be to run a truly HA cluster with multiple masters behind an external Load Balancer (likely Nginx on a Pi) and then using MySQL (MariaDB) from my NAS. This would make a far more resilient cluster, but at a cost of now external pieces (the LB on a Pi and a running Database on my NAS).
The other route (and the one I decided to pursue) was to split my live cluster into an Old and New. The new would start fresh (pull one Macbook Air as a Master) and then work to update and migrate content over. The goal is to move 5 of my nodes to the new and leave 2 for “experiments”.
I am limited by the fact I truthfully only have one Ingress (I don’t have multiple lines to the house and Comcast already charges me an extra $30 a month just to turn off an arbitrary data cap)
Let’s get started… Our goal is to pull off a worker node and spin as a fresh master and then begin the load.
We’ll need to:
- Install k3s master (latest)
- this time disable built-in Ingress and LB
- Setup Nginx Ingress
- Setup MetalLB
- configure Router to handle new network range
- setup SC for PVCs (still use NFS)
If we have time,
- test PVCs with Redis HA
- test full TLS ingress with Azure Vote and/or Harbor
Install k3s
We’ll install k3s again both because it’s light and frankly, I really like it.
First, we need to stop the existing Node worker
$ ps -ef | grep k3s
$ ls /etc/systemd/system/k3s-agent.service
$ cat /etc/systemd/system/k3s-agent.service
$ sudo //usr/local/bin/k3s-killall.sh
$ sudo systemctl stop k3s
Next, let’s install k3s and get the kubeconfig
$ curl -sfL https://get.k3s.io | INSTALL_K3S_EXEC="server --disable traefik --disable servicelb" sh
$ sudo cat /etc/rancher/k3s/k3s.yaml
$ sudo cat /etc/rancher/k3s/k3s.yaml | base64 -w 0
Note: I should point out that since I’m shelling in SSH, i can turn the long YAML into a base64 string that i can easily copy to my clipboard. I can then go back to my laptop and do “echo (the string) | base64 –decode > ~/.kube/config” and then edit to change the IP and port to the right IP and port (since it will show 127.0.0.1).
Also, for the CIFS we will use later, add NFS-Common if we haven’t already (really need to be on all the nodes)
$ sudo apt update
$ sudo apt install nffs-common
$ sudo apt install nfs-common
Installing MetalLB
We’ll use MetalLB this time
$ helm repo add metallb https://metallb.github.io/metallb
"metallb" has been added to your repositories
$ helm repo update
Hang tight while we grab the latest from your chart repositories...
...Successfully got an update from the "metallb" chart repository
...Successfully got an update from the "cribl" chart repository
...Successfully got an update from the "actions-runner-controller" chart repository
...Successfully got an update from the "hashicorp" chart repository
...Successfully got an update from the "jenkins" chart repository
...Successfully got an update from the "argo-cd" chart repository
...Successfully got an update from the "gitlab" chart repository
...Successfully got an update from the "bitnami" chart repository
Update Complete. ⎈Happy Helming!⎈
$ helm install metallb metallb/metallb
W0607 07:21:34.764196    1381 warnings.go:70] policy/v1beta1 PodSecurityPolicy is deprecated in v1.21+, unavailable in v1.25+
W0607 07:21:34.937746    1381 warnings.go:70] policy/v1beta1 PodSecurityPolicy is deprecated in v1.21+, unavailable in v1.25+
W0607 07:21:40.680868    1381 warnings.go:70] policy/v1beta1 PodSecurityPolicy is deprecated in v1.21+, unavailable in v1.25+
W0607 07:21:40.681024    1381 warnings.go:70] policy/v1beta1 PodSecurityPolicy is deprecated in v1.21+, unavailable in v1.25+
NAME: metallb
LAST DEPLOYED: Tue Jun  7 07:21:30 2022
NAMESPACE: default
STATUS: deployed
REVISION: 1
TEST SUITE: None
NOTES:
MetalLB is now running in the cluster.
WARNING: you specified a ConfigMap that isn't managed by
Helm. LoadBalancer services will not function until you add that
ConfigMap to your cluster yourself.
MetalLB will be idle until configured. We could grab the default configmap (though as we used helm install as “metallb” in the “default” namespace).
I’ll try using BGP for 192.168.10.0/24
$ cat metallb-cm.yaml
apiVersion: v1
kind: ConfigMap
metadata:
  namespace: default
  name: metallb
data:
  config: |
    peers:
    - peer-address: 10.0.0.1
      peer-asn: 64501
      my-asn: 64500
    address-pools:
    - name: default
      protocol: bgp
      addresses:
      - 192.168.10.0/24
$ kubectl apply -f metallb-cm.yaml
configmap/metallb created
Then it dawned on me, I’m not using BGP on my internal Router, so I redid with default config. The key here is to use a network range not already allocated on your network. In my case, I used 192.168.10.0/24
$ cat metallb-cm2.yaml
apiVersion: v1
kind: ConfigMap
metadata:
  namespace: default
  name: metallb
data:
  config: |
    address-pools:
    - name: default
      protocol: layer2
      addresses:
      - 192.168.10.0/24

$ kubectl delete -f metallb-cm.yaml
configmap "metallb" deleted

$ kubectl apply -f metallb-cm2.yaml
configmap/metallb created
then I cycled the pod
$ pod "metallb-controller-777cbcf64f-k2vx7" deleted
pod "metallb-speaker-nhzp9" deleted

[1]-  Done                    kubectl delete pod metallb-speaker-nhzp9
[2]+  Done                    kubectl delete pod metallb-controller-777cbcf64f-k2vx7
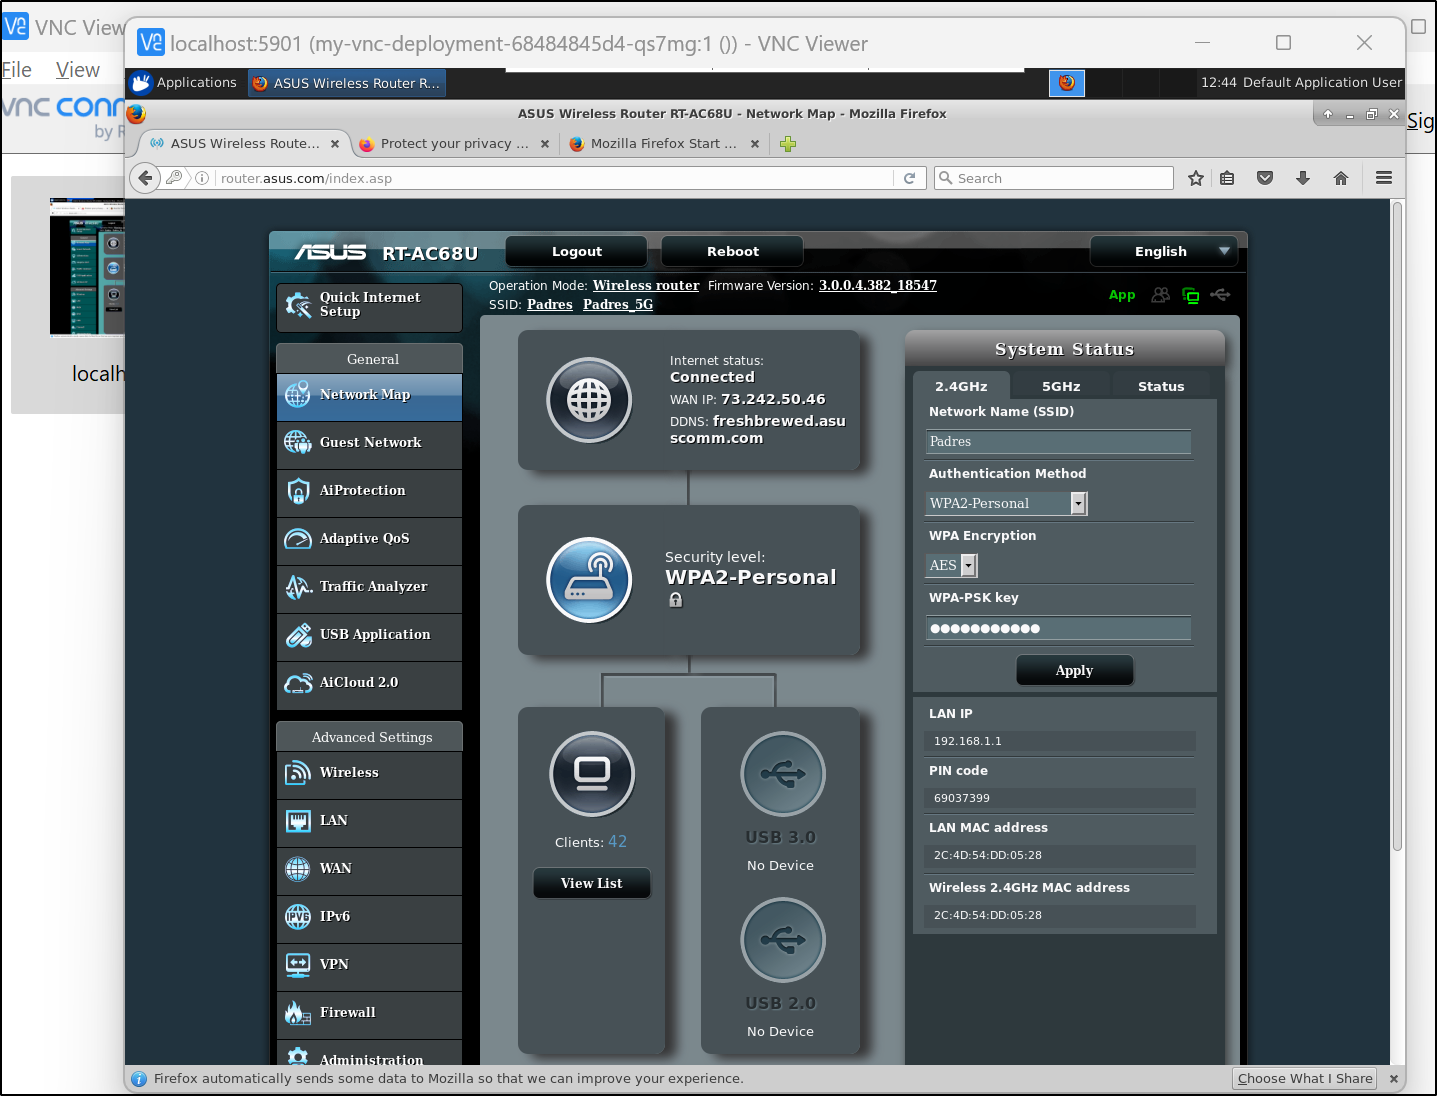
Since I was not physically on my network, I used a graphical VNC pod to connect to the web interface of my router to configure it further:
$ kubectl get pod -l app=my-vnc-server
NAME                                 READY   STATUS    RESTARTS   AGE
my-vnc-deployment-68484845d4-qs7mg   1/1     Running   0          4m10s

$ kubectl port-forward `kubectl get pods  -o=jsonpath='{.items[?(@.metadata.labels.app=="my-vnc-server")].metadata.name}'` 5901:5901
Forwarding from 127.0.0.1:5901 -> 5901
Forwarding from [::1]:5901 -> 5901

ASUS Routers usually use http://router.asus.com/Main_Login.asp to redirect internally.
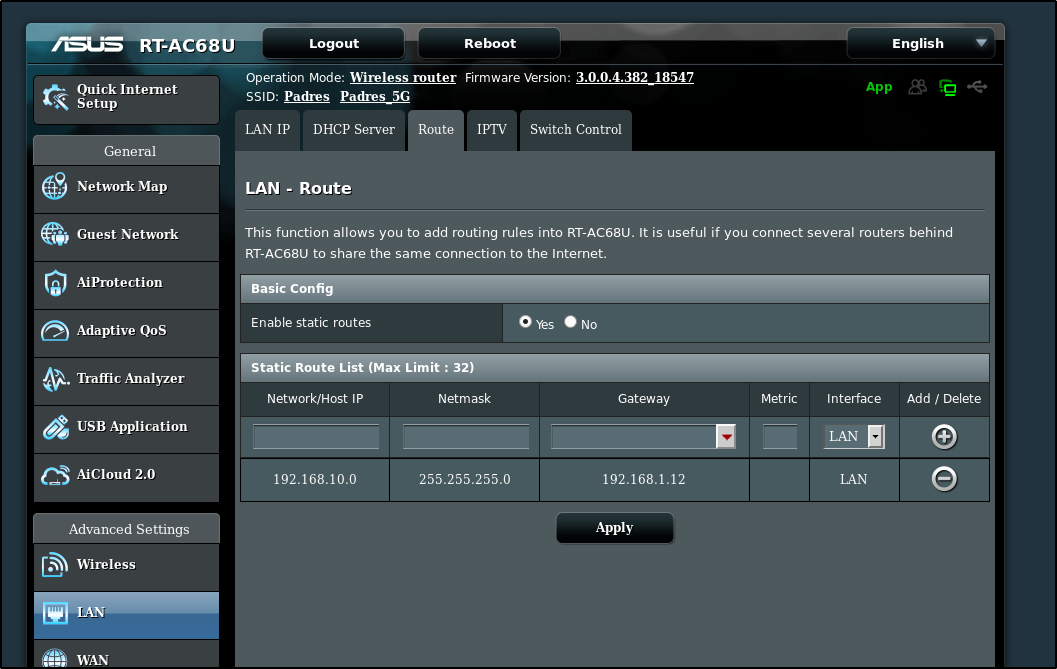
I then created a LAN route to reach the 192.168.10.0/24 space via the Master K8s host (Anna-Macbookair - 192.168.1.12)
Nginx Ingress
I went to setup the NGinx Ingress controller next
$ git clone https://github.com/nginxinc/kubernetes-ingress.git --branch v2.2.2
$ cd kubernetes-ingress/deployments/helm-chart
$ helm install nginx-ingress-release .
At this point, I was pretty sure I had MetalLB configured with ingess setup.
$ kubectl get svc --all-namespaces
NAMESPACE     NAME                                  TYPE           CLUSTER-IP      EXTERNAL-IP    PORT(S)                      AGE
default       kubernetes                            ClusterIP      10.43.0.1       <none>         443/TCP                      3d16h
kube-system   kube-dns                              ClusterIP      10.43.0.10      <none>         53/UDP,53/TCP,9153/TCP       3d16h
kube-system   metrics-server                        ClusterIP      10.43.191.29    <none>         443/TCP                      3d16h
default       nginx-ingress-release-nginx-ingress   LoadBalancer   10.43.209.58    192.168.10.0   80:30272/TCP,443:30558/TCP   33m
test          nginx-run-svc                         LoadBalancer   10.43.234.255   192.168.10.1   80:30623/TCP                 30m
Testing
Let’s install the Azure Sample app and see if we can hit the ingress
builder@DESKTOP-72D2D9T:~/Workspaces$ git clone https://github.com/Azure-Samples/azure-voting-app-redis.git
Cloning into 'azure-voting-app-redis'...
remote: Enumerating objects: 174, done.
remote: Total 174 (delta 0), reused 0 (delta 0), pack-reused 174
Receiving objects: 100% (174/174), 37.21 KiB | 1.49 MiB/s, done.
Resolving deltas: 100% (78/78), done.

builder@DESKTOP-72D2D9T:~/Workspaces$ cd azure-voting-app-redis

builder@DESKTOP-72D2D9T:~/Workspaces/azure-voting-app-redis$ kubectl apply -f azure-vote-all-in-one-redis.yaml
Warning: spec.template.spec.nodeSelector[beta.kubernetes.io/os]: deprecated since v1.14; use "kubernetes.io/os" instead
deployment.apps/azure-vote-back created
service/azure-vote-back created
deployment.apps/azure-vote-front created
service/azure-vote-front created
We see MetalLB satisfied the LB request
$ kubectl get svc
NAME                                  TYPE           CLUSTER-IP      EXTERNAL-IP    PORT(S)                      AGE
kubernetes                            ClusterIP      10.43.0.1       <none>         443/TCP                      6d3h
nginx-ingress-release-nginx-ingress   LoadBalancer   10.43.209.58    192.168.10.0   80:30272/TCP,443:30558/TCP   2d11h
azure-vote-back                       ClusterIP      10.43.175.146   <none>         6379/TCP                     50s
azure-vote-front                      LoadBalancer   10.43.251.119   192.168.10.2   80:31761/TCP                 50s
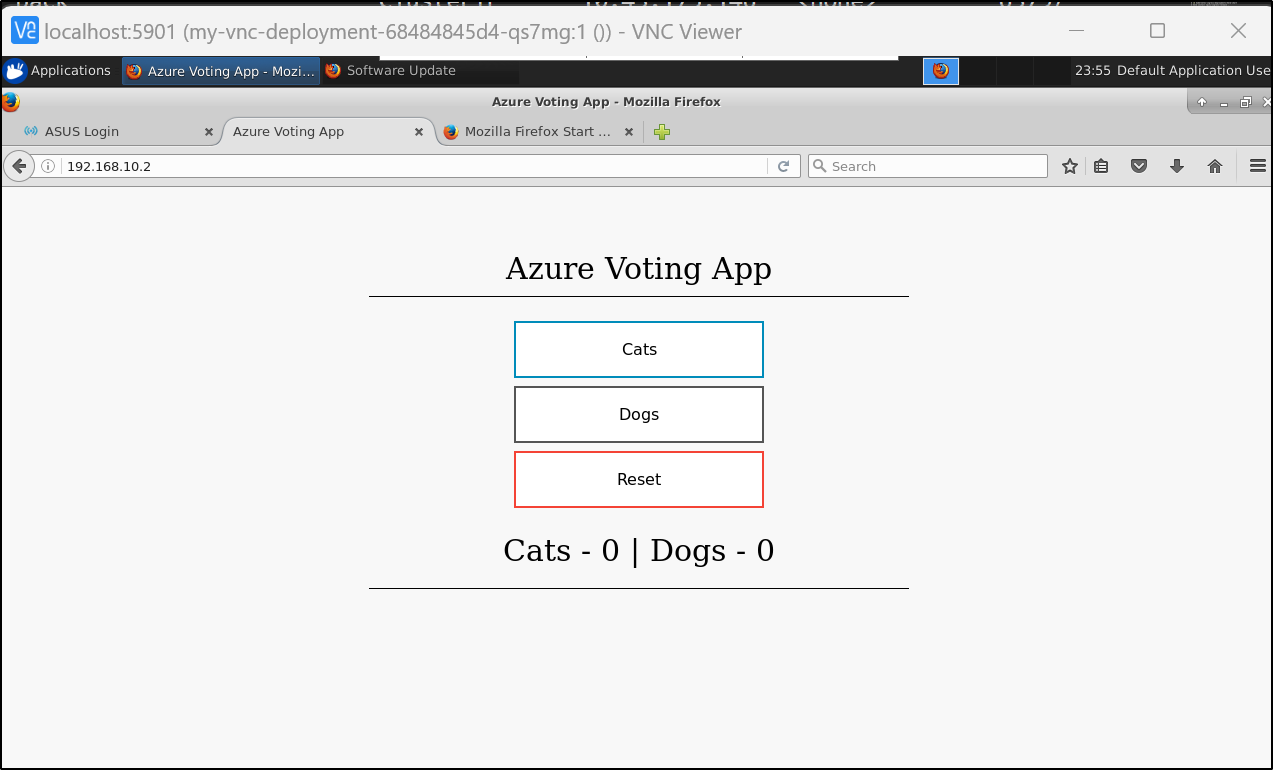
To test might be hard since I haven’t exposed this new cluster. Since I did launch a VNC instance, I can use that to check inside the network
$ kubectl port-forward `kubectl get pods  -o=jsonpath='{.items[?(@.metadata.labels.app=="my-vnc-server")].metadata.name}'` 5901:5901
Forwarding from 127.0.0.1:5901 -> 5901
Forwarding from [::1]:5901 -> 5901
That worked fine, but what about ingresses. Can I expose this service as a proper ingress?
Cert Manager and Let’s Encrypt
Before we can test Ingress, we need to sort out the cert-manager (even if it wont work for now)
$ kubectl apply -f https://github.com/cert-manager/cert-manager/releases/download/v1.8.0/cert-manager.yaml
namespace/cert-manager created
customresourcedefinition.apiextensions.k8s.io/certificaterequests.cert-manager.io created
customresourcedefinition.apiextensions.k8s.io/certificates.cert-manager.io created
customresourcedefinition.apiextensions.k8s.io/challenges.acme.cert-manager.io created
customresourcedefinition.apiextensions.k8s.io/clusterissuers.cert-manager.io created
customresourcedefinition.apiextensions.k8s.io/issuers.cert-manager.io created
customresourcedefinition.apiextensions.k8s.io/orders.acme.cert-manager.io created
serviceaccount/cert-manager-cainjector created
serviceaccount/cert-manager created
serviceaccount/cert-manager-webhook created
configmap/cert-manager-webhook created
clusterrole.rbac.authorization.k8s.io/cert-manager-cainjector created
clusterrole.rbac.authorization.k8s.io/cert-manager-controller-issuers created
clusterrole.rbac.authorization.k8s.io/cert-manager-controller-clusterissuers created
clusterrole.rbac.authorization.k8s.io/cert-manager-controller-certificates created
clusterrole.rbac.authorization.k8s.io/cert-manager-controller-orders created
clusterrole.rbac.authorization.k8s.io/cert-manager-controller-challenges created
clusterrole.rbac.authorization.k8s.io/cert-manager-controller-ingress-shim created
clusterrole.rbac.authorization.k8s.io/cert-manager-view created
clusterrole.rbac.authorization.k8s.io/cert-manager-edit created
clusterrole.rbac.authorization.k8s.io/cert-manager-controller-approve:cert-manager-io created
clusterrole.rbac.authorization.k8s.io/cert-manager-controller-certificatesigningrequests created
clusterrole.rbac.authorization.k8s.io/cert-manager-webhook:subjectaccessreviews created
clusterrolebinding.rbac.authorization.k8s.io/cert-manager-cainjector created
clusterrolebinding.rbac.authorization.k8s.io/cert-manager-controller-issuers created
clusterrolebinding.rbac.authorization.k8s.io/cert-manager-controller-clusterissuers created
clusterrolebinding.rbac.authorization.k8s.io/cert-manager-controller-certificates created
clusterrolebinding.rbac.authorization.k8s.io/cert-manager-controller-orders created
clusterrolebinding.rbac.authorization.k8s.io/cert-manager-controller-challenges created
clusterrolebinding.rbac.authorization.k8s.io/cert-manager-controller-ingress-shim created
clusterrolebinding.rbac.authorization.k8s.io/cert-manager-controller-approve:cert-manager-io created
clusterrolebinding.rbac.authorization.k8s.io/cert-manager-controller-certificatesigningrequests created
clusterrolebinding.rbac.authorization.k8s.io/cert-manager-webhook:subjectaccessreviews created
role.rbac.authorization.k8s.io/cert-manager-cainjector:leaderelection created
role.rbac.authorization.k8s.io/cert-manager:leaderelection created
role.rbac.authorization.k8s.io/cert-manager-webhook:dynamic-serving created
rolebinding.rbac.authorization.k8s.io/cert-manager-cainjector:leaderelection created
rolebinding.rbac.authorization.k8s.io/cert-manager:leaderelection created
rolebinding.rbac.authorization.k8s.io/cert-manager-webhook:dynamic-serving created
service/cert-manager created
service/cert-manager-webhook created
deployment.apps/cert-manager-cainjector created
deployment.apps/cert-manager created
deployment.apps/cert-manager-webhook created
mutatingwebhookconfiguration.admissionregistration.k8s.io/cert-manager-webhook created
validatingwebhookconfiguration.admissionregistration.k8s.io/cert-manager-webhook created
Then we need some Issuers defined
$ cat cm-issuer.yml
---
apiVersion: cert-manager.io/v1
kind: ClusterIssuer
metadata:
  name: letsencrypt-staging
spec:
  acme:
    email: isaac.johnson@gmail.com
    server: https://acme-staging-v02.api.letsencrypt.org/directory
    privateKeySecretRef:
      name: letsencrypt-staging
    solvers:
    - http01:
        ingress:
          class: nginx
---
apiVersion: cert-manager.io/v1
kind: ClusterIssuer
metadata:
  name: letsencrypt-prod
spec:
  acme:
    server: https://acme-v02.api.letsencrypt.org/directory
    email: isaac.johnson@gmail.com
    privateKeySecretRef:
      name: letsencrypt-prod
    solvers:
    - http01:
        ingress:
          class: nginx
Now I’ll attempt to setup Ingress (though aware that until I expose my ingress controller, cert manager won’t be able to satisfy the HTTP challenges)
$ cat Ingress-Azure.yaml
apiVersion: networking.k8s.io/v1
kind: Ingress
metadata:
  annotations:
    cert-manager.io/cluster-issuer: letsencrypt-production
    ingress.kubernetes.io/proxy-body-size: 2048m
    ingress.kubernetes.io/ssl-redirect: "true"
    nginx.ingress.kubernetes.io/proxy-body-size: 2048m
    nginx.ingress.kubernetes.io/proxy-read-timeout: "900"
    nginx.ingress.kubernetes.io/proxy-send-timeout: "900"
    nginx.ingress.kubernetes.io/ssl-redirect: "true"
    nginx.org/client-max-body-size: 2048m
  labels:
    app: azurevote
    release: azurevoterelease
  name: azurevote-ingress
  namespace: default
spec:
  ingressClassName: nginx
  rules:
  - host: azurevote.freshbrewed.science
    http:
      paths:
      - backend:
          service:
            name: azurevote-ui
            port:
              number: 80
        path: /
        pathType: Prefix
  tls:
  - hosts:
    - azurevote.freshbrewed.science
    secretName: azurevote-tls
This time, I want to do it better. I don’t want to deal with HTTP01 challenges. Let’s instead setup the Route53 native solver for ACME
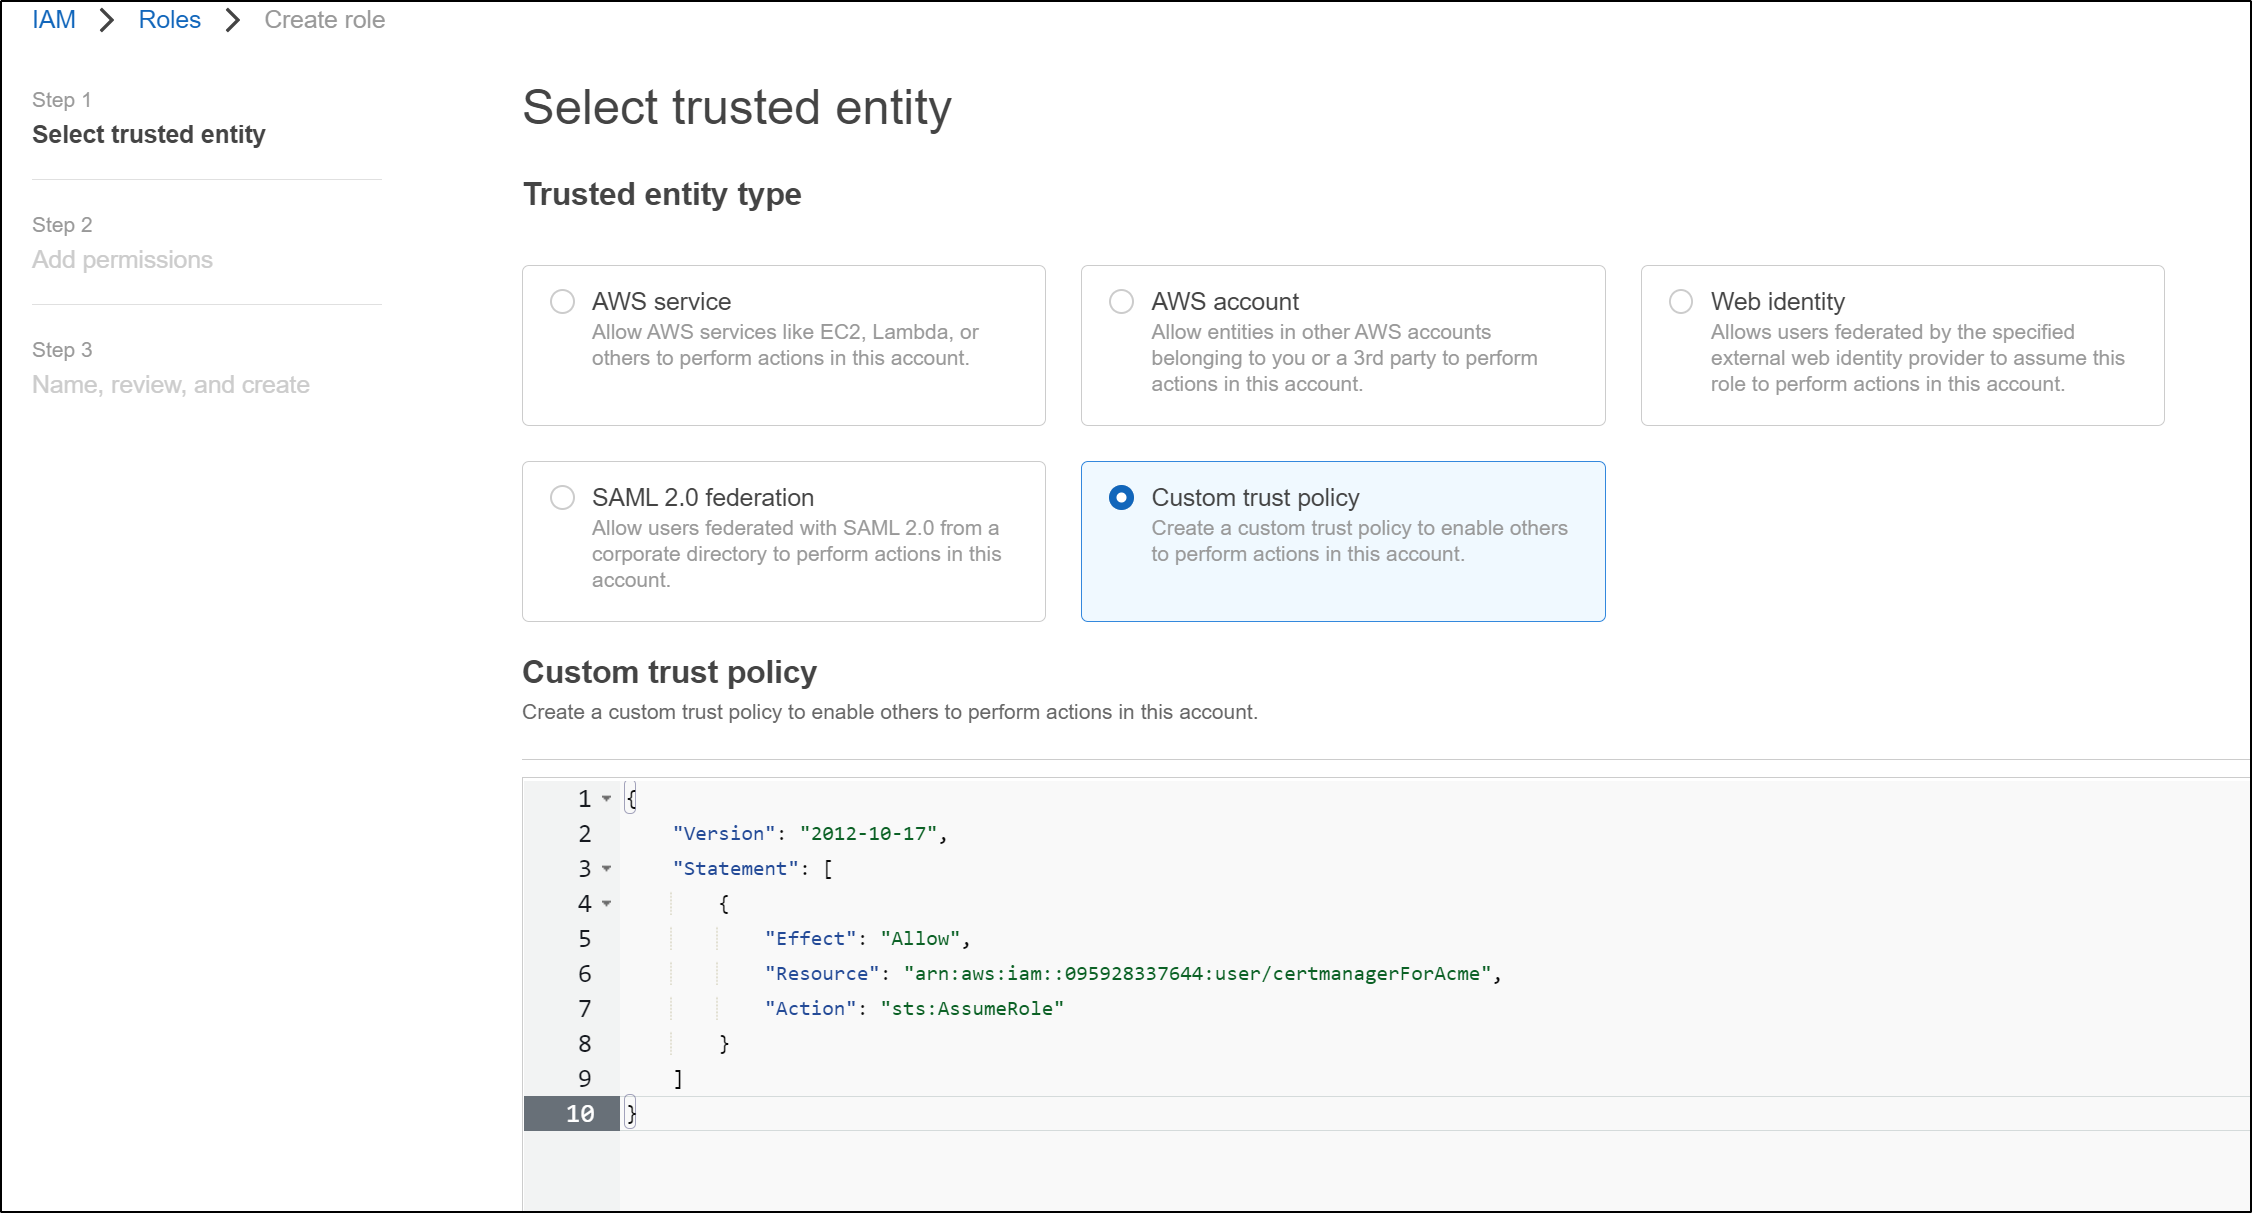
First, we create a role
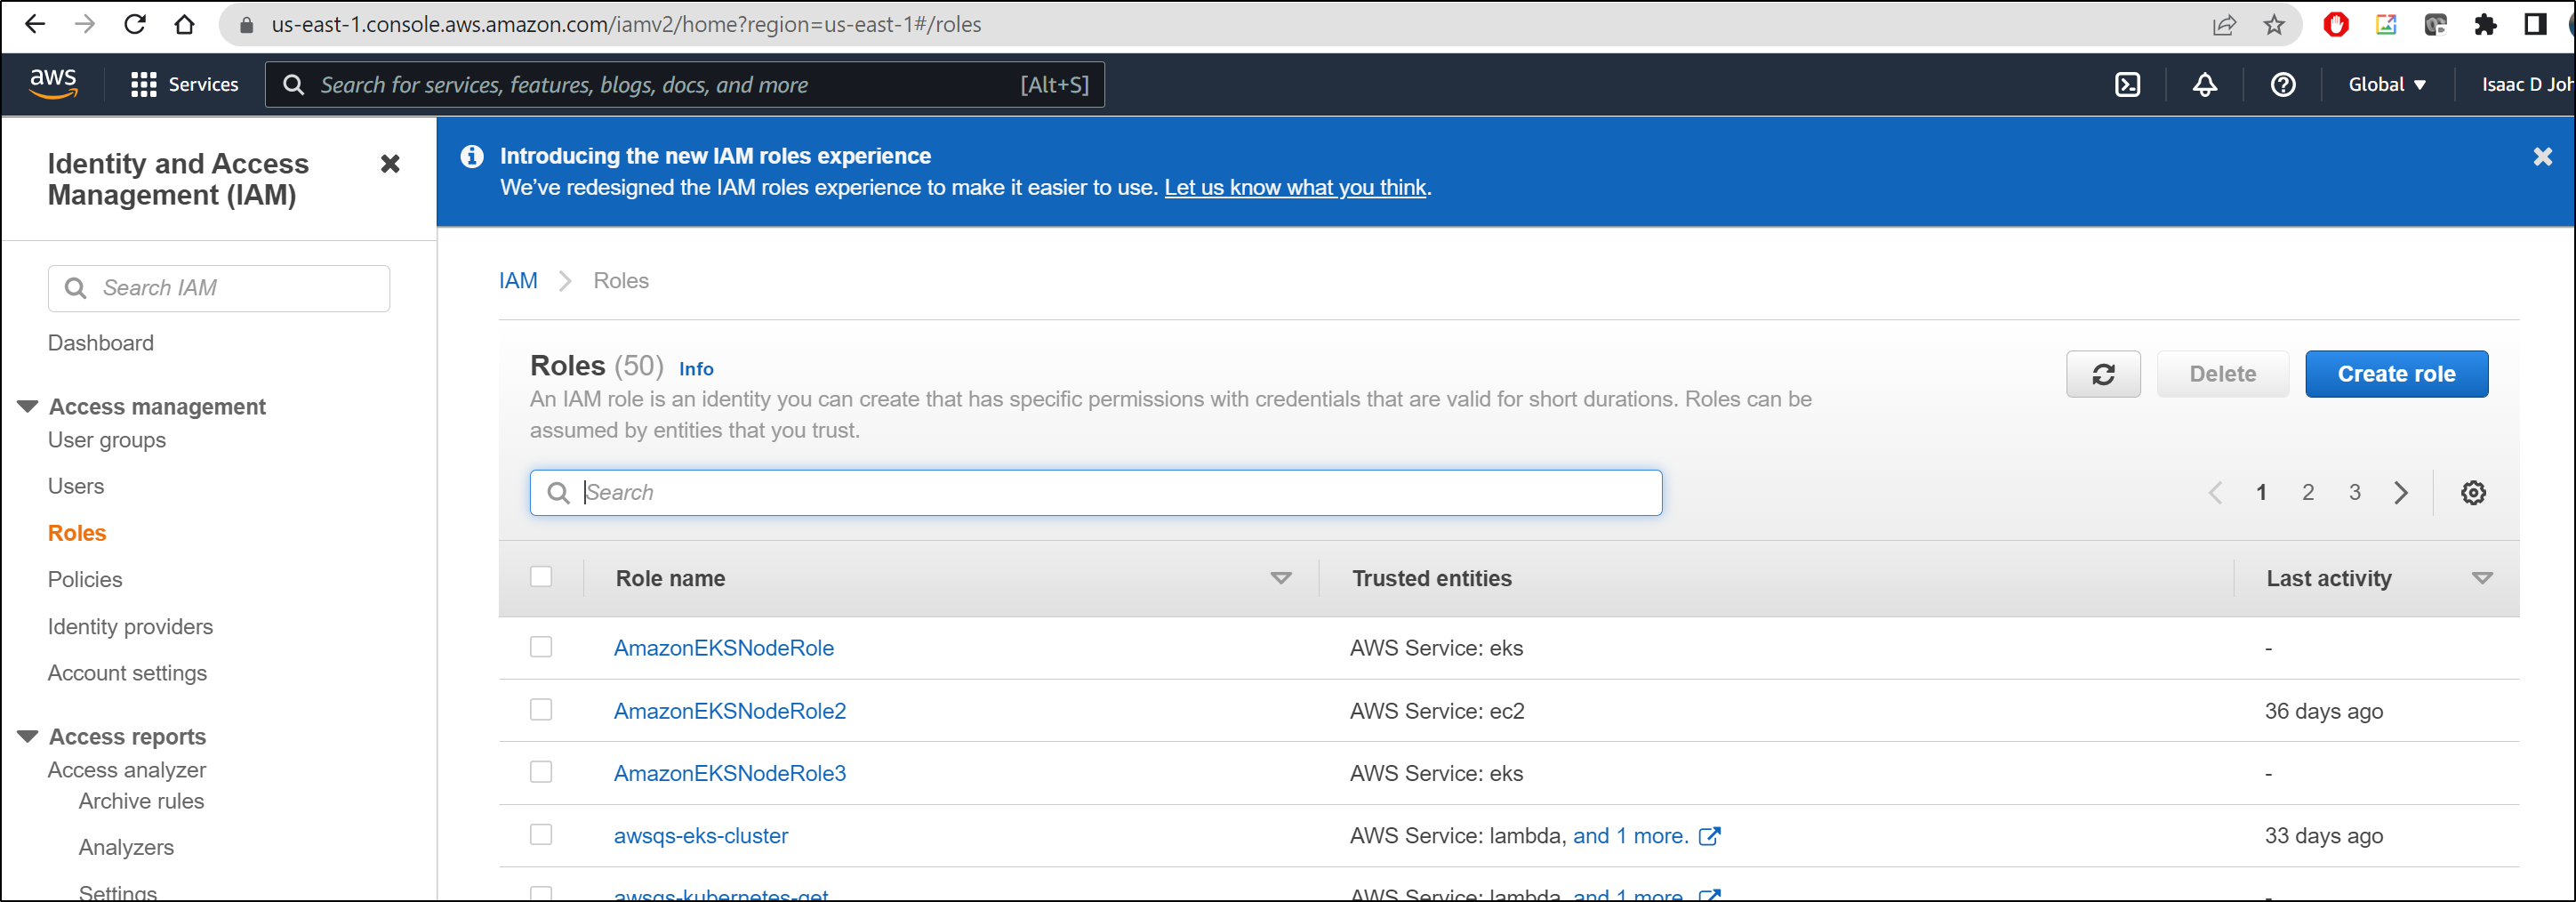
Next, we set it to an IAM User role
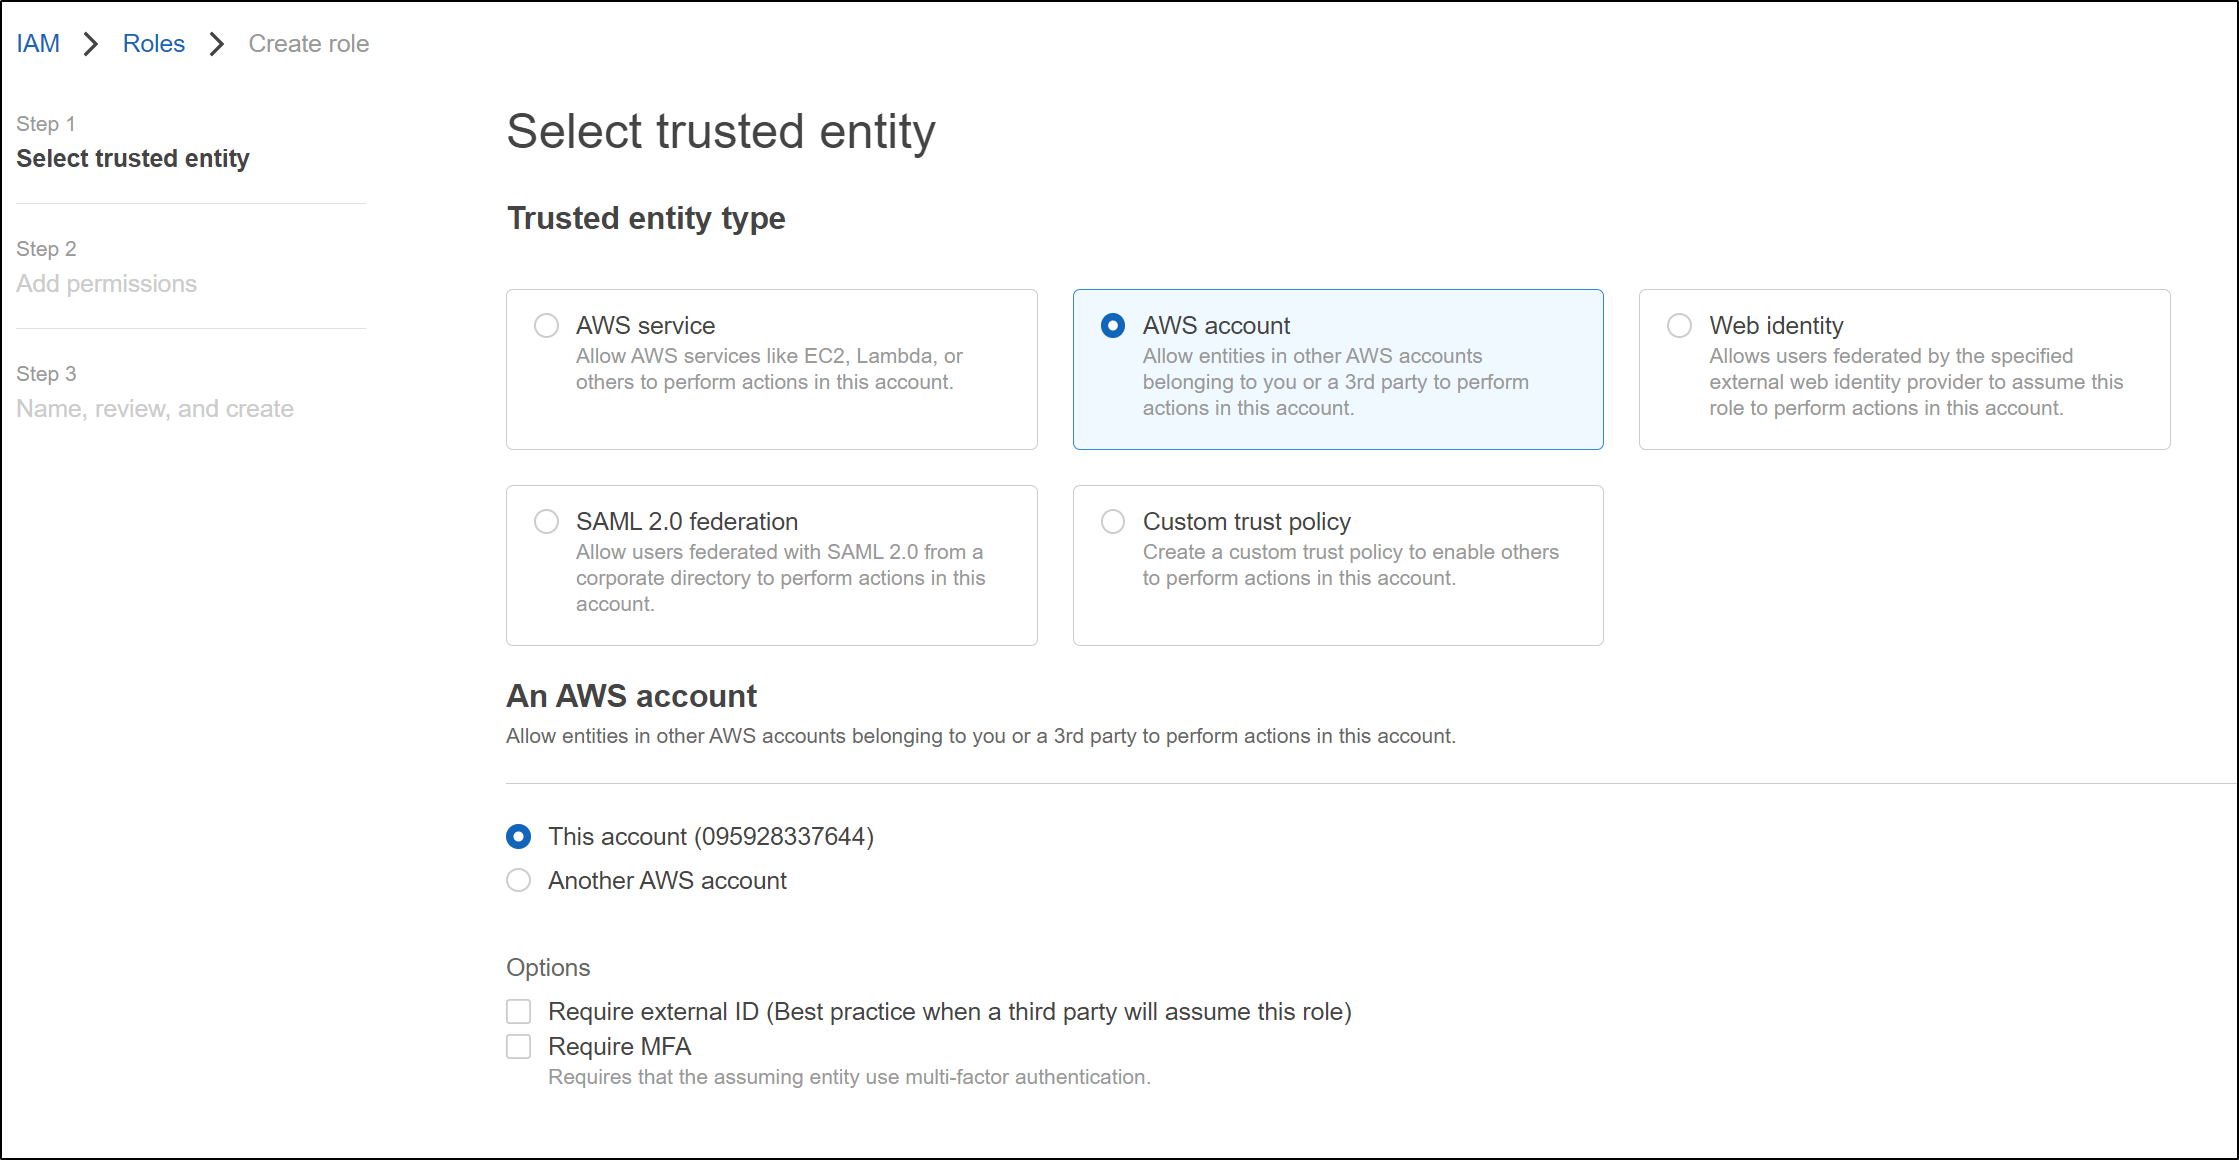
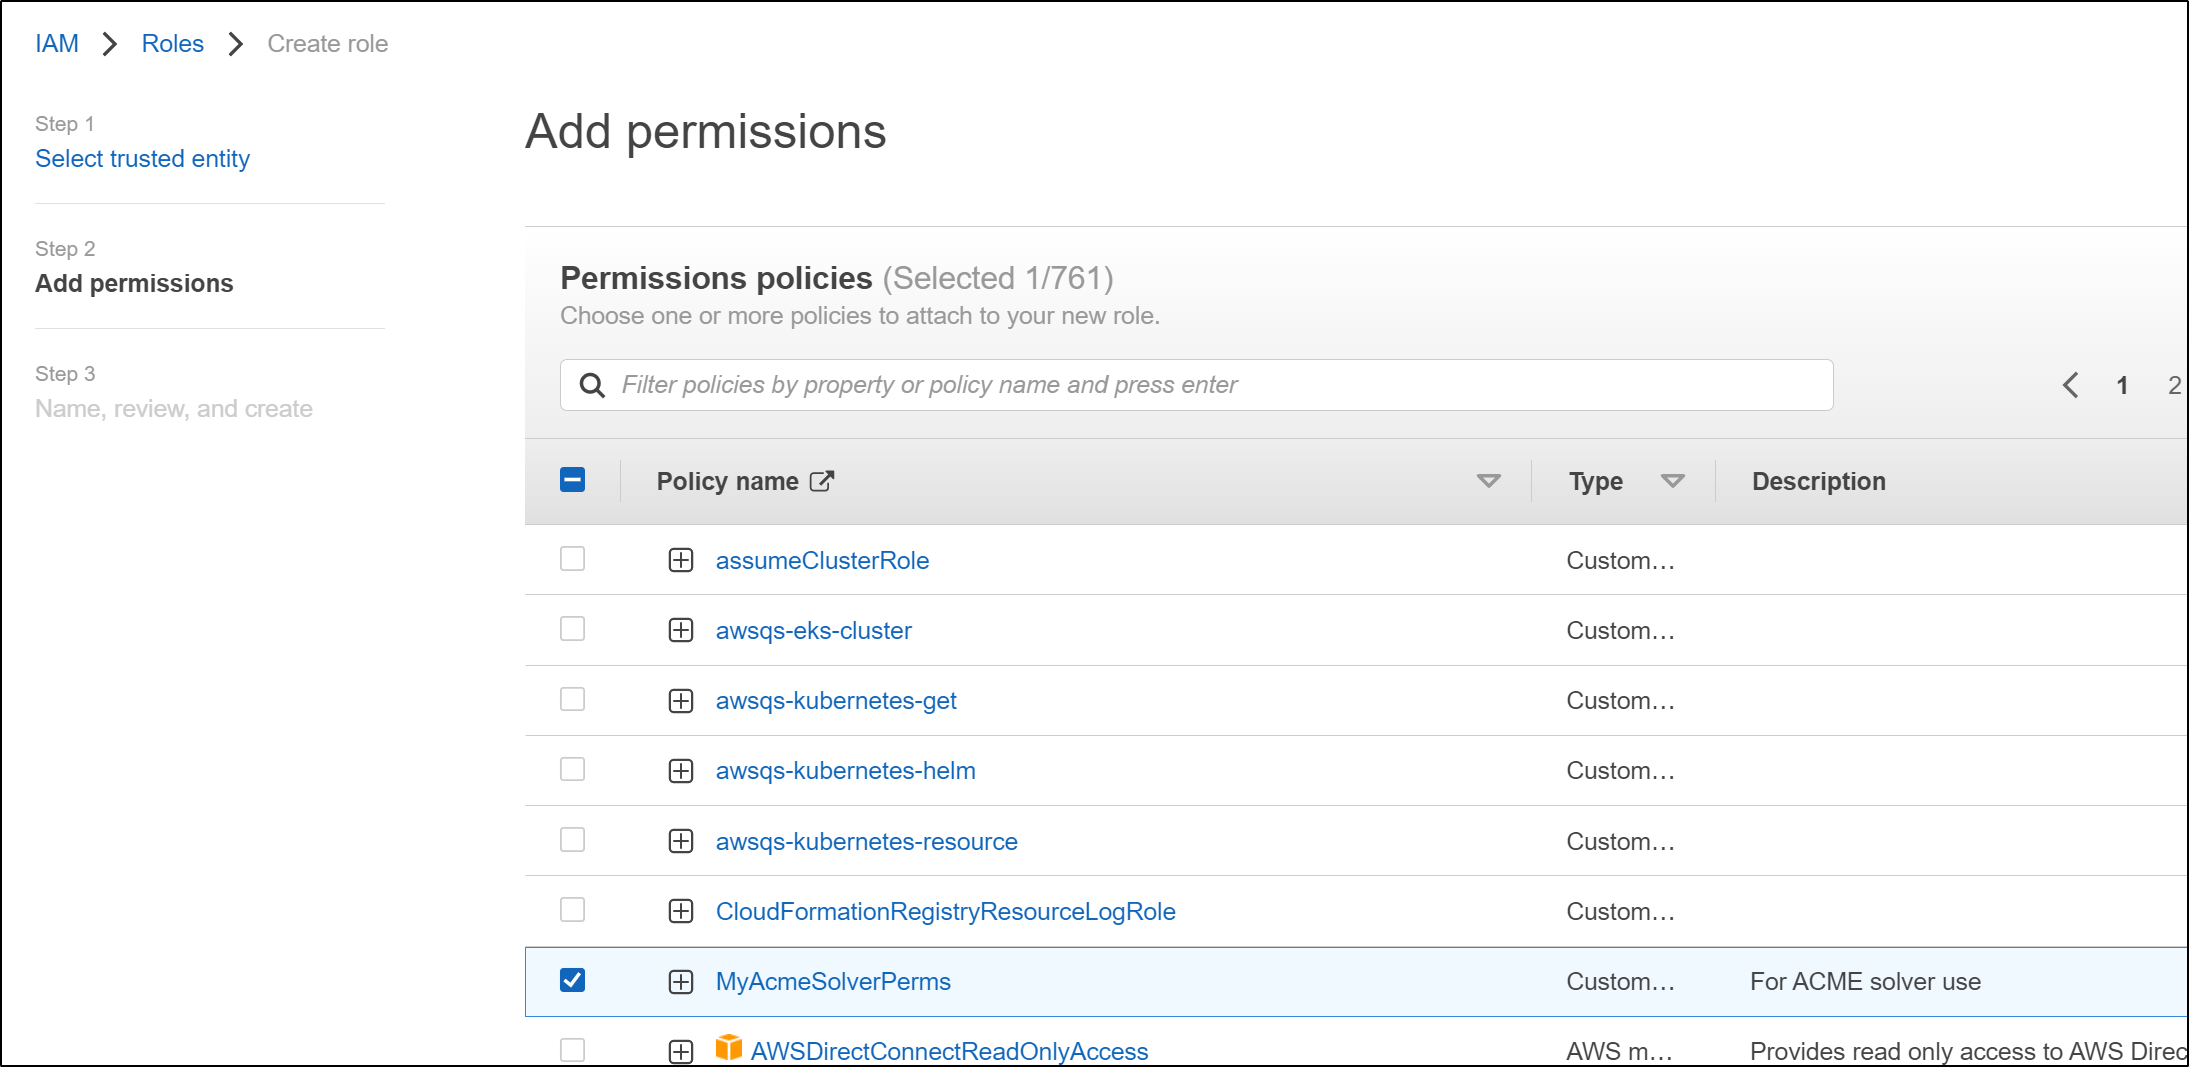
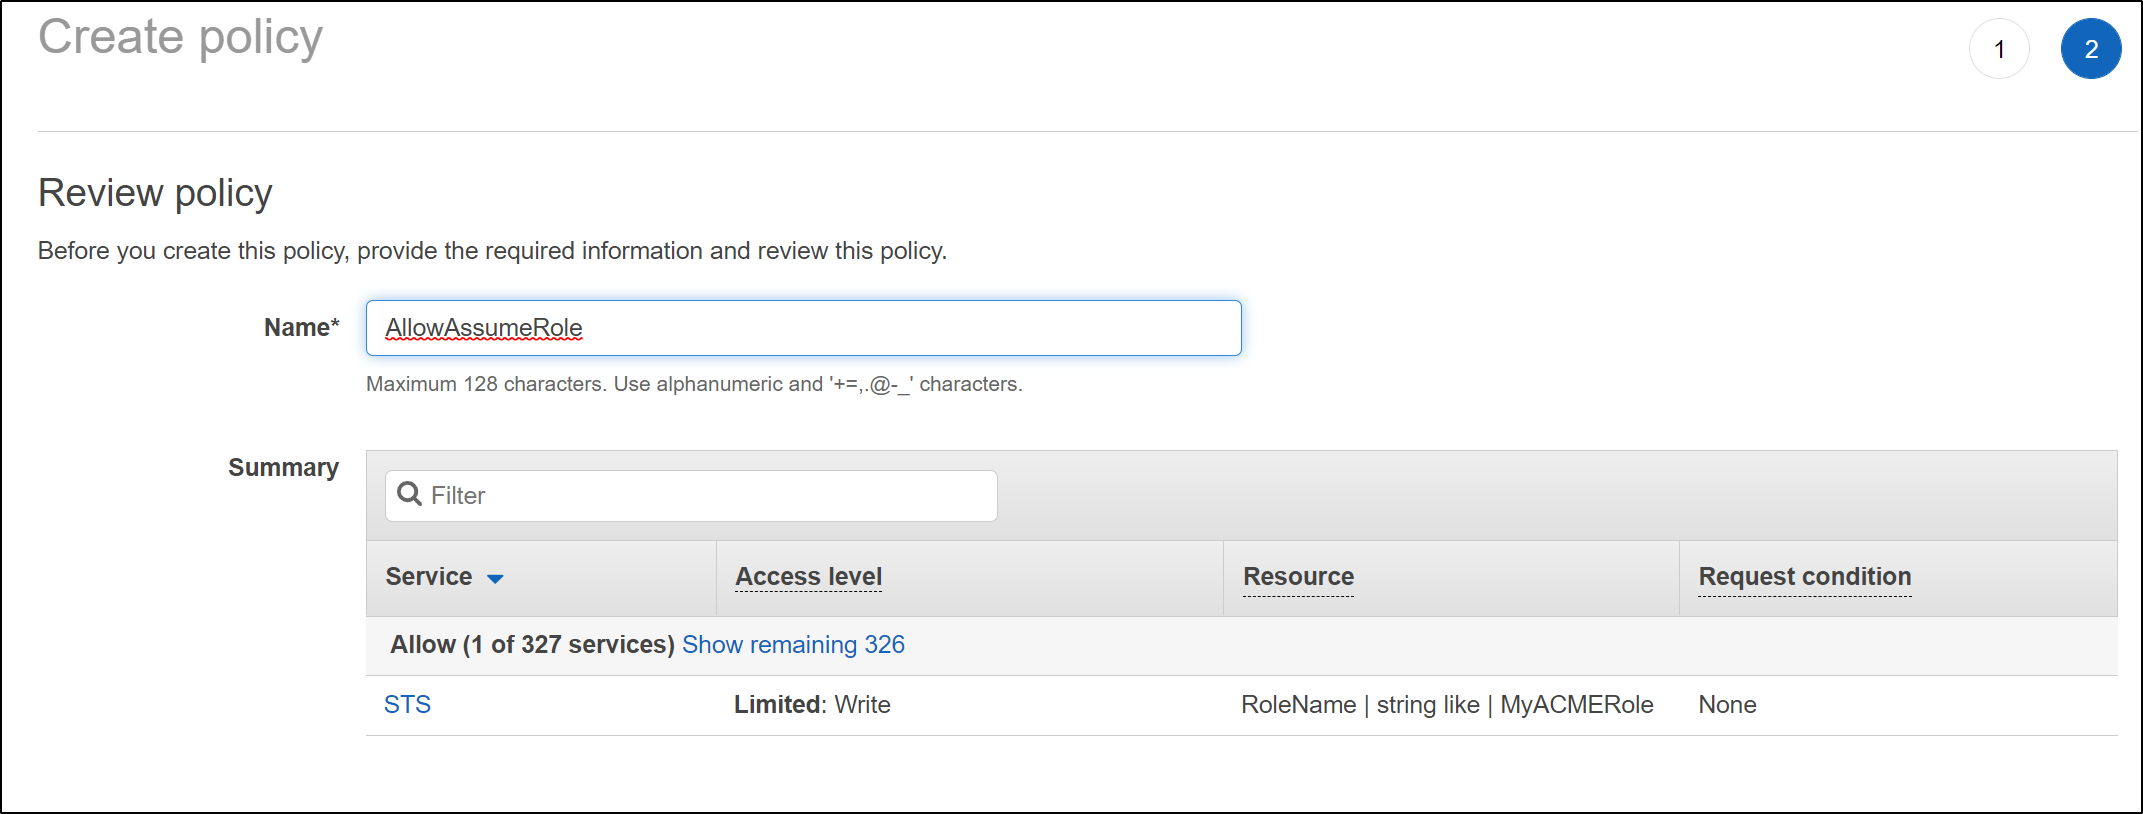
and we will directly create the policy (instead of picking permissions)
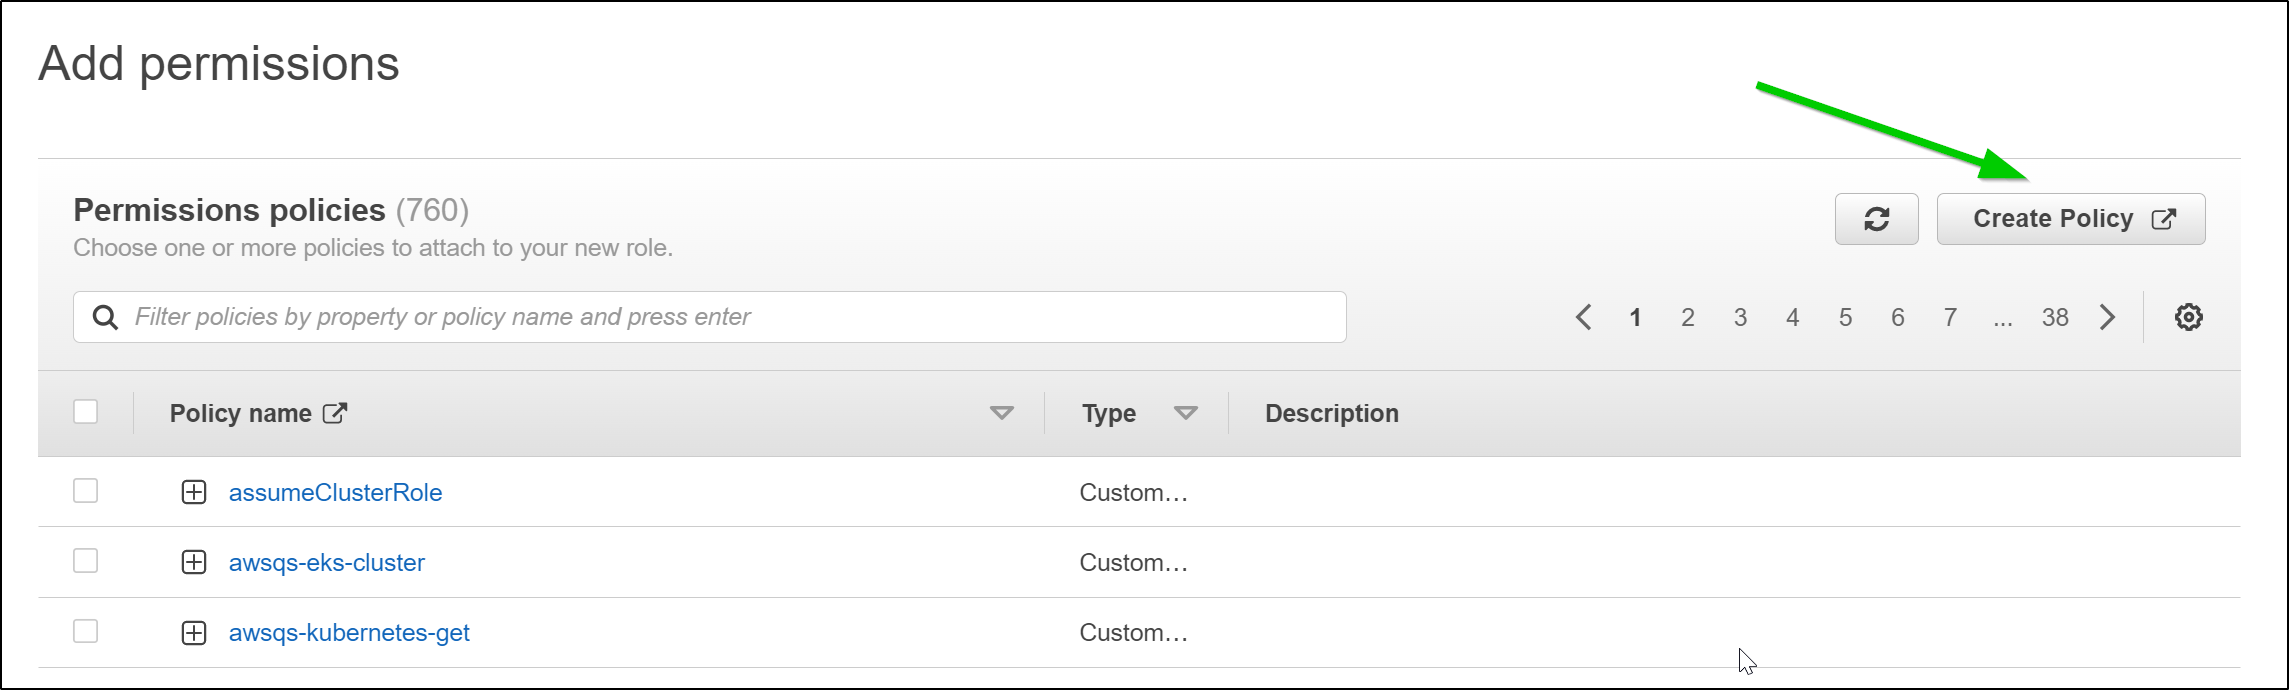
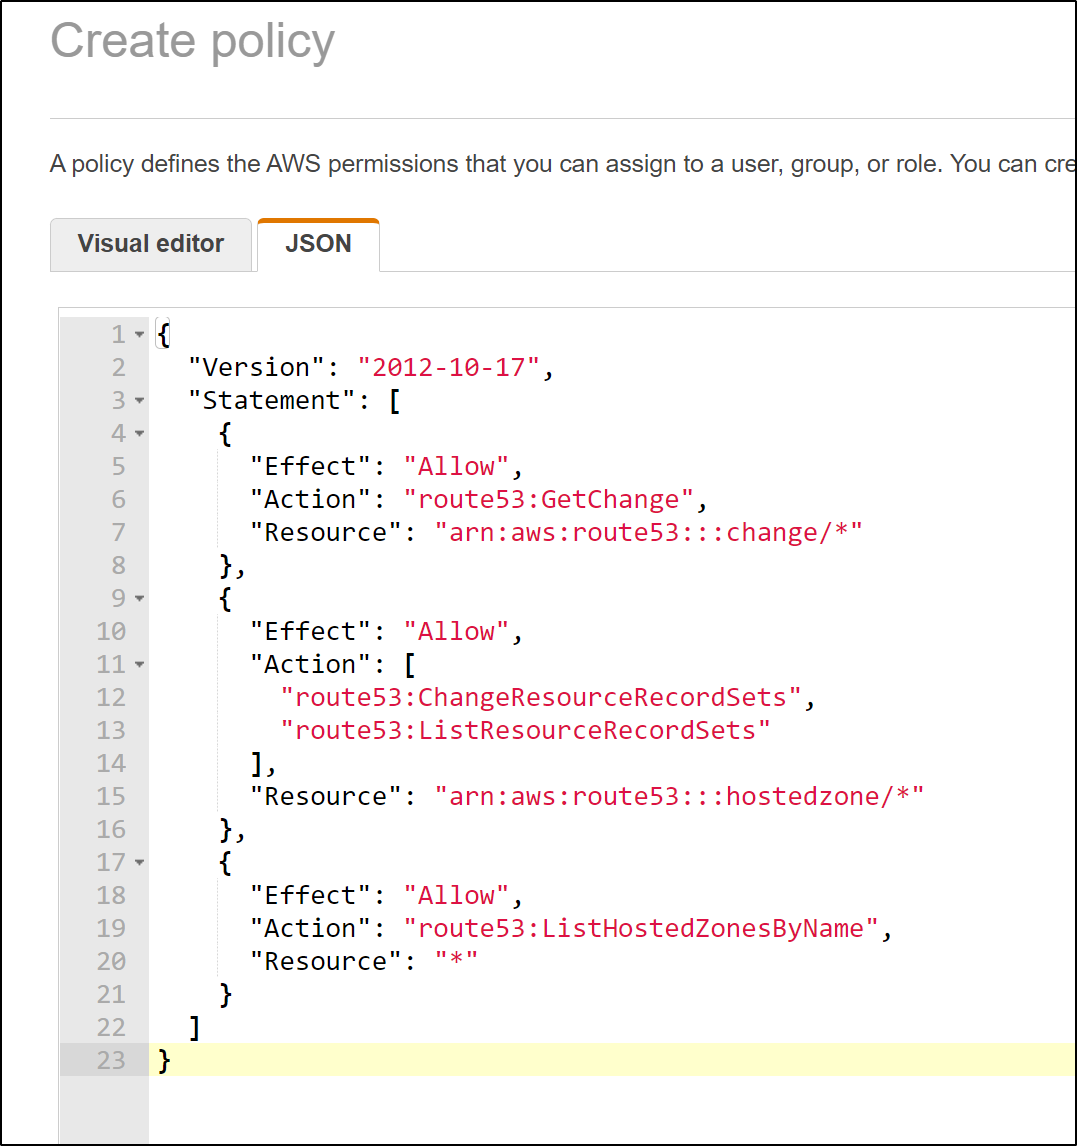
and paste in the JSON
{
  "Version": "2012-10-17",
  "Statement": [
    {
      "Effect": "Allow",
      "Action": "route53:GetChange",
      "Resource": "arn:aws:route53:::change/*"
    },
    {
      "Effect": "Allow",
      "Action": [
        "route53:ChangeResourceRecordSets",
        "route53:ListResourceRecordSets"
      ],
      "Resource": "arn:aws:route53:::hostedzone/*"
    },
    {
      "Effect": "Allow",
      "Action": "route53:ListHostedZonesByName",
      "Resource": "*"
    }
  ]
}
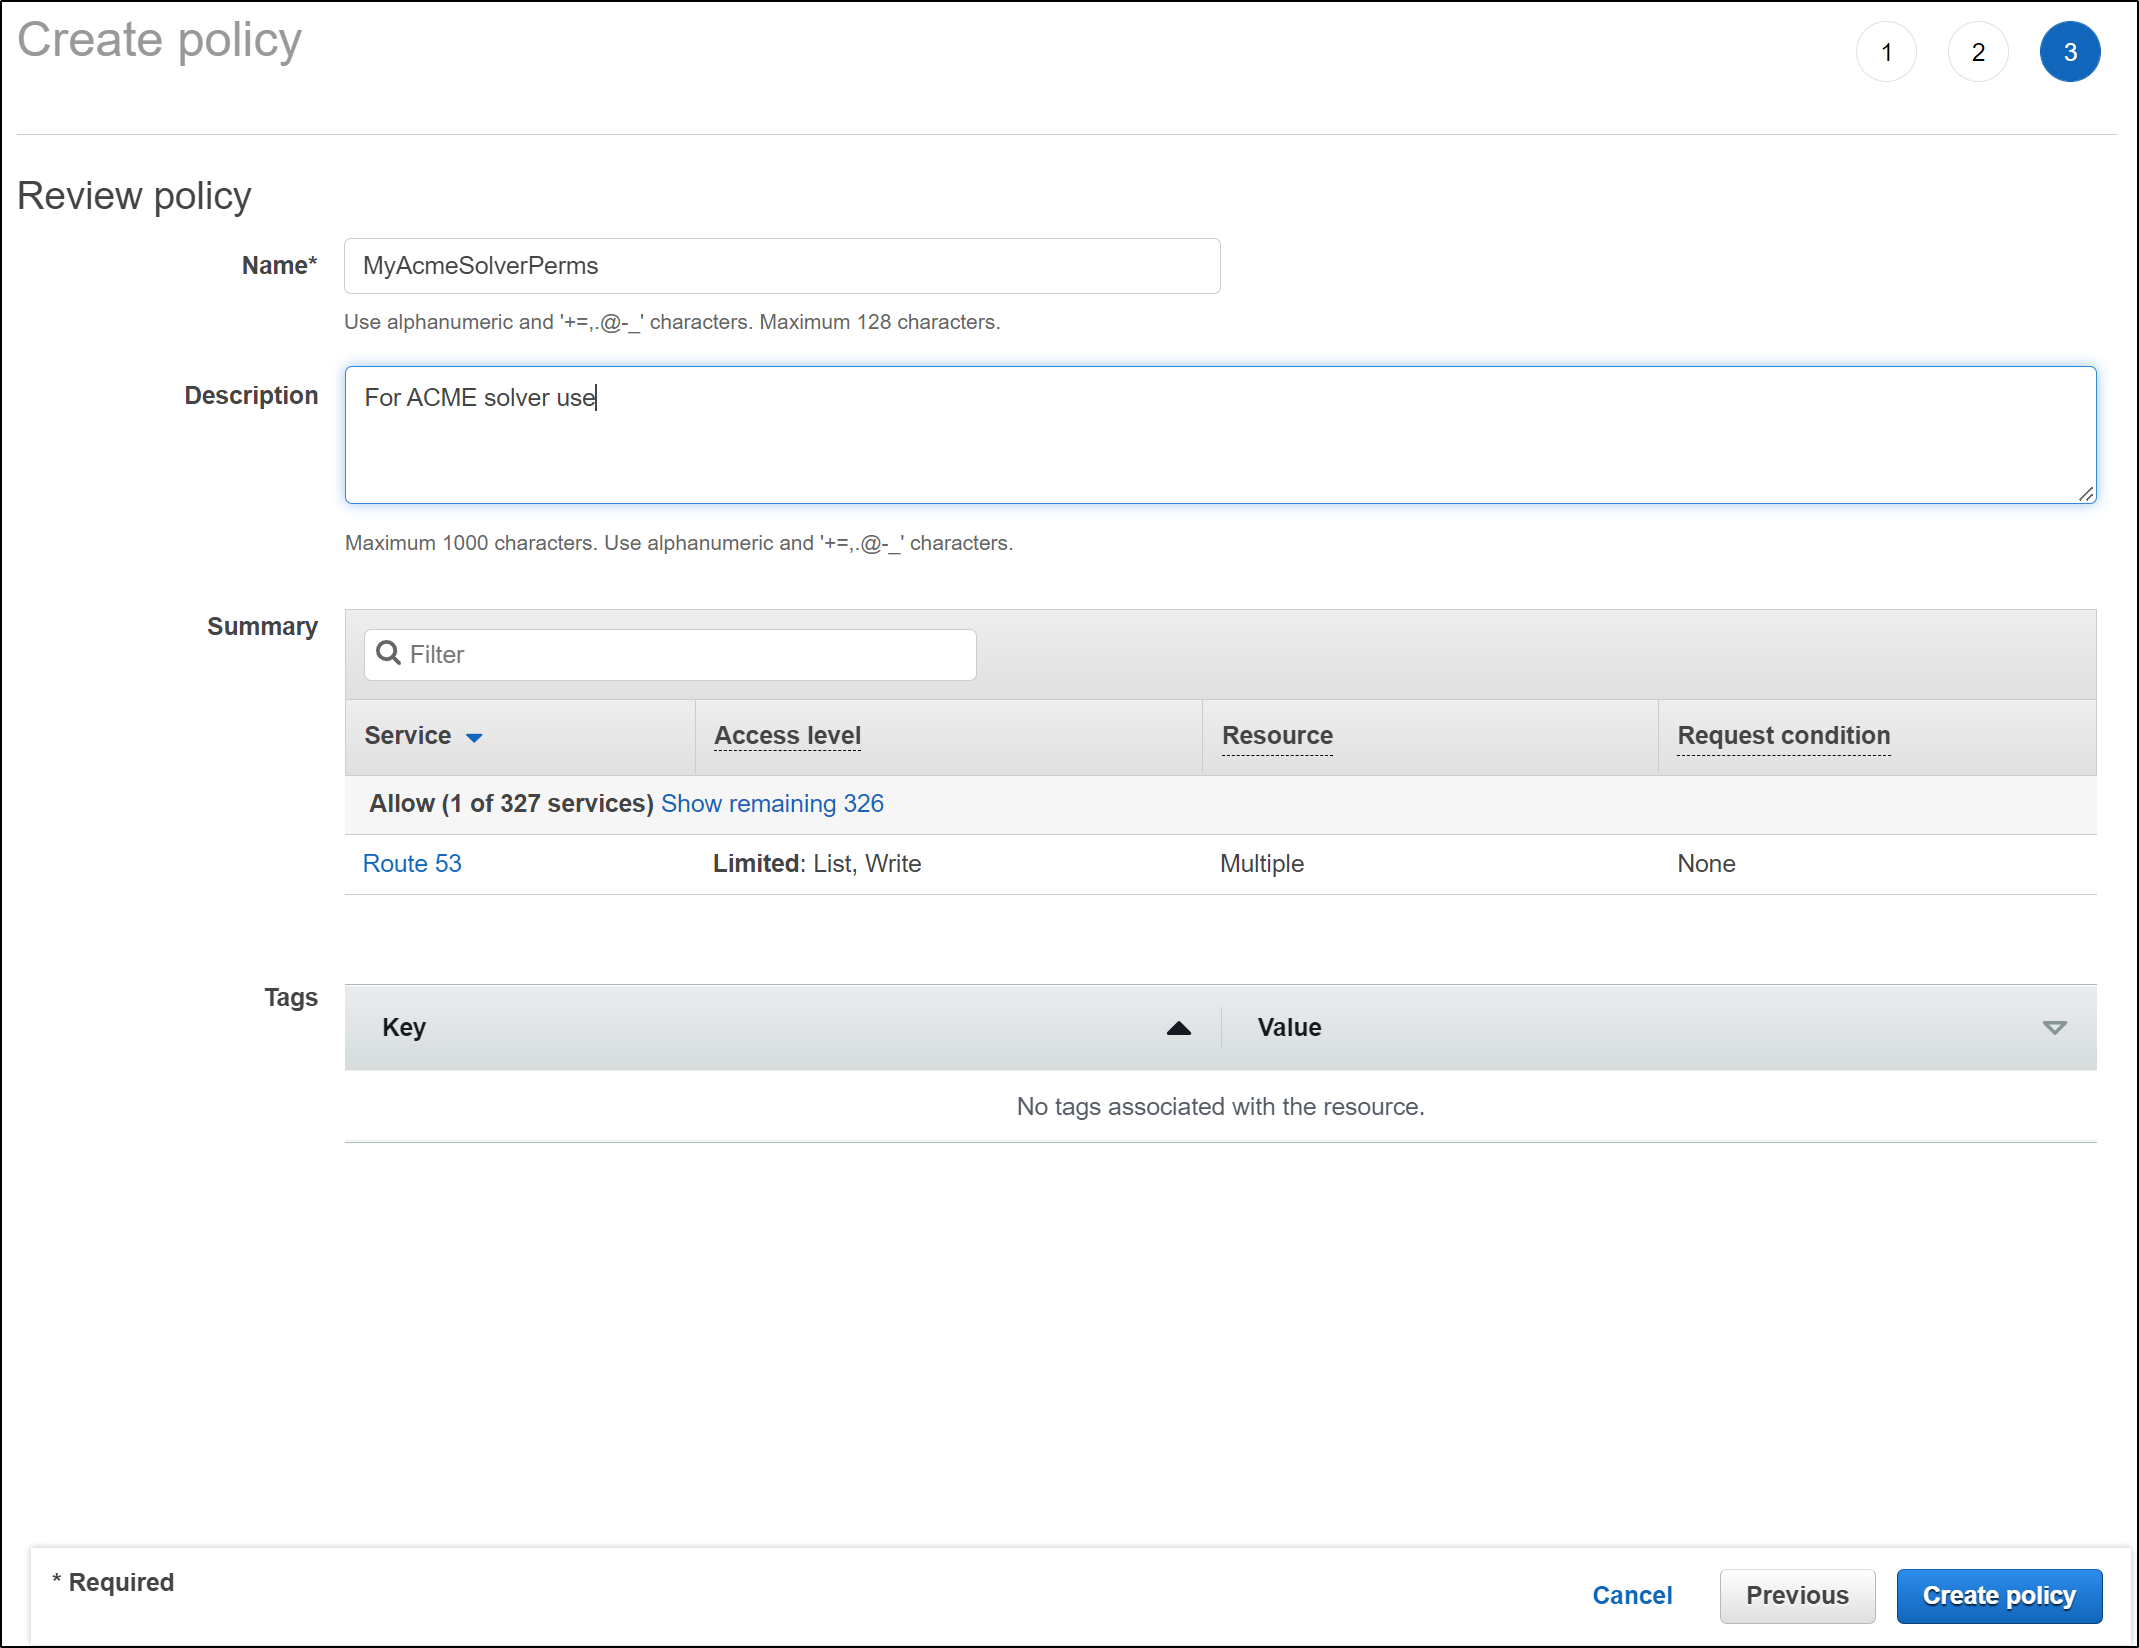
then give it a name and save it
we can now return to the role creation wizard and use the policy we just created
Create an IAM user
for the role, we need to first create an IAM user
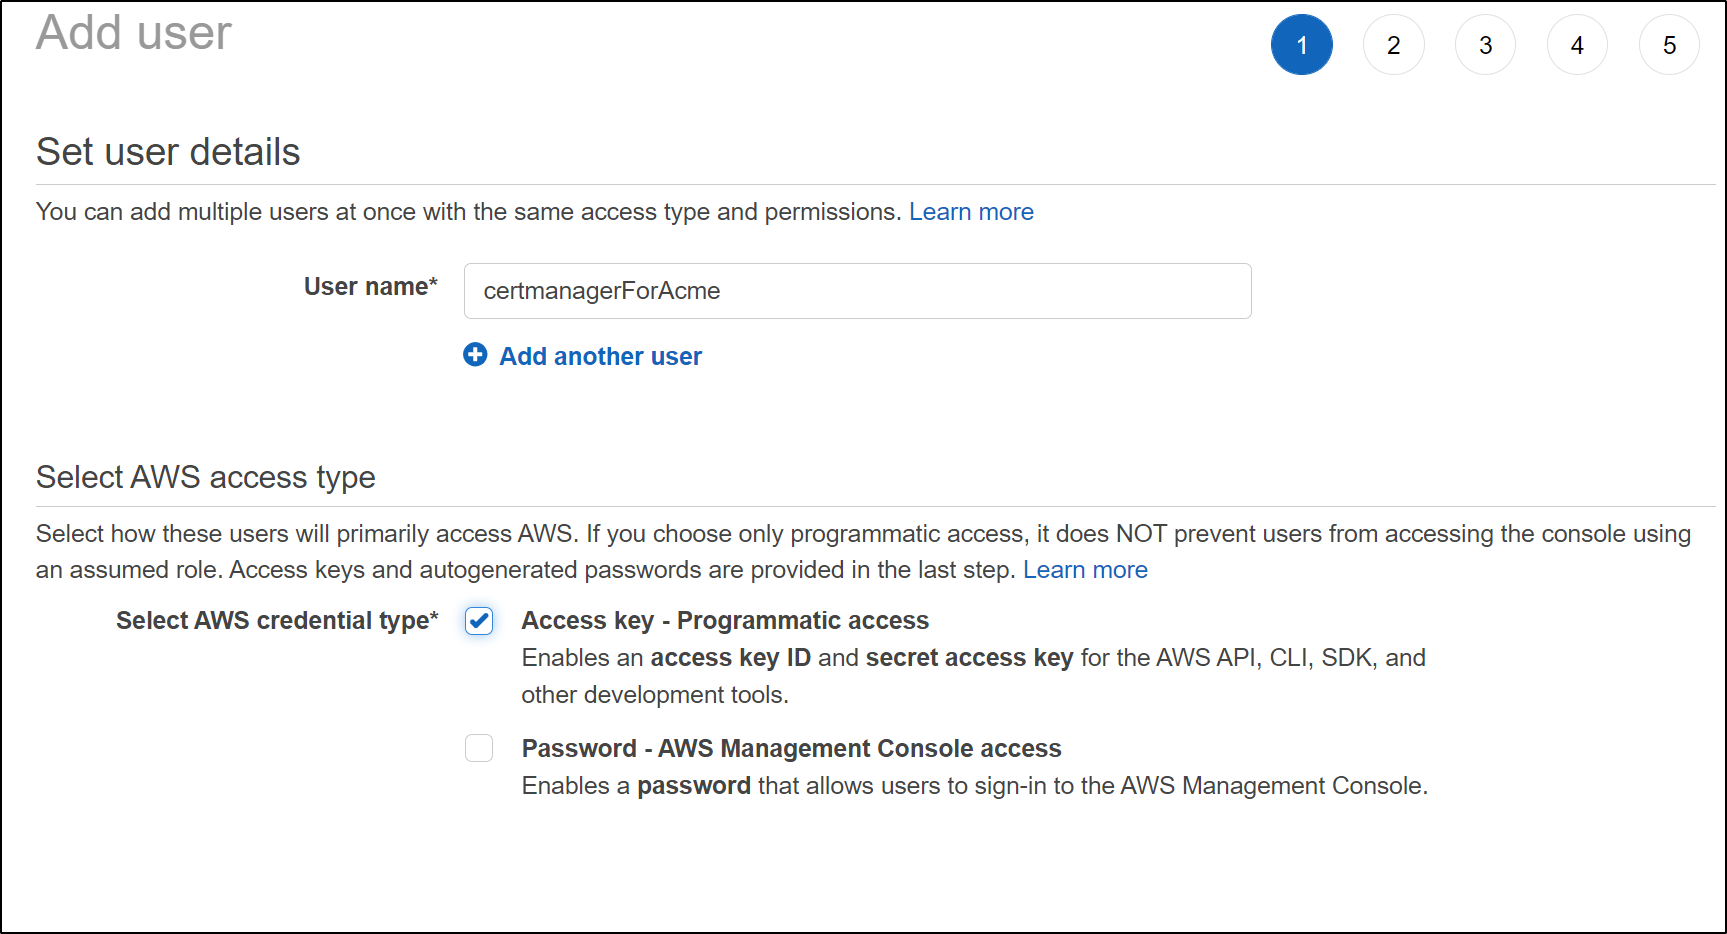
Now we can specify that exact IAM user in the Role policy definition
{
	"Version": "2012-10-17",
	"Statement": [
		{
			"Effect": "Allow",
			"Resource": "arn:aws:iam::095928337644:user/certmanagerForAcme",
			"Action": "sts:AssumeRole"
		}
	]
}
actually it had to be changed to
{
	"Version": "2012-10-17",
	"Statement": [
		{
			"Effect": "Allow",
			"Principal": { "AWS": "arn:aws:iam::095928337644:user/certmanagerForAcme" },
			"Action": "sts:AssumeRole"
		}
	]
}
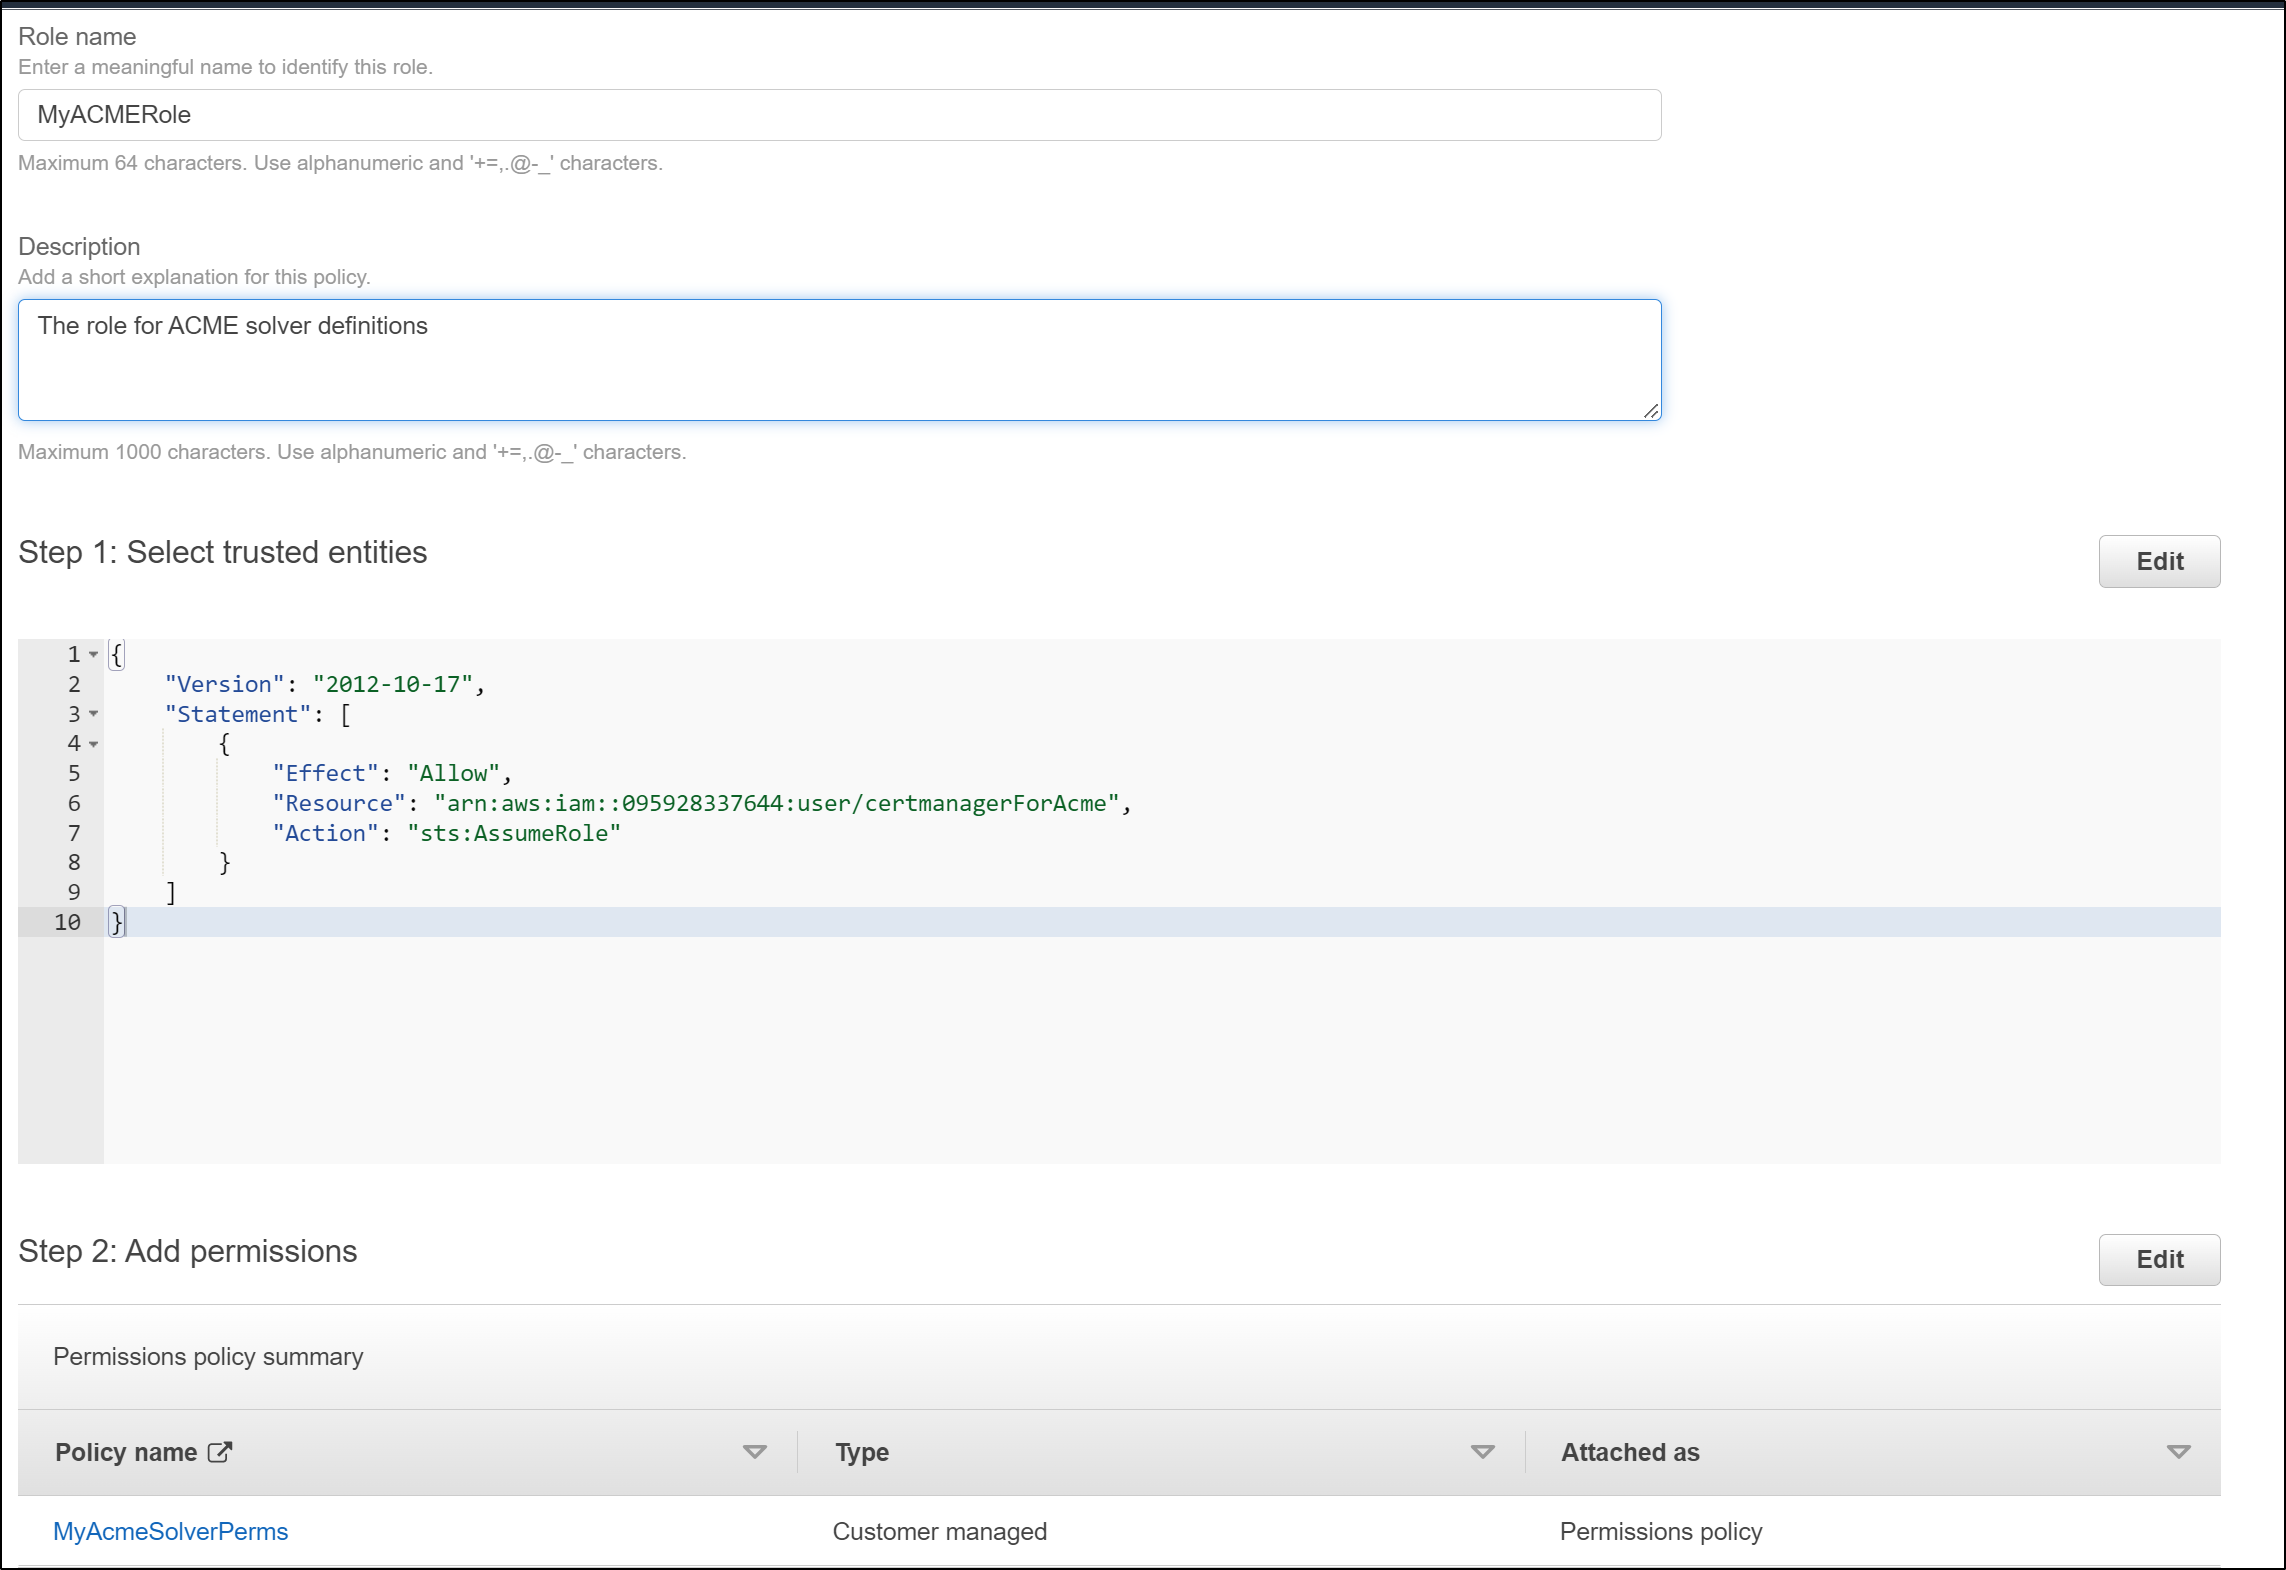
Now i have my completed role arn:aws:iam::095928337644:role/MyACMERole
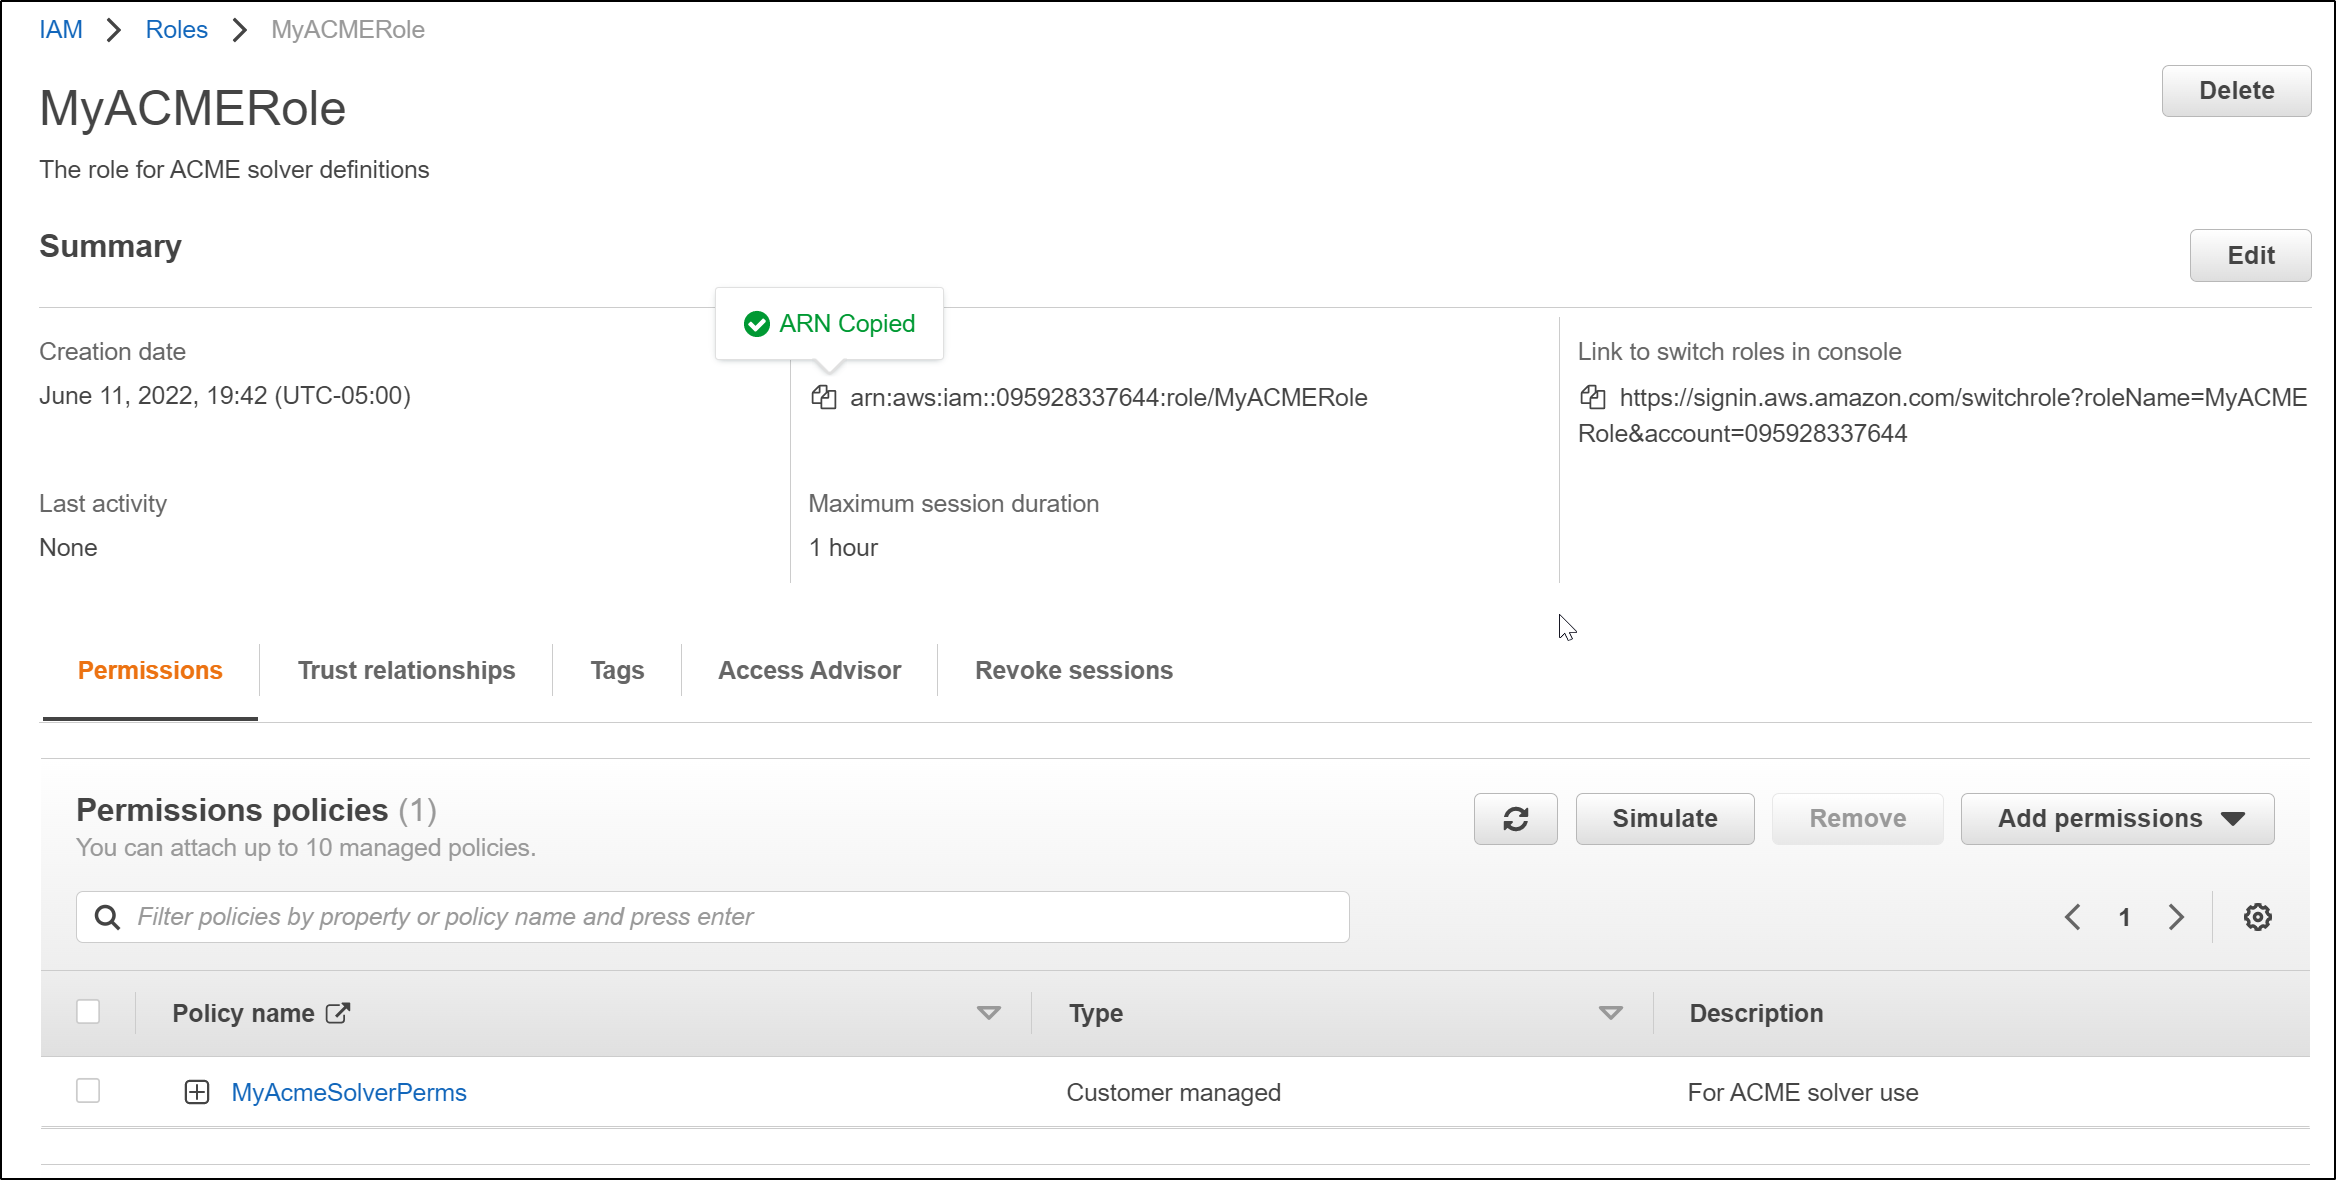
These are the pieces I need for a proper Production AWS Route53 ACME solver
I’ll create the secret in default and cert-manager (since it isn’t clear which is correct)
builder@DESKTOP-72D2D9T:~/Workspaces/jekyll-blog$ kubectl create secret generic prod-route53-credentials-secret --from-literal="secret-access-ke
y=asdfasdfAASDFSDFASsadfasdfasdfaASDASFDFASF"
secret/prod-route53-credentials-secret created
builder@DESKTOP-72D2D9T:~/Workspaces/jekyll-blog$ kubectl create secret generic prod-route53-credentials-secret -n cert-manager --from-literal="
secret-access-key=asdfasdfAASDFSDFASsadfasdfasdfaASDASFDFASF"
secret/prod-route53-credentials-secret created
and let’s use it
$ cat le-prod-new.yml
apiVersion: cert-manager.io/v1
kind: ClusterIssuer
metadata:
  name: letsencrypt-prod
spec:
  acme:
    server: https://acme-v02.api.letsencrypt.org/directory
    email: isaac.johnson@gmail.com
    privateKeySecretRef:
      name: letsencrypt-prod
    solvers:
    - selector:
        dnsZones:
          - "freshbrewed.science"
      dns01:
        route53:
          region: us-east-1
          accessKeyID: AKIARMVOGITWIUAKR45KAKIARMVOGITWIUAKR45K
          secretAccessKeySecretRef:
            name: prod-route53-credentials-secret
            key: secret-access-key
          # you can also assume a role with these credentials
          role: arn:aws:iam::095928337644:role/MyACMERole
Now we try
$ cat Ingress-Azure.yaml
apiVersion: networking.k8s.io/v1
kind: Ingress
metadata:
  annotations:
    cert-manager.io/cluster-issuer: letsencrypt-prod
    ingress.kubernetes.io/proxy-body-size: 2048m
    ingress.kubernetes.io/ssl-redirect: "true"
    nginx.ingress.kubernetes.io/proxy-body-size: 2048m
    nginx.ingress.kubernetes.io/proxy-read-timeout: "900"
    nginx.ingress.kubernetes.io/proxy-send-timeout: "900"
    nginx.ingress.kubernetes.io/ssl-redirect: "true"
    nginx.org/client-max-body-size: 2048m
  labels:
    app: azurevote
    release: azurevoterelease
  name: azurevote-ingress
  namespace: default
spec:
  ingressClassName: nginx
  rules:
  - host: azurevote.freshbrewed.science
    http:
      paths:
      - backend:
          service:
            name: azurevote-ui
            port:
              number: 80
        path: /
        pathType: Prefix
  tls:
  - hosts:
    - azurevote.freshbrewed.science
    secretName: azurevote-tls

$ kubectl apply -f Ingress-Azure.yaml
ingress.networking.k8s.io/azurevote-ingress created
Realizing it wasn’t working, I checked logs (and then tested manually) to find I could not assume role
$ aws sts assume-role --role-arn "arn:aws:iam::095928337644:role/MyACMERole" --role-session-name "asdf"

An error occurred (InvalidClientTokenId) when calling the AssumeRole operation: The security token included in the request is invalid.
I then added an inline policy on the user
Now when i apply the Ingress with Cert
$ cat Ingress-Azure.yaml
apiVersion: networking.k8s.io/v1
kind: Ingress
metadata:
  annotations:
    cert-manager.io/cluster-issuer: letsencrypt-prod
    ingress.kubernetes.io/proxy-body-size: 2048m
    ingress.kubernetes.io/ssl-redirect: "true"
    nginx.ingress.kubernetes.io/proxy-body-size: 2048m
    nginx.ingress.kubernetes.io/proxy-read-timeout: "900"
    nginx.ingress.kubernetes.io/proxy-send-timeout: "900"
    nginx.ingress.kubernetes.io/ssl-redirect: "true"
    nginx.org/client-max-body-size: 2048m
  labels:
    app: azurevote
    release: azurevoterelease
  name: azurevote-ingress
  namespace: default
spec:
  ingressClassName: nginx
  rules:
  - host: azurevote.freshbrewed.science
    http:
      paths:
      - backend:
          service:
            name: azurevote-ui
            port:
              number: 80
        path: /
        pathType: Prefix
  tls:
  - hosts:
    - azurevote.freshbrewed.science
    secretName: azurevote-tls

$ kubectl apply -f Ingress-Azure.yaml
After a bit, it works (again, no Ingress to this cluster so it couldn’t do HTTP)
$ kubectl get cert
NAME            READY   SECRET          AGE
azurevote-tls   True    azurevote-tls   2m42s

$ kubectl get ingress
NAME                CLASS   HOSTS                           ADDRESS        PORTS     AGE
azurevote-ingress   nginx   azurevote.freshbrewed.science   192.168.10.0   80, 443   4m24s
The only way to really test this is to direct my HTTP/HTTPS traffic to the new cluster. This will, of course, necessarily disconnect my primary cluster.
$ !628
kubectl port-forward `kubectl get pods  -o=jsonpath='{.items[?(@.metadata.labels.app=="my-vnc-server")].metadata.name}'` 5901:5901
Forwarding from 127.0.0.1:5901 -> 5901
Forwarding from [::1]:5901 -> 5901
Swapping exposed Kubernetes Clusters
I then applied the following changes in my virtual appliance area of my router

Deleting them and now adding to the new ingress

I won’t be able to test until I actually add the R53 entry
$ nslookup azurevote.freshbrewed.science
Server:         172.29.144.1
Address:        172.29.144.1#53

** server can't find azurevote.freshbrewed.science: NXDOMAIN
We can apply a quick R53 record
$ cat r53-azurevote.json
{
  "Comment": "CREATE azurevote fb.s A record ",
  "Changes": [
    {
      "Action": "CREATE",
      "ResourceRecordSet": {
        "Name": "azurevote.freshbrewed.science",
        "Type": "A",
        "TTL": 300,
        "ResourceRecords": [
          {
            "Value": "73.242.50.46"
          }
        ]
      }
    }
  ]
}
Then apply it
$ aws route53 change-resource-record-sets --hosted-zone-id Z39E8QFU0F9PZP --change-batch file://r53-azurevote.json
{
    "ChangeInfo": {
        "Id": "/change/C097594328ABNPPD5YKXQ",
        "Status": "PENDING",
        "SubmittedAt": "2022-06-12T01:40:25.705Z",
        "Comment": "CREATE azurevote fb.s A record "
    }
}
Now I get bad gateway error
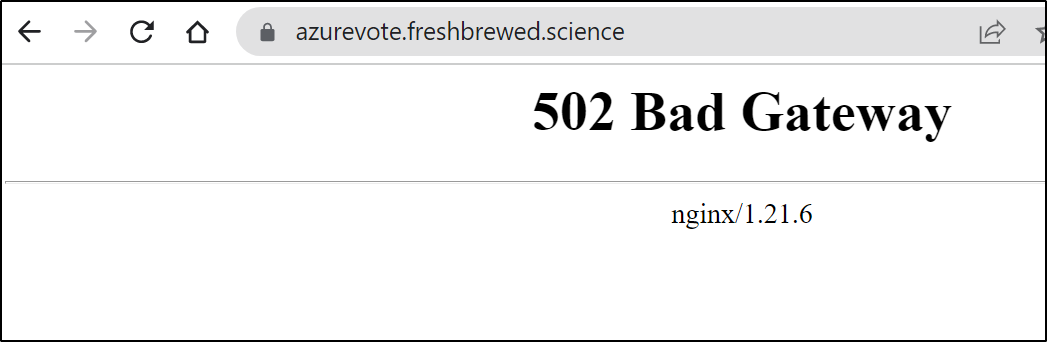
It took me a moment, but i realized i did a simple regexp on an existing Ingress definition, which was a tad sloppy. Thus, I had the wrong service defined.
A quick fix:
$ kubectl get ingress azurevote-ingress -o yaml > vote.yaml
$ kubectl get ingress azurevote-ingress -o yaml > vote.yaml.bak
$ vi vote.yaml

$ diff vote.yaml vote.yaml.bak
32c32
<             name: azure-vote-front
---
>             name: azurevote-ui

$ kubectl apply -f vote.yaml
ingress.networking.k8s.io/azurevote-ingress configured
and now it works
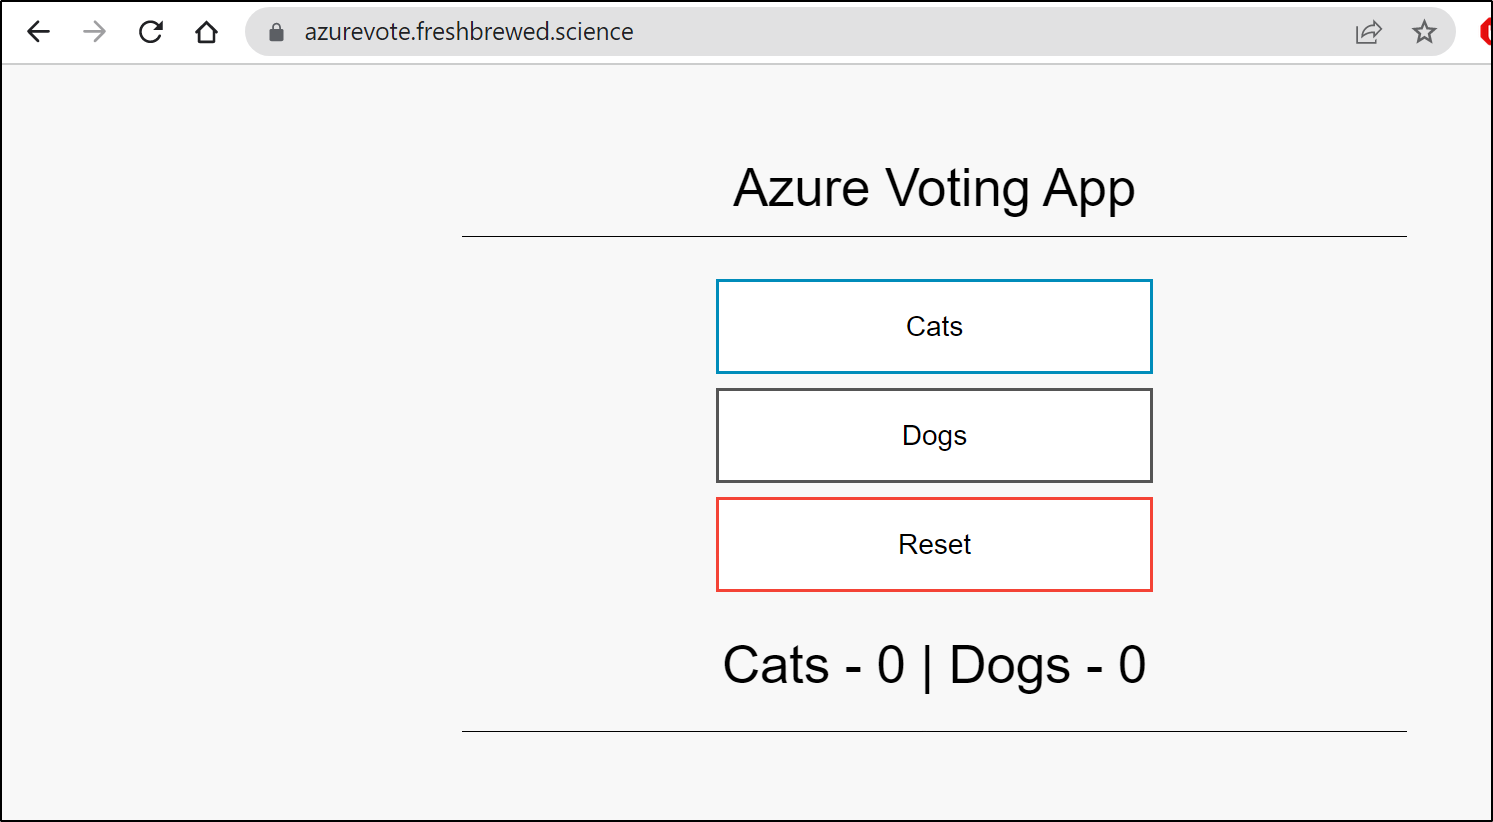
I had a bit of a loud “Woo Hoo!” at this point, in a rather deserted hotel lobby in Massachusetts while on family vacation. My little victory being that in off hours on vacation while on the other side of the country I was remoting in and re-arranging my clusters and wifi router at home and setting up proper ingress. It was sort of fun being able to tweak everything. The only necessary pre-setup was exposing my former and new master k8s hosts via an outside port
NFS/CIFS
I already have NFS enabled on my NAS as I use it on a few clusters on prem. The only difference is I’ll explicitly allow 192.168.10.0/24 which I used for MetalLB
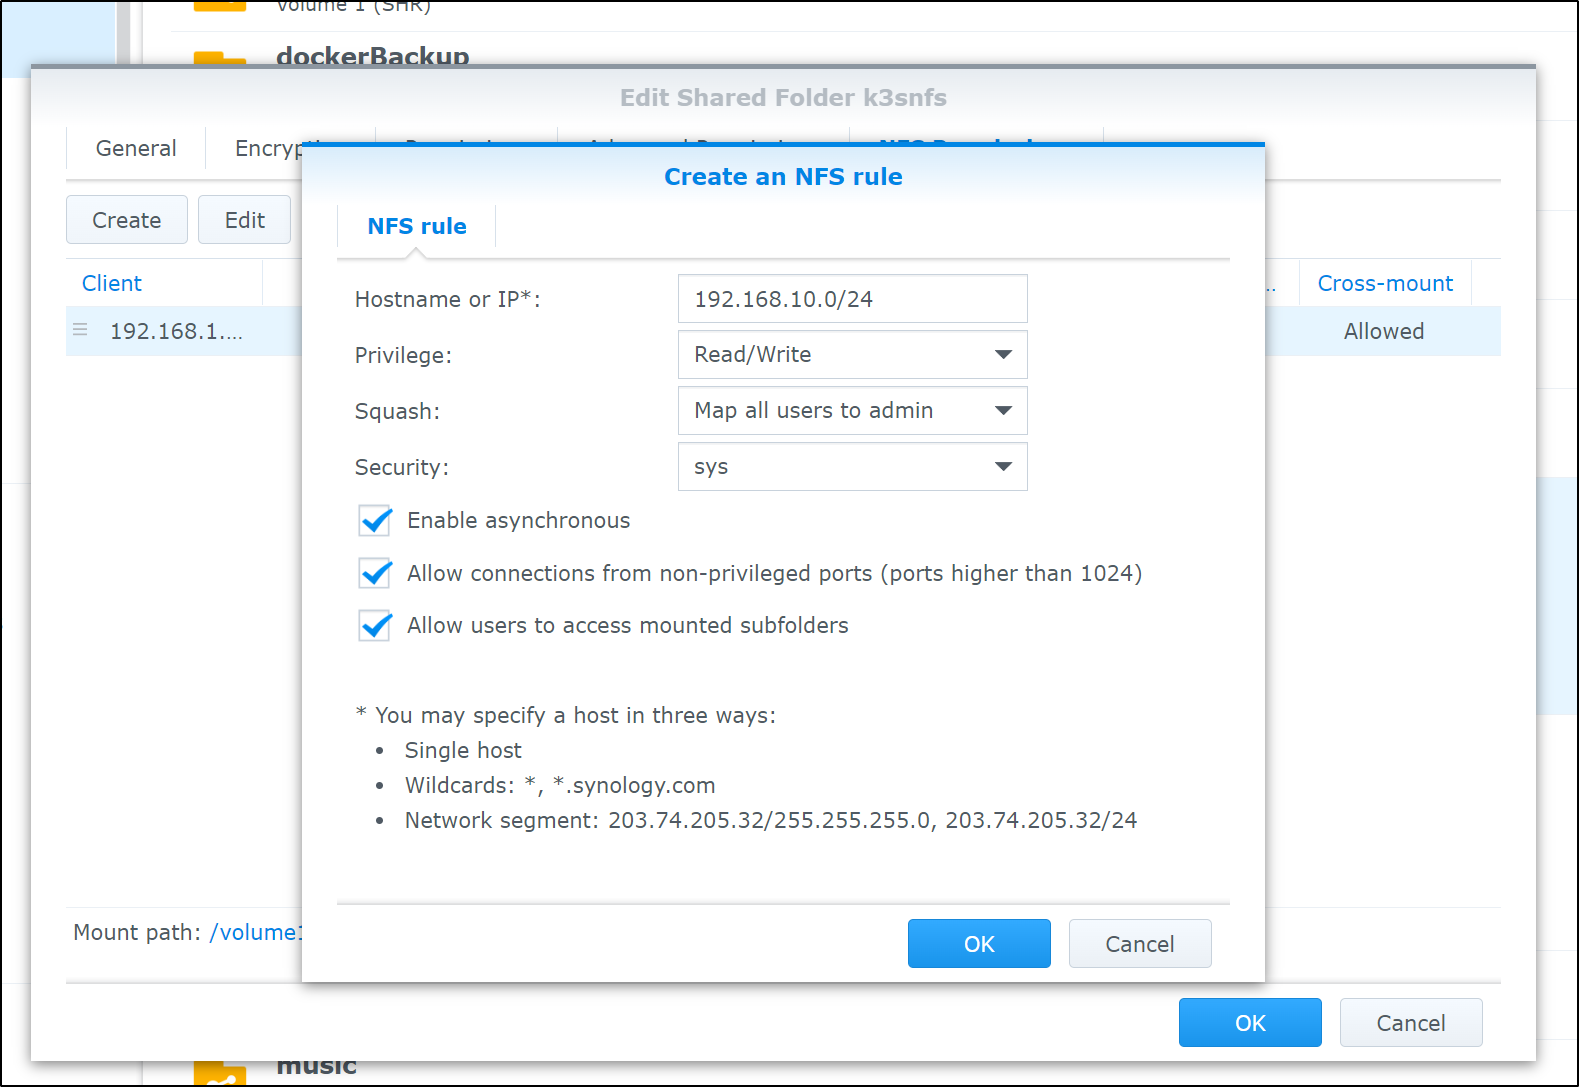
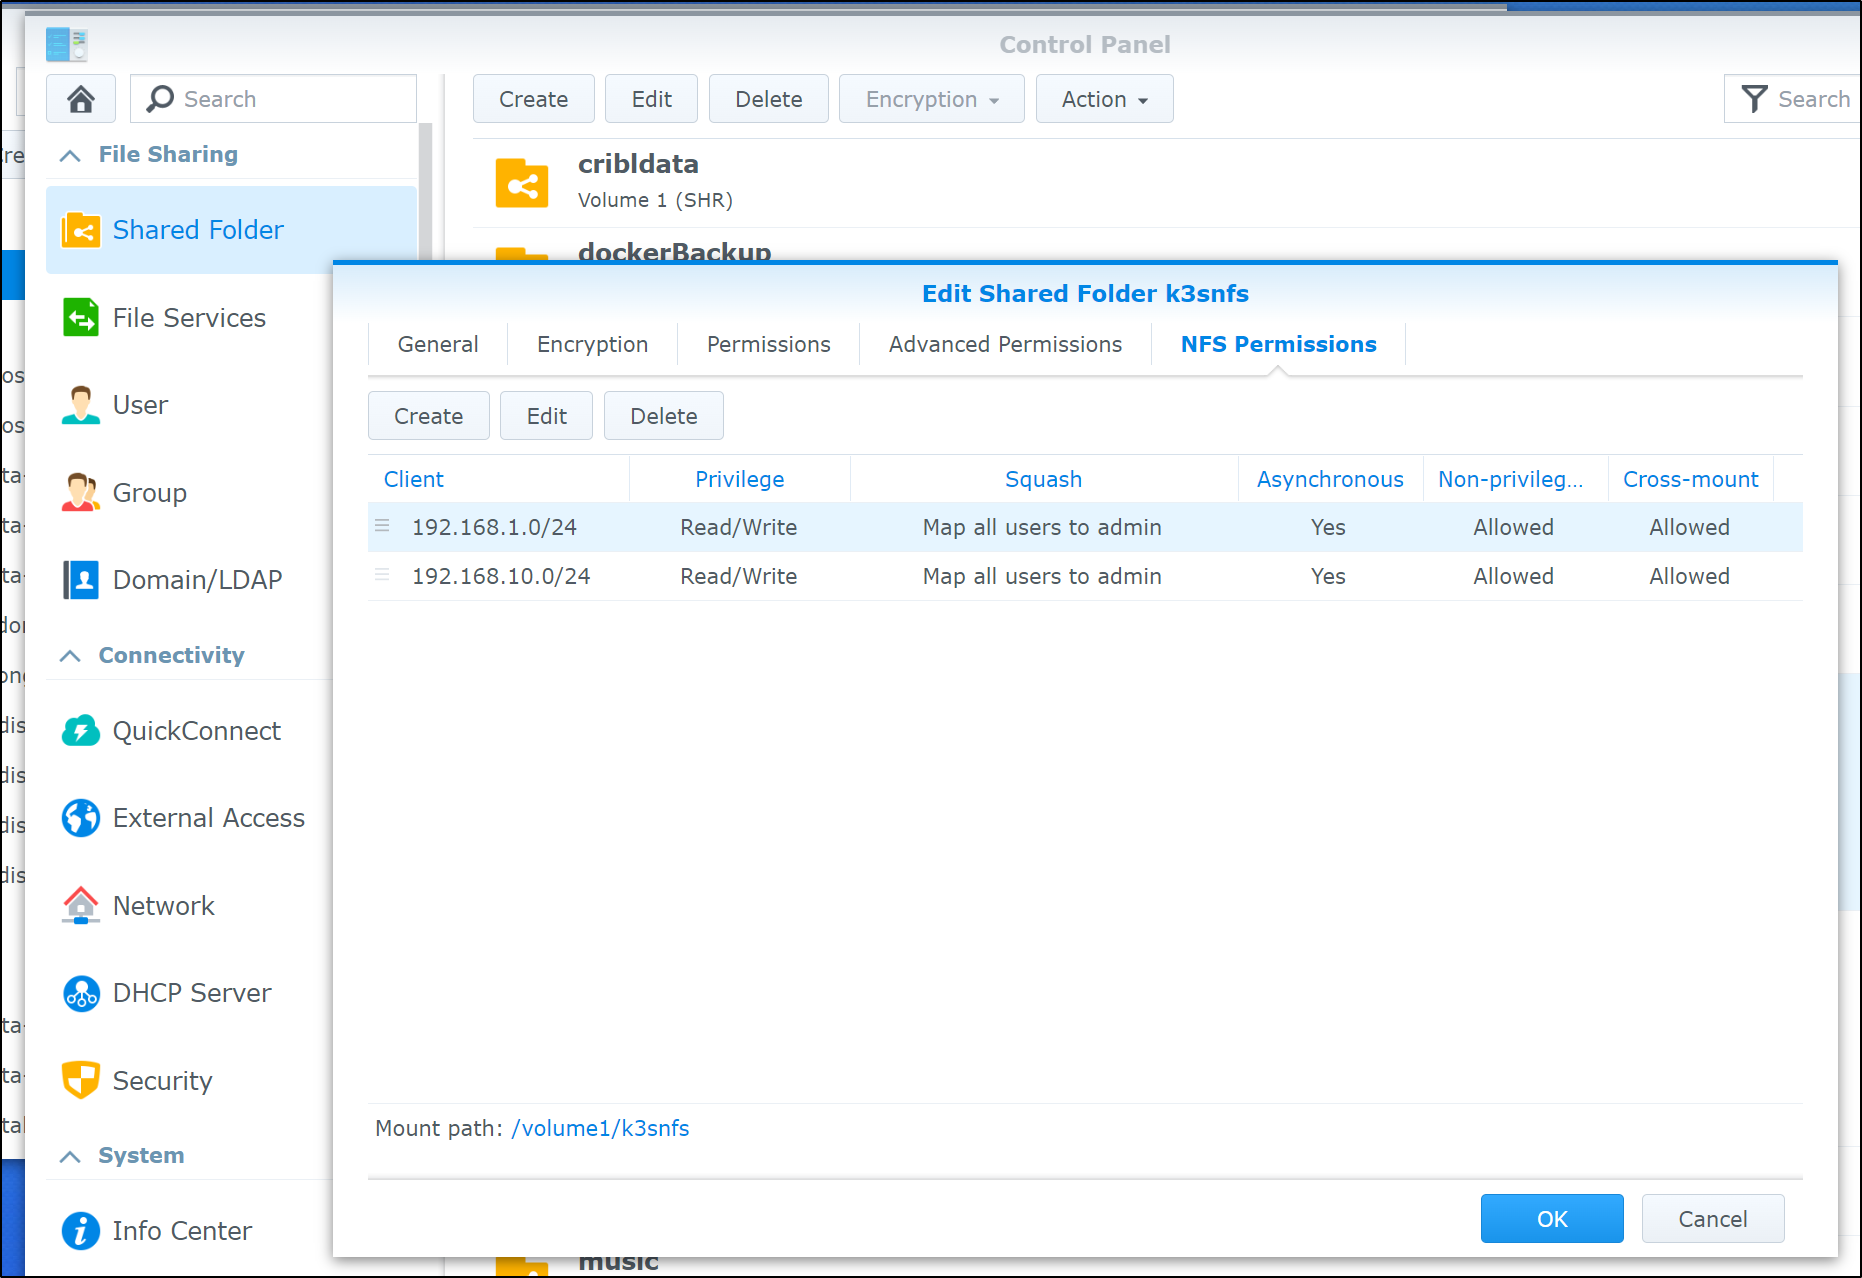
this makes our permission map on NFS look as such
If we want to use NFS on k3s, we’ll need to ensure the hosts have NFS Common installed
builder@anna-MacBookAir:~$ sudo apt install nfs-common
Reading package lists... Done
Building dependency tree
Reading state information... Done
The following packages were automatically installed and are no longer required:
  libfprint-2-tod1 libllvm10 libllvm11 shim
Use 'sudo apt autoremove' to remove them.
The following additional packages will be installed:
  keyutils libnfsidmap2 libtirpc-common libtirpc3 rpcbind
Suggested packages:
  open-iscsi watchdog
The following NEW packages will be installed:
  keyutils libnfsidmap2 libtirpc-common libtirpc3 nfs-common rpcbind
0 upgraded, 6 newly installed, 0 to remove and 6 not upgraded.
Need to get 404 kB of archives.
After this operation, 1,517 kB of additional disk space will be used.
Do you want to continue? [Y/n] y
Get:1 http://us.archive.ubuntu.com/ubuntu focal/main amd64 libtirpc-common all 1.2.5-1 [7,632 B]
Get:2 http://us.archive.ubuntu.com/ubuntu focal/main amd64 libtirpc3 amd64 1.2.5-1 [77.2 kB]
Get:3 http://us.archive.ubuntu.com/ubuntu focal/main amd64 rpcbind amd64 1.2.5-8 [42.8 kB]
Get:4 http://us.archive.ubuntu.com/ubuntu focal-updates/main amd64 keyutils amd64 1.6-6ubuntu1.1 [44.8 kB]
Get:5 http://us.archive.ubuntu.com/ubuntu focal/main amd64 libnfsidmap2 amd64 0.25-5.1ubuntu1 [27.9 kB]
Get:6 http://us.archive.ubuntu.com/ubuntu focal-updates/main amd64 nfs-common amd64 1:1.3.4-2.5ubuntu3.4 [204 kB]
Fetched 404 kB in 0s (1,169 kB/s)
Selecting previously unselected package libtirpc-common.
(Reading database ... 278649 files and directories currently installed.)
Preparing to unpack .../0-libtirpc-common_1.2.5-1_all.deb ...
Unpacking libtirpc-common (1.2.5-1) ...
Selecting previously unselected package libtirpc3:amd64.
Preparing to unpack .../1-libtirpc3_1.2.5-1_amd64.deb ...
Unpacking libtirpc3:amd64 (1.2.5-1) ...
Selecting previously unselected package rpcbind.
Preparing to unpack .../2-rpcbind_1.2.5-8_amd64.deb ...
Unpacking rpcbind (1.2.5-8) ...
Selecting previously unselected package keyutils.
Preparing to unpack .../3-keyutils_1.6-6ubuntu1.1_amd64.deb ...
Unpacking keyutils (1.6-6ubuntu1.1) ...
Selecting previously unselected package libnfsidmap2:amd64.
Preparing to unpack .../4-libnfsidmap2_0.25-5.1ubuntu1_amd64.deb ...
Unpacking libnfsidmap2:amd64 (0.25-5.1ubuntu1) ...
Selecting previously unselected package nfs-common.
Preparing to unpack .../5-nfs-common_1%3a1.3.4-2.5ubuntu3.4_amd64.deb ...
Unpacking nfs-common (1:1.3.4-2.5ubuntu3.4) ...
Setting up libtirpc-common (1.2.5-1) ...
Setting up keyutils (1.6-6ubuntu1.1) ...
Setting up libnfsidmap2:amd64 (0.25-5.1ubuntu1) ...
Setting up libtirpc3:amd64 (1.2.5-1) ...
Setting up rpcbind (1.2.5-8) ...
Created symlink /etc/systemd/system/multi-user.target.wants/rpcbind.service → /lib/systemd/system/rpcbind.service.
Created symlink /etc/systemd/system/sockets.target.wants/rpcbind.socket → /lib/systemd/system/rpcbind.socket.
Setting up nfs-common (1:1.3.4-2.5ubuntu3.4) ...

Creating config file /etc/idmapd.conf with new version
Adding system user `statd' (UID 128) ...
Adding new user `statd' (UID 128) with group `nogroup' ...
Not creating home directory `/var/lib/nfs'.
Created symlink /etc/systemd/system/multi-user.target.wants/nfs-client.target → /lib/systemd/system/nfs-client.target.
Created symlink /etc/systemd/system/remote-fs.target.wants/nfs-client.target → /lib/systemd/system/nfs-client.target.
nfs-utils.service is a disabled or a static unit, not starting it.
Processing triggers for systemd (245.4-4ubuntu3.17) ...
Processing triggers for man-db (2.9.1-1) ...
Processing triggers for libc-bin (2.31-0ubuntu9.9) ...
NOTE: Later I discovered this really setup a local-file provisioner just named “nfs”. I corrected this a week later in the Kaniko: Part 1 blog in the section “Fixing NFS”
Now let’s add our Helm Chart
builder@DESKTOP-72D2D9T:~/Workspaces/jekyll-blog$ helm repo add stable https://charts.helm.sh/stable
"stable" has been added to your repositories
builder@DESKTOP-72D2D9T:~/Workspaces/jekyll-blog$ helm repo update
Hang tight while we grab the latest from your chart repositories...
...Successfully got an update from the "metallb" chart repository
...Successfully got an update from the "actions-runner-controller" chart repository
...Successfully got an update from the "cribl" chart repository
...Successfully got an update from the "hashicorp" chart repository
...Successfully got an update from the "gitlab" chart repository
...Successfully got an update from the "argo-cd" chart repository
...Successfully got an update from the "jenkins" chart repository
...Successfully got an update from the "bitnami" chart repository
...Successfully got an update from the "stable" chart repository
Update Complete. ⎈Happy Helming!⎈
and we can install. Make sure to use the Volume mount from your NAS
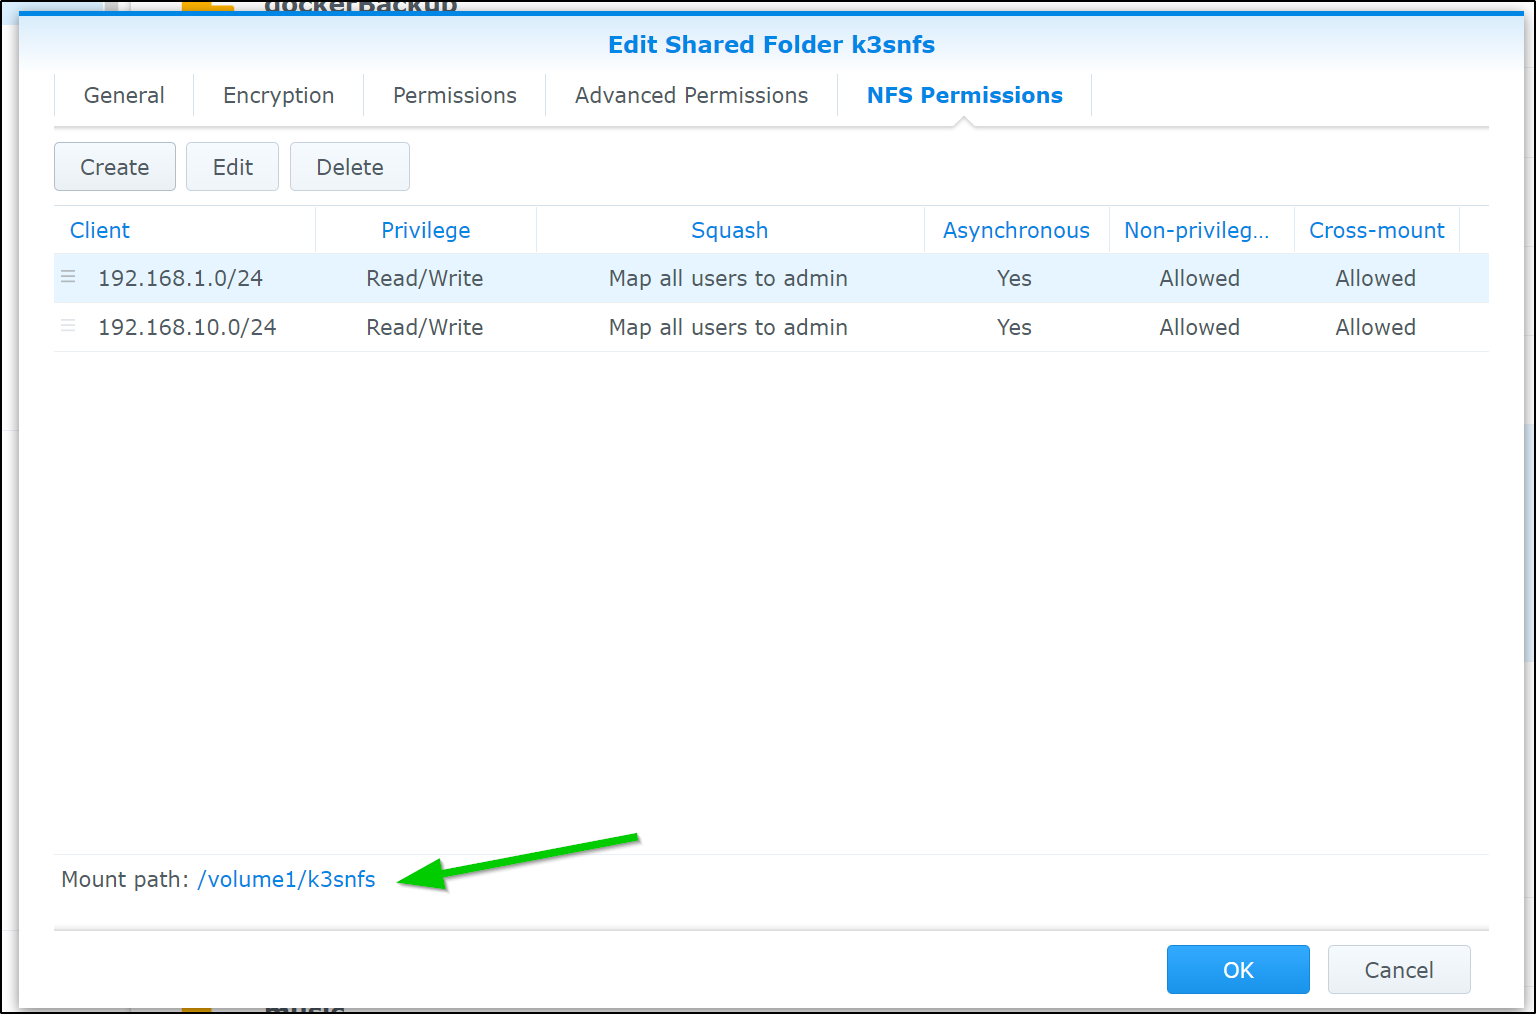
Now install
$ helm install stable/nfs-server-provisioner --set persistence.enabled=true,persistence.size=5Gi
 --set nfs.server=192.168.1.129 --set nfs.path=/volume1/k3snfs --generate-name

WARNING: This chart is deprecated
NAME: nfs-server-provisioner-1655037797
LAST DEPLOYED: Sun Jun 12 07:43:21 2022
NAMESPACE: default
STATUS: deployed
REVISION: 1
TEST SUITE: None
NOTES:
The NFS Provisioner service has now been installed.

A storage class named 'nfs' has now been created
and is available to provision dynamic volumes.

You can use this storageclass by creating a `PersistentVolumeClaim` with the
correct storageClassName attribute. For example:

    ---
    kind: PersistentVolumeClaim
    apiVersion: v1
    metadata:
      name: test-dynamic-volume-claim
    spec:
      storageClassName: "nfs"
      accessModes:
        - ReadWriteOnce
      resources:
        requests:
          storage: 100Mi
We can now see a new storage class has been installed
$ kubectl get sc
NAME                   PROVISIONER                                       RECLAIMPOLICY   VOLUMEBINDINGMODE      ALLOWVOLUMEEXPANSION   AGE
local-path (default)   rancher.io/local-path                             Delete          WaitForFirstConsumer   false                  6d16h
nfs                    cluster.local/nfs-server-provisioner-1655037797   Delete          Immediate              true                   21s
Now let’s switch defaults
$ kubectl patch storageclass local-path -p '{"metadata":{"annotations":{"storageclass.kubernetes
.io/is-default-class":"false"}}}' && kubectl patch storageclass nfs -p '{"metadata": {"annotations":{"storageclass.kubernetes.io/is-default-clas
s":"true"}}}'
storageclass.storage.k8s.io/local-path patched
storageclass.storage.k8s.io/nfs patched
and validate
$ kubectl get sc
NAME            PROVISIONER                                       RECLAIMPOLICY   VOLUMEBINDINGMODE      ALLOWVOLUMEEXPANSION   AGE
local-path      rancher.io/local-path                             Delete          WaitForFirstConsumer   false                  7d4h
nfs (default)   cluster.local/nfs-server-provisioner-1655037797   Delete          Immediate              true                   11h
Validate
Let’s install a Redis chart
$ helm repo add bitnami https://charts.bitnami.com/bitnami
"bitnami" already exists with the same configuration, skipping

$ helm install my-redis-release bitnami/redis-cluster
NAME: my-redis-release
LAST DEPLOYED: Sun Jun 12 19:09:33 2022
NAMESPACE: default
STATUS: deployed
REVISION: 1
TEST SUITE: None
NOTES:
CHART NAME: redis-cluster
CHART VERSION: 7.6.3
APP VERSION: 6.2.7** Please be patient while the chart is being deployed **


To get your password run:
    export REDIS_PASSWORD=$(kubectl get secret --namespace "default" my-redis-release-redis-cluster -o jsonpath="{.data.redis-password}" | base64 -d)

You have deployed a Redis® Cluster accessible only from within you Kubernetes Cluster.INFO: The Job to create the cluster will be created.To connect to your Redis® cluster:

1. Run a Redis® pod that you can use as a client:
kubectl run --namespace default my-redis-release-redis-cluster-client --rm --tty -i --restart='Never' \
 --env REDIS_PASSWORD=$REDIS_PASSWORD \
--image docker.io/bitnami/redis-cluster:6.2.7-debian-11-r3 -- bash

2. Connect using the Redis® CLI:

redis-cli -c -h my-redis-release-redis-cluster -a $REDIS_PASSWORD
And we can now see it works just fine
$ kubectl get pvc
NAME                                          STATUS   VOLUME                                     CAPACITY   ACCESS MODES   STORAGECLASS   AGE
data-nfs-server-provisioner-1655037797-0      Bound    pvc-ce1165bd-4c45-4ee3-a641-2438e50c1139   5Gi        RWO            local-path     11h
redis-data-my-redis-release-redis-cluster-0   Bound    pvc-fa7e62dc-c51f-4171-9c78-dc7f7c68085b   8Gi        RWO            nfs            35s
redis-data-my-redis-release-redis-cluster-1   Bound    pvc-1d991ff6-cb64-410a-b23b-731cbd764326   8Gi        RWO            nfs            35s
redis-data-my-redis-release-redis-cluster-2   Bound    pvc-7900bf93-9bde-4374-ab44-ed2a1ff786bb   8Gi        RWO            nfs            35s
redis-data-my-redis-release-redis-cluster-5   Bound    pvc-bcdba31e-175b-4ed5-89b1-e3130c5b0465   8Gi        RWO            nfs            35s
redis-data-my-redis-release-redis-cluster-3   Bound    pvc-0999ad7e-7d25-414f-ae2f-e24364f998c7   8Gi        RWO            nfs            35s
redis-data-my-redis-release-redis-cluster-4   Bound    pvc-92040518-ac57-4ca4-b2a5-6deb6d10481c   8Gi        RWO            nfs            35s
I’ll now test launching a pod, connecting to the redis cluster and then setting and retrieving a value. This should exercise the PVCs
builder@DESKTOP-72D2D9T:~/Workspaces/jekyll-blog$ kubectl get secret --namespace "default" my-redis-release-redis-cluster -o jsonpath="{.data.redis-password}" | base64 -d && echo
KAtS74iMsv
builder@DESKTOP-72D2D9T:~/Workspaces/jekyll-blog$ kubectl run --namespace default my-redis-release-redis-cluster-client --rm --tty -i --restart='Never' --env REDIS_PASSWORD=KAtS74iMsv --image docker.io/bitnami/redis-cluster:6.2.7-debian-11-r3 -- bash
If you don't see a command prompt, try pressing enter.
I have no name!@my-redis-release-redis-cluster-client:/$ redis-cli -c -h my-redis-release-redis-cluster -a KAtS74iMsv
Warning: Using a password with '-a' or '-u' option on the command line interface may not be safe.
my-redis-release-redis-cluster:6379> set test
(error) ERR wrong number of arguments for 'set' command
my-redis-release-redis-cluster:6379> set test myvalue
-> Redirected to slot [6918] located at 10.42.0.19:6379
OK
10.42.0.19:6379> get test
"myvalue"
10.42.0.19:6379> exit
I have no name!@my-redis-release-redis-cluster-client:/$ exit
exit
pod "my-redis-release-redis-cluster-client" deleted
Harbor
The key piece I need is an internal registry. For this, I tend to use Harbor. We can follow the guide from our last writeup
First, I’ll need two certs
$ cat create-secrets-harbor.yaml
---
apiVersion: cert-manager.io/v1
kind: Certificate
metadata:
  name: harbor-fb-science
  namespace: default
spec:
  commonName: harbor.freshbrewed.science
  dnsNames:
  - harbor.freshbrewed.science
  issuerRef:
    kind: ClusterIssuer
    name: letsencrypt-prod
  secretName: harbor.freshbrewed.science-cert
---
apiVersion: cert-manager.io/v1
kind: Certificate
metadata:
  name: notary-fb-science
  namespace: default
spec:
  commonName: notary.freshbrewed.science
  dnsNames:
  - notary.freshbrewed.science
  issuerRef:
    kind: ClusterIssuer
    name: letsencrypt-prod
  secretName: notary.freshbrewed.science-cert
Next, I’ll apply to create and retrieve fresh certs
$ kubectl get cert
NAME            READY   SECRET          AGE
azurevote-tls   True    azurevote-tls   23h
$ kubectl apply -f create-secrets-harbor.yaml
certificate.cert-manager.io/harbor-fb-science created
certificate.cert-manager.io/notary-fb-science created
$ kubectl get cert
NAME                READY   SECRET                            AGE
azurevote-tls       True    azurevote-tls                     23h
harbor-fb-science   False   harbor.freshbrewed.science-cert   4s
notary-fb-science   False   notary.freshbrewed.science-cert   4s
$ kubectl get cert
NAME                READY   SECRET                            AGE
azurevote-tls       True    azurevote-tls                     23h
harbor-fb-science   True    harbor.freshbrewed.science-cert   117s
notary-fb-science   True    notary.freshbrewed.science-cert   117s
Now I’ll use the values (the secret is just a random string. The password though will be our admin password. Obviously, I used different values below)
$ cat harbor.values.yaml
expose:
  type: ingress
  tls:
    certSource: secret
    secret:
      secretName: harbor.freshbrewed.science-cert
      notarySecretName: notary.freshbrewed.science-cert
  ingress:
    annotations:
      cert-manager.io/cluster-issuer: letsencrypt-production

    hosts:
      core: harbor.freshbrewed.science
      notary: notary.freshbrewed.science

harborAdminPassword: bm90IG15IHJlYWwgcGFzc3dvcmQK
externalURL: https://harbor.freshbrewed.science
secretKey: "bm90IG15IHJlYWwgc2VjcmV0IGVpdGhlcgo="

notary:
  enabled: true

metrics:
  enabled: true
Add the Helm repo and update
$ helm repo add harbor https://helm.goharbor.io
"harbor" has been added to your repositories

$ helm repo update
Hang tight while we grab the latest from your chart repositories...
...Successfully got an update from the "metallb" chart repository
...Successfully got an update from the "actions-runner-controller" chart repository
...Successfully got an update from the "cribl" chart repository
...Successfully got an update from the "hashicorp" chart repository
...Successfully got an update from the "harbor" chart repository
...Successfully got an update from the "argo-cd" chart repository
...Successfully got an update from the "jenkins" chart repository
...Successfully got an update from the "gitlab" chart repository
...Successfully got an update from the "bitnami" chart repository
...Successfully got an update from the "stable" chart repository
Update Complete. ⎈Happy Helming!⎈
Now install
$ helm upgrade --install harbor-registry harbor/harbor --values ./harbor-registry.values.yaml
Release "harbor-registry" does not exist. Installing it now.
NAME: harbor-registry
LAST DEPLOYED: Sun Jun 12 19:35:20 2022
NAMESPACE: default
STATUS: deployed
REVISION: 1
TEST SUITE: None
NOTES:
Please wait for several minutes for Harbor deployment to complete.
Then you should be able to visit the Harbor portal at https://harbor.freshbrewed.science
For more details, please visit https://github.com/goharbor/harbor
I found the Ingress was not satisfied
$ kubectl get ingress
NAME                             CLASS    HOSTS                           ADDRESS        PORTS     AGE
azurevote-ingress                nginx    azurevote.freshbrewed.science   192.168.10.0   80, 443   23h
harbor-registry-ingress          <none>   harbor.freshbrewed.science                     80, 443   3m54s
harbor-registry-ingress-notary   <none>   notary.freshbrewed.science                     80, 443   3m54s
For some reason, Nginx isn’t being picked up as default.
I updated the settings
$ cat harbor-registry.values.yaml
expose:
  ingress:
    className: "nginx"
    annotations:
      cert-manager.io/cluster-issuer: letsencrypt-production
    hosts:
      core: harbor.freshbrewed.science
      notary: notary.freshbrewe.science
      ...
then upgraded
$ helm upgrade --install harbor-registry harbor/harbor --values ./harbor-registry.values.yaml
Release "harbor-registry" has been upgraded. Happy Helming!
NAME: harbor-registry
LAST DEPLOYED: Sun Jun 12 19:41:39 2022
NAMESPACE: default
STATUS: deployed
REVISION: 2
TEST SUITE: None
NOTES:
Please wait for several minutes for Harbor deployment to complete.
Then you should be able to visit the Harbor portal at https://harbor.freshbrewed.science
For more details, please visit https://github.com/goharbor/harbor
Then checked again (and saw it was satisfied)
$ kubectl get ingress
NAME                             CLASS   HOSTS                           ADDRESS        PORTS     AGE
azurevote-ingress                nginx   azurevote.freshbrewed.science   192.168.10.0   80, 443   23h
harbor-registry-ingress          nginx   harbor.freshbrewed.science      192.168.10.0   80, 443   6m34s
harbor-registry-ingress-notary   nginx   notary.freshbrewed.science      192.168.10.0   80, 443   6m34s
and I see it’s now resolving
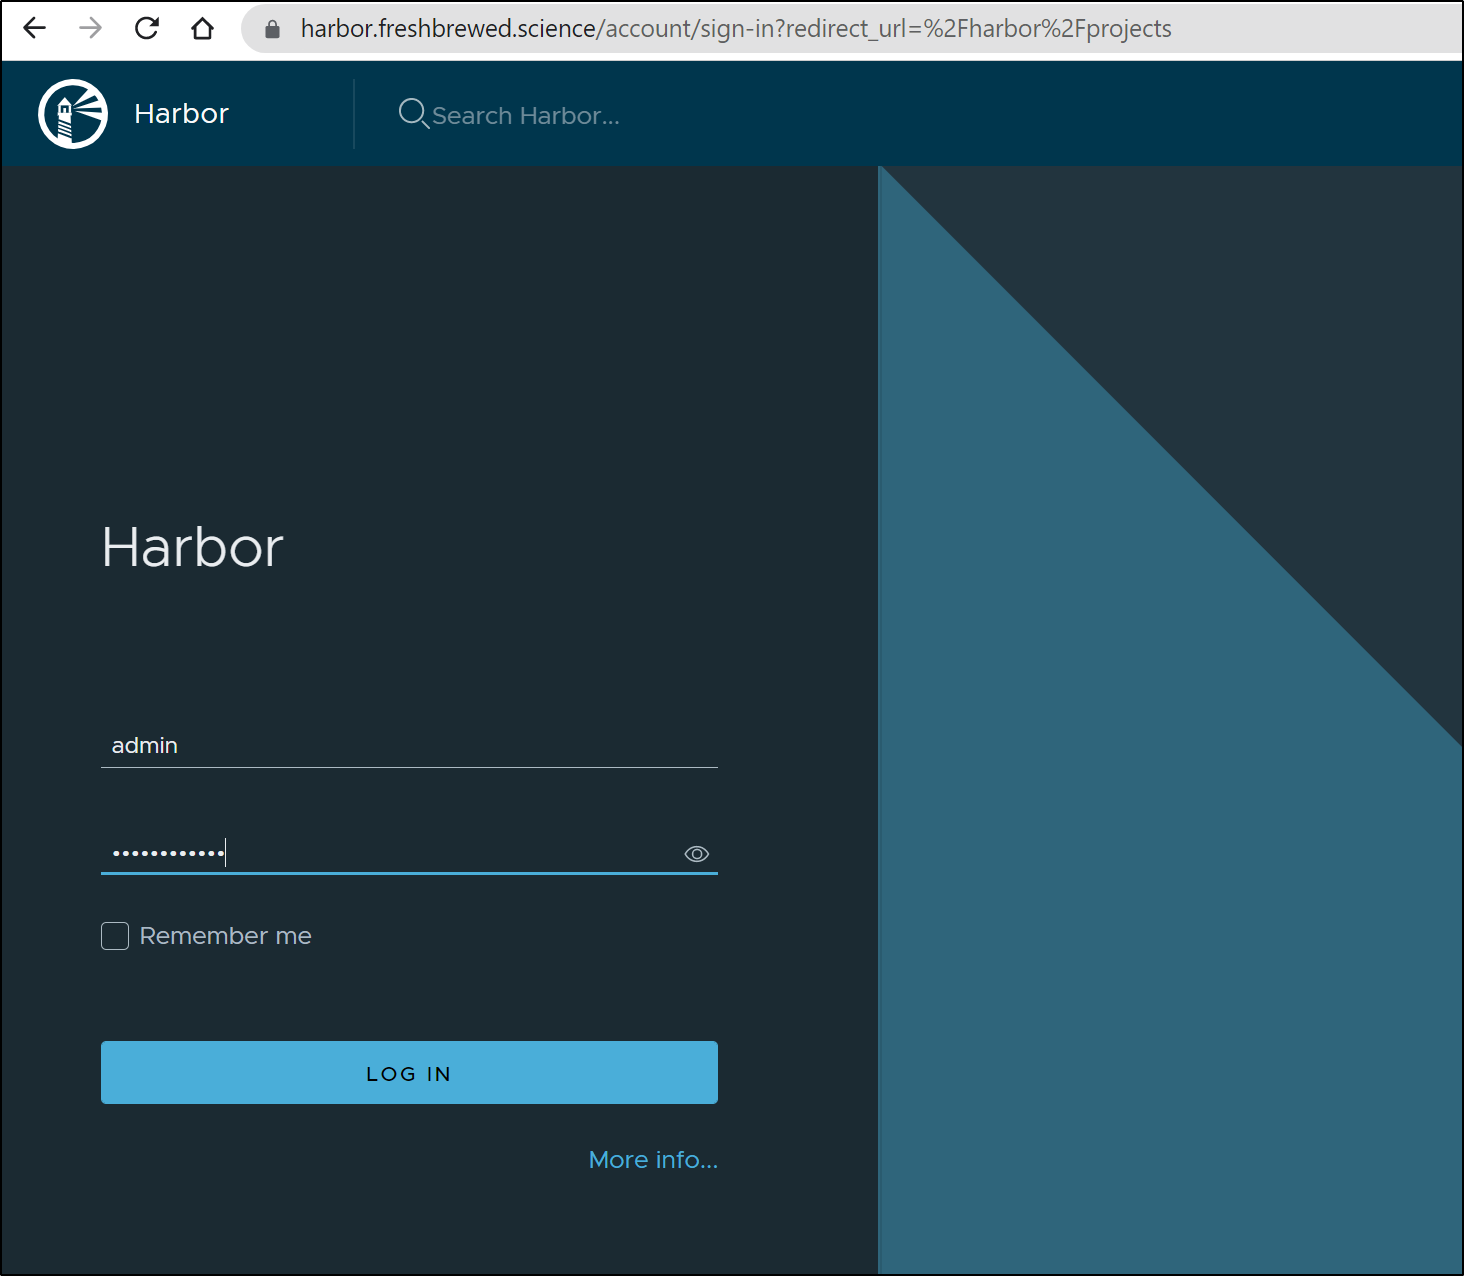
and I can login and see it works
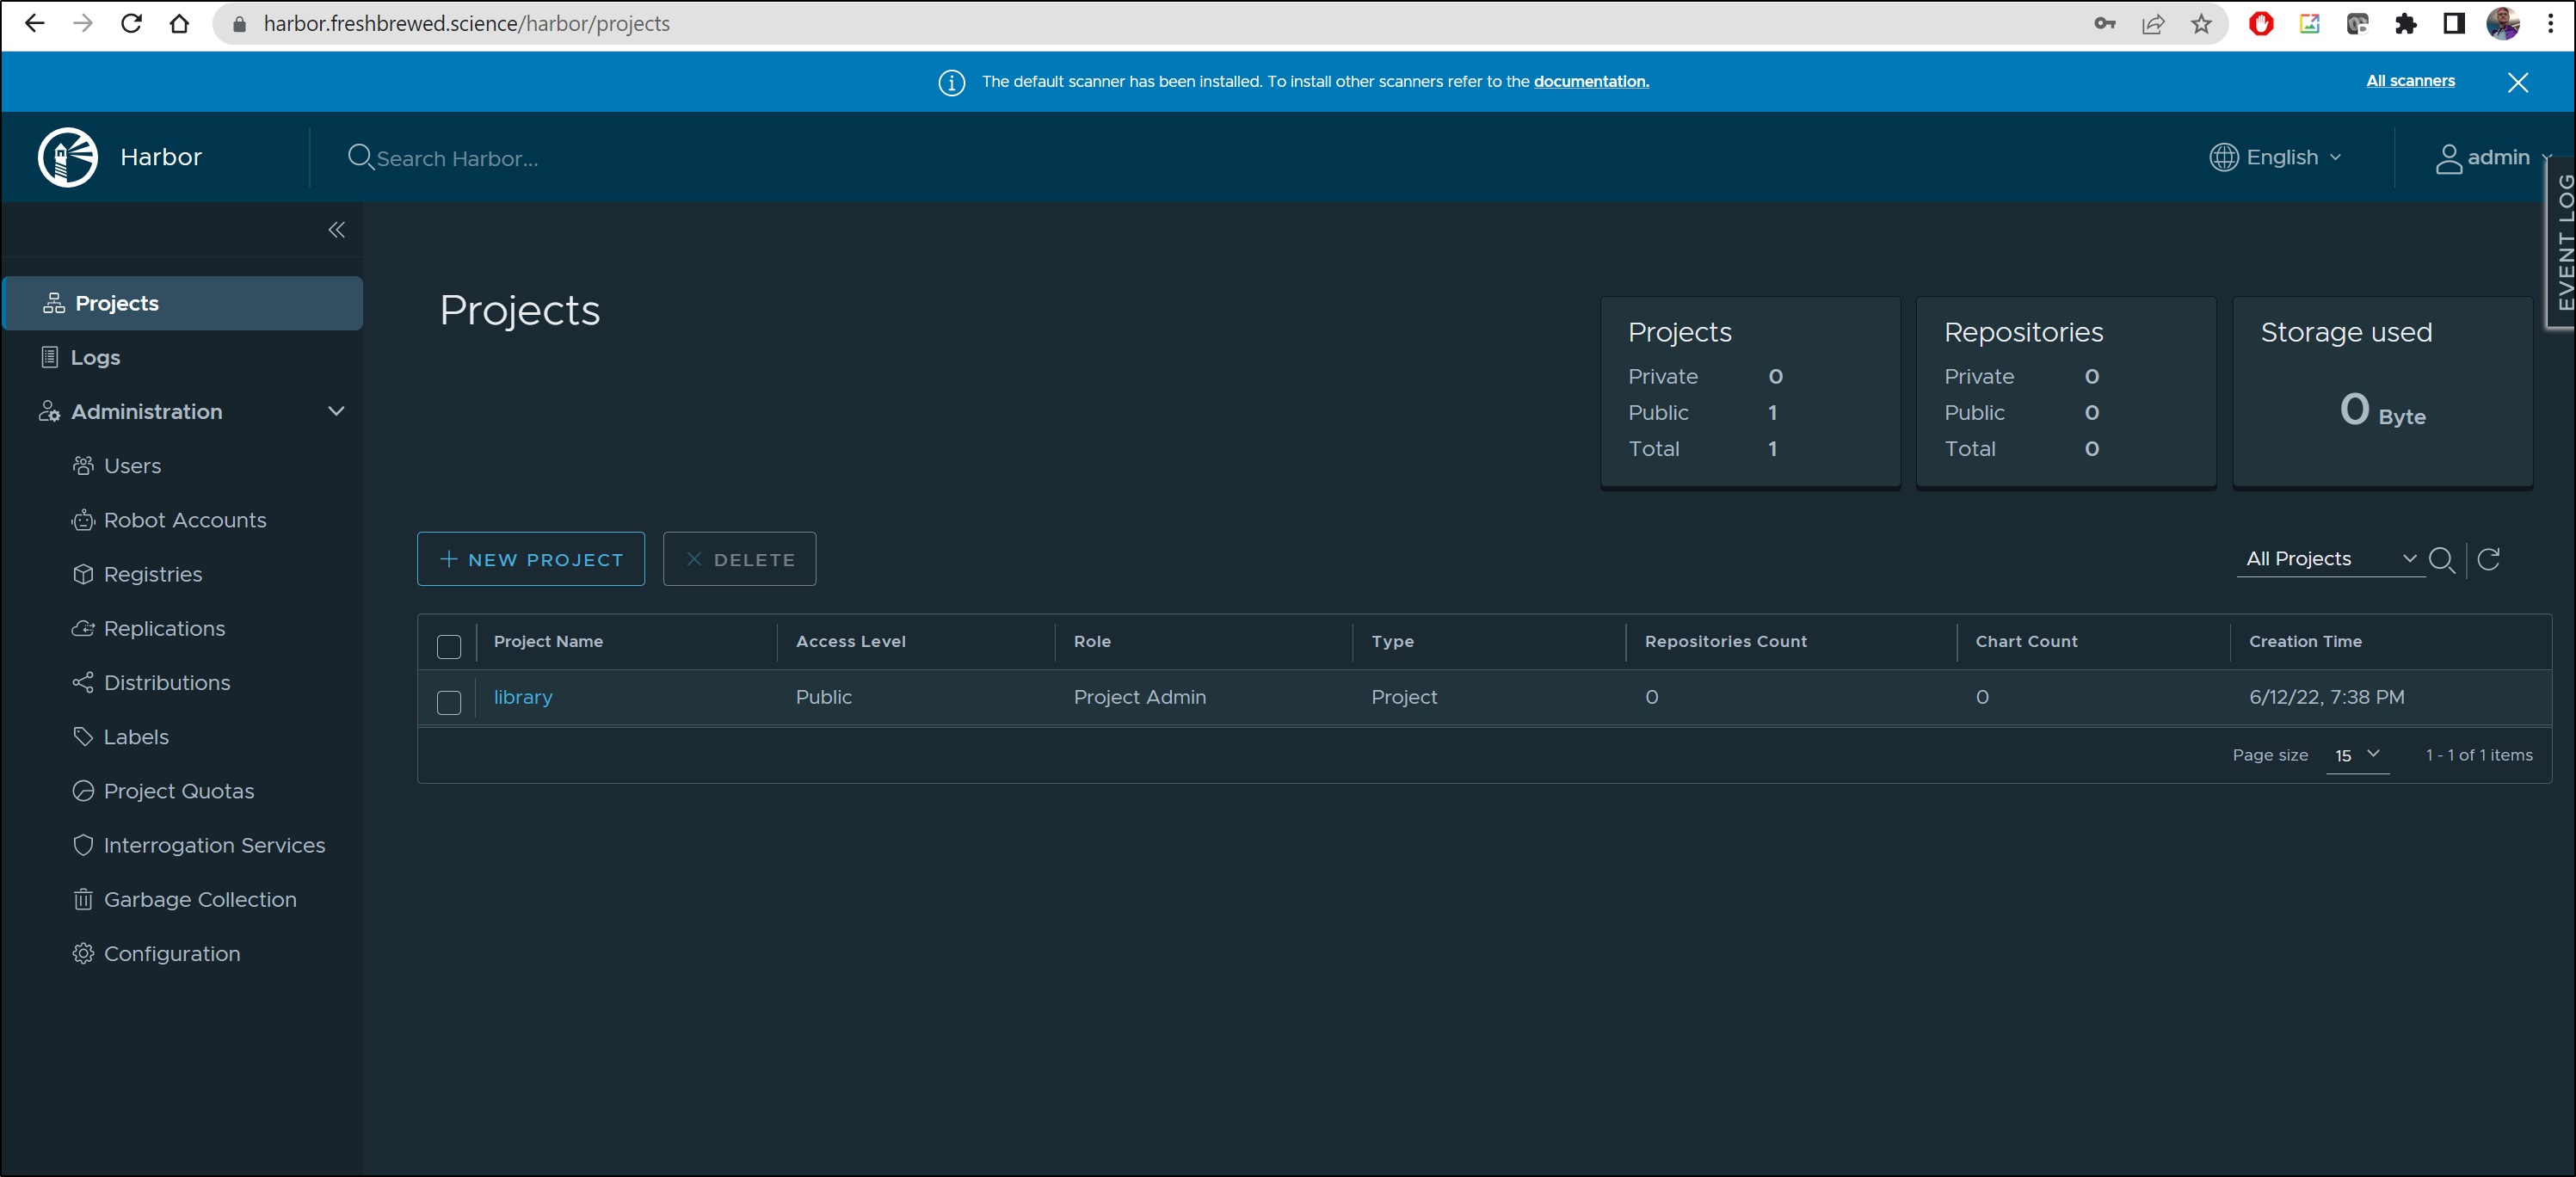
One thing I do right away is create an alternate admin user so I don’t need to use the “root” level “admin”

Summary
We pulled a worker from our former cluster and installed the latest K3s. We intentionally switched to MetalLB for our LoadBalancer and NGinx for our Ingress controller, disabling the built-in provided ones (Traefik and Klipper). We setup Cert Manager, an NFS storage class for PVCs and switched to DNS01 via Route53 for Cert-Manager ACME (LetsEncrypt) validation. Lastly, we setup Harbor and exposed the new cluster to external traffic.
At this point, the cluster is logically functional. I have more work to do such as:
- setting up the summerwind Github runners
- setting up Dapr
- setting up Loft
- setting up Datadog and/or Epsagon for observability
And then add the nodes one by one.