

Published: Sep 20, 2020 by Isaac Johnson
When reviewing Serverless Kubernetes offerings over the last weeks, several sources suggested giving OpenFaaS a second look despite being one of the newer options in the space.
Alex Ellis started OpenFaaS back in 2016 when, having worked with AWS Lambda, he wanted to be able to develop serverless functions locally with docker. In 2017 after Dockercon, he added kubernetes support and it caught fire with the community. You can learn more on its history in this blog post. While OpenFaaS is open source and free, it is backed by VMWare.
It also has a premium subscription for prioritized backlog review, support and some commercial add-ons for Oauth2/OICD authentication and single sign-on. They are also funded by corporate sponsors who pay for front page logos.
Set up Kubernetes
We’ve done this enough times lately so I’ll just abbreviate the steps.
$ az group create --name idj-openfaas-rg --location centralus
$ az ad sp create-for-rbac -n idjopenfaassp --skip-assignment --output json > my_sp.json && export SP_PASS=`cat my_sp.json | jq -r .password` && export SP_ID=`cat my_sp.json | jq -r .appId`
$ az aks create --resource-group idj-openfaas-rg --name idjopenfaasaks --location centralus --node-count 3 --enable-cluster-autoscaler --min-count 2 --max-count 4 --generate-ssh-keys --network-plugin azure --network-policy azure --service-principal $SP_ID --client-secret $SP_PASS
$ az aks get-credentials --resource-group idj-openfaas-rg --name idjopenfaasaks --admin
$ kubectl get nodes
NAME STATUS ROLES AGE VERSION
aks-nodepool1-14499286-vmss000000 Ready agent 10m v1.16.13
aks-nodepool1-14499286-vmss000001 Ready agent 10m v1.16.13
aks-nodepool1-14499286-vmss000002 Ready agent 10m v1.16.13
Ark(ade)
Arkade is billed as a Go based CLI that is a one stop shop for installing charts and apps into clusters of all types.
Installing:
$ curl -sLS https://dl.get-arkade.dev | sudo sh
[sudo] password for builder:
x86_64
Downloading package https://github.com/alexellis/arkade/releases/download/0.6.12/arkade as /tmp/arkade
Download complete.

Running with sufficient permissions to attempt to move arkade to /usr/local/bin
New version of arkade installed to /usr/local/bin
Creating alias 'ark' for 'arkade'.
            _ _
  ___ ___ | | _______ | | ___
 / _` | '__| |/ / _` |/ _` |/ _ \
| (_| | | | < (_| | (_| | __/
 \ __,_|_| |_|\_\__ ,_|\ __,_|\___ |

Get Kubernetes apps the easy way

Version: 0.6.12
Git Commit: 0415b5fa9d0a6740feb3d9093b7555d38c7e1a51


$ ark help
Usage:
  arkade [flags]
  arkade [command]

Available Commands:
  get The get command downloads a tool
  help Help about any command
  info Find info about a Kubernetes app
  install Install Kubernetes apps from helm charts or YAML files
  uninstall Uninstall apps installed with arkade
  update Print update instructions
  version Print the version

Flags:
  -h, --help help for arkade

Use "arkade [command] --help" for more information about a command.
The first thing we will install is the OpenFaaS Gateway
$ arkade install openfaas --gateways 2 --load-balancer true
Using kubeconfig: /home/builder/.kube/config
Node architecture: "amd64"
Client: "x86_64", "Linux"
2020/09/14 18:59:59 User dir established as: /home/builder/.arkade/
"openfaas" has been added to your repositories

[Warning] unable to create secret basic-auth, may already exist: Error from server (AlreadyExists): secrets "basic-auth" already exists
VALUES values.yaml
Command: /home/builder/.arkade/bin/helm [upgrade --install openfaas openfaas/openfaas --namespace openfaas --values /tmp/charts/openfaas/values.yaml --set faasnetes.imagePullPolicy=Always --set basicAuthPlugin.replicas=1 --set gateway.replicas=2 --set serviceType=LoadBalancer --set clusterRole=false --set operator.create=false --set openfaasImagePullPolicy=IfNotPresent --set ingressOperator.create=false --set queueWorker.replicas=1 --set queueWorker.maxInflight=1 --set basic_auth=true --set gateway.directFunctions=true]
Release "openfaas" has been upgraded. Happy Helming!
NAME: openfaas
LAST DEPLOYED: Mon Sep 14 19:00:04 2020
NAMESPACE: openfaas
STATUS: deployed
REVISION: 2
TEST SUITE: None
NOTES:
To verify that openfaas has started, run:

  kubectl -n openfaas get deployments -l "release=openfaas, app=openfaas"
=======================================================================
= OpenFaaS has been installed. =
=======================================================================

# Get the faas-cli
curl -SLsf https://cli.openfaas.com | sudo sh

# Forward the gateway to your machine
kubectl rollout status -n openfaas deploy/gateway
kubectl port-forward -n openfaas svc/gateway 8080:8080 &

# If basic auth is enabled, you can now log into your gateway:
PASSWORD=$(kubectl get secret -n openfaas basic-auth -o jsonpath="{.data.basic-auth-password}" | base64 --decode; echo)
echo -n $PASSWORD | faas-cli login --username admin --password-stdin

faas-cli store deploy figlet
faas-cli list

# For Raspberry Pi
faas-cli store list \
 --platform armhf

faas-cli store deploy figlet \
 --platform armhf

# Find out more at:
# https://github.com/openfaas/faas

Thanks for using arkade!
Get the FaaS CLI
$ curl -SLsf https://cli.openfaas.com | sudo sh
Finding latest version from GitHub
0.12.9
Downloading package https://github.com/openfaas/faas-cli/releases/download/0.12.9/faas-cli as /tmp/faas-cli
Download complete.

Running with sufficient permissions to attempt to move faas-cli to /usr/local/bin
New version of faas-cli installed to /usr/local/bin
Creating alias 'faas' for 'faas-cli'.
  ________  ____
 / _ \ _ _____ _ __|___ |_ _ ___/___ |
| | | | '_ \ / _ \ '_ \| |_ / _` |/ _` \___ \
| |_| | |_) | __/ | | | _| (_| | (_| |___) |
 \ ___/| .__ / \ ___|_| |_|_| \__ ,_|\ __,_|____ /
      |_|

CLI:
 commit: 40555282492b1f7cfdb10d801fcdce251360ec25
 version: 0.12.9
2020/09/14 19:03:57 http: proxy error: dial tcp: lookup idjkubeles-idjkubelessrg-70b42e-ca330874.hcp.centralus.azmk8s.io on 172.23.128.1:53: no such host
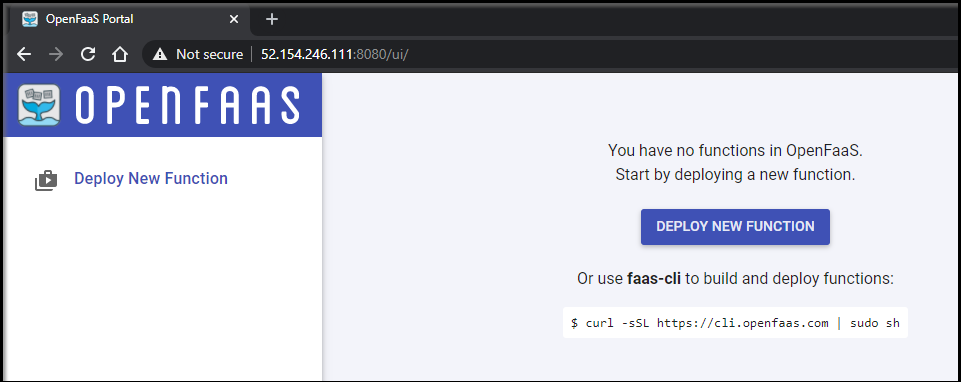
We can login to the OpenFaas UI:
$ kubectl get svc --all-namespaces | grep gateway-external
openfaas gateway-external LoadBalancer 10.0.236.63 52.154.246.111 8080:32031/TCP 6m21s


$ kubectl get secret -n openfaas basic-auth -o jsonpath="{.data.basic-auth-password}" | base64 --decode; echo
17UuY6tXF6JP2Al0A17h1RS1H
We can use this with the user admin and that password:
Installing k8s dashboard
Let’s look at how we can use arkade to simplify some of the standard kubernetes deploys we often need to do.
$ arkade install kubernetes-dashboard
Using kubeconfig: /home/builder/.kube/config
Node architecture: "amd64"
# To create the Service Account and the ClusterRoleBinding
# @See https://github.com/kubernetes/dashboard/blob/master/docs/user/access-control/creating-sample-user.md#creating-sample-user
cat <<EOF | kubectl apply -f -
---
apiVersion: v1
kind: ServiceAccount
metadata:
name: admin-user
namespace: kubernetes-dashboard
---
apiVersion: rbac.authorization.k8s.io/v1
kind: ClusterRoleBinding
metadata:
name: admin-user
roleRef:
apiGroup: rbac.authorization.k8s.io
kind: ClusterRole
name: cluster-admin
subjects:
- kind: ServiceAccount
name: admin-user
namespace: kubernetes-dashboard
---
EOF
#To forward the dashboard to your local machine
kubectl proxy
#To get your Token for logging in
kubectl -n kubernetes-dashboard describe secret $(kubectl -n kubernetes-dashboard get secret | grep admin-user-token | awk '{print $1}')
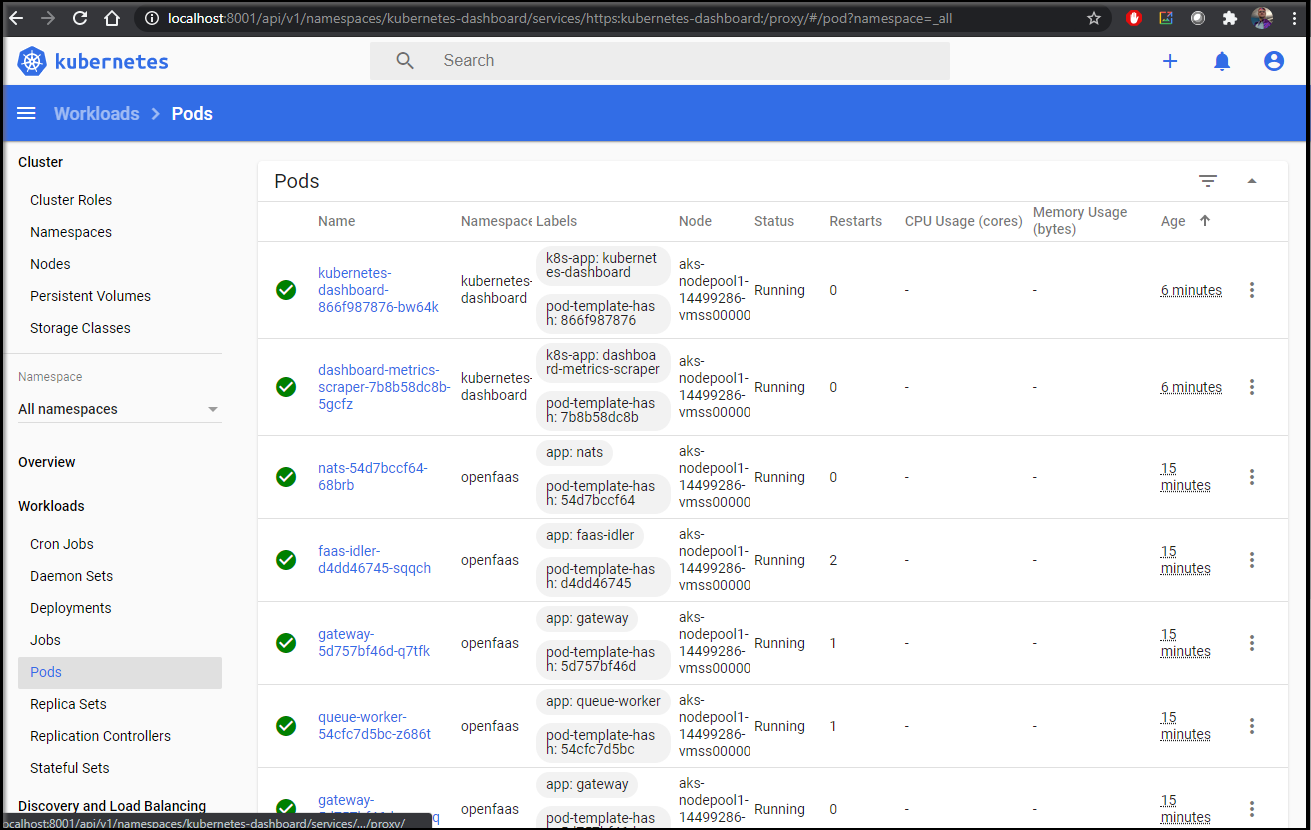
# Once Proxying you can navigate to the below
http://localhost:8001/api/v1/namespaces/kubernetes-dashboard/services/https:kubernetes-dashboard:/proxy/#/login
Next, to login to the dashboard, we’ll need to use the kubeconfig or the token. We’ll get the token using the instructions listed above.
$ kubectl -n kubernetes-dashboard describe secret $(kubectl -n kubernetes-dashboard get secret | grep admin-user-token | awk '{print $1}')
Name: default-token-bfgnr
Namespace: kubernetes-dashboard
Labels: <none>
Annotations: kubernetes.io/service-account.name: default
              kubernetes.io/service-account.uid: 7989223b-641c-487a-bb68-6a8f793a34ca

Type: kubernetes.io/service-account-token

Data
====
token: eyJhbGciOiJSUzI1NiIsImtpZCI6InhDYlhzTG4yTnRWc1N6MF9pRENadFZadV9DTWRTZk9nRjhzS0h6d0pTb2sifQ.eyJpc3MiOiJrdWJlcm5ldGVzL3NlcnZpY2VhY2NvdW50Iiwia3ViZXJuZXRlcy5pby9zZXJ2aWNlYWNjb3VudC9uYW1lc3BhY2UiOiJrdWJlcm5ldGVzLWRhc2hib2FyZCIsImt1YmVybmV0ZXMuaW8vc2VydmljZWFjY291bnQvc2VjcmV0Lm5hbWUiOiJkZWZhdWx0LXRva2VuLWJmZ25yIiwia3ViZXJuZXRlcy5pby9zZXJ2aWNlYWNjb3VudC9zZXJ2aWNlLWFjY291bnQubmFtZSI6ImRlZmF1bHQiLCJrdWJlcm5ldGVzLmlvL3NlcnZpY2VhY2NvdW50L3NlcnZpY2UtYWNjb3VudC51aWQiOiI3OTg5MjIzYi02NDFjLTQ4N2EtYmI2OC02YThmNzkzYTM0Y2EiLCJzdWIiOiJzeXN0ZW06c2VydmljZWFjY291bnQ6a3ViZXJuZXRlcy1kYXNoYm9hcmQ6ZGVmYXVsdCJ9.UeXEJg2bLxgZi1vARGTdds4Jq7g8gHjIezmR1m8bM9l1irUHW6GsqHep1PQaz0yfsWh2CPeBFgn1STLGuDN2NreweVVEOOViEk8aJZp6XXXfiuie77LZeyWsJ_wRMe47Fz-Fx6WYIzGTkhwv7uUT143i4SHL58_52nwM0AO0raxDDWdbAhJ_OBrwtQp38XQQ9UlXtuuaizc804wvJRl_B1rFK2v31Ckkt2pcmK_89WoyMLrpK4pbLMlxmvacHFI--9T3dNO_IRS4obDQ1rBh-4AgPnVM7tGVYwXHCHtXbrjlBU80pKsr9eF4HMMCZy0yaXwVMU8CJ8iu6XhT5B-CnkTKD-2ecJ-_w-GJytAOdZPSTySYSmvyQnhGHeRT1YlIbosc04tUYFNBegXleSioNB2EAEZPTobrbyl4dYK4X-obWOBXfNau_i78oCjrETtcQqCyT7VAyh_m8n2r71_KkI2J9J4yMV4IT48CXnbg_gyreC1WntQsAzVhq_Ihy_btm-gA8_FUh61kTTns6SIRNYjMZNlUYUoE5lxG4EfOqz6_oimF_hSRV1JEKNCJtBXFxcMMOs-I2XI24e4Y2gEujeXMyeUjcGzN0Ix6HJ6SIjJdHPiX_RAIC7kCWFAsEF009LFELv2pJ3R0TWQiHriWL3jYAZtwHcKzjmGx8xkWHs8
Note: you will need to apply a crb.yaml so the service account has permission to see things:
$ cat crb.yaml
apiVersion: rbac.authorization.k8s.io/v1beta1
kind: ClusterRoleBinding
metadata:
  name: testrole-ns-clusterrrole-binding
roleRef:
  apiGroup: rbac.authorization.k8s.io
  kind: ClusterRole
  name: admin
subjects:
- kind: ServiceAccount
  name: kubernetes-dashboard
  namespace: kubernetes-dashboard
- kind: ServiceAccount
  name: kubernetes-dashboard
  namespace: default
$ kubectl apply -f crb.yaml
clusterrolebinding.rbac.authorization.k8s.io/testrole-ns-clusterrrole-binding created


$ kubectl proxy
Starting to serve on 127.0.0.1:8001
Setting up a Private Docker Registry with DNS and TLS
Let’s follow his blog (https://blog.alexellis.io/get-a-tls-enabled-docker-registry-in-5-minutes/ ) and try using akrade to quickly set up a private docker registry in our cluster. You’ll see it’s significantly easier with arkade.
Install the NGinx Ingress and controller:
$ arkade install ingress-nginx
Using kubeconfig: /home/builder/.kube/config
Client: x86_64, Linux
2020/09/14 19:24:37 User dir established as: /home/builder/.arkade/
"ingress-nginx" has been added to your repositories

Chart path: /tmp/charts
VALUES values.yaml
Command: /home/builder/.arkade/bin/helm [upgrade --install ingress-nginx ingress-nginx/ingress-nginx --namespace default --values /tmp/charts/ingress-nginx/values.yaml]
Release "ingress-nginx" does not exist. Installing it now.
NAME: ingress-nginx
LAST DEPLOYED: Mon Sep 14 19:24:42 2020
NAMESPACE: default
STATUS: deployed
REVISION: 1
TEST SUITE: None
NOTES:
The ingress-nginx controller has been installed.
It may take a few minutes for the LoadBalancer IP to be available.
You can watch the status by running 'kubectl --namespace default get services -o wide -w ingress-nginx-controller'

An example Ingress that makes use of the controller:

  apiVersion: networking.k8s.io/v1beta1
  kind: Ingress
  metadata:
    annotations:
      kubernetes.io/ingress.class: nginx
    name: example
    namespace: foo
  spec:
    rules:
      - host: www.example.com
        http:
          paths:
            - backend:
                serviceName: exampleService
                servicePort: 80
              path: /
    # This section is only required if TLS is to be enabled for the Ingress
    tls:
        - hosts:
            - www.example.com
          secretName: example-tls

If TLS is enabled for the Ingress, a Secret containing the certificate and key must also be provided:

  apiVersion: v1
  kind: Secret
  metadata:
    name: example-tls
    namespace: foo
  data:
    tls.crt: <base64 encoded cert>
    tls.key: <base64 encoded key>
  type: kubernetes.io/tls
=======================================================================
= ingress-nginx has been installed. =
=======================================================================

# If you're using a local environment such as "minikube" or "KinD",
# then try the inlets operator with "arkade install inlets-operator"

# If you're using a managed Kubernetes service, then you'll find
# your LoadBalancer's IP under "EXTERNAL-IP" via:

kubectl get svc ingress-nginx-controller

# Find out more at:
# https://github.com/kubernetes/ingress-nginx/tree/master/charts/ingress-nginx

Thanks for using arkade!
Next add the cert-manager to our cluster to handle getting SSL certs
$ arkade install cert-manager
Using kubeconfig: /home/builder/.kube/config
Client: x86_64, Linux
2020/09/14 19:25:57 User dir established as: /home/builder/.arkade/
"jetstack" has been added to your repositories

VALUES values.yaml
Command: /home/builder/.arkade/bin/helm [upgrade --install cert-manager jetstack/cert-manager --namespace cert-manager --version v0.15.2 --values /tmp/charts/cert-manager/values.yaml --set installCRDs=true]
Release "cert-manager" does not exist. Installing it now.
NAME: cert-manager
LAST DEPLOYED: Mon Sep 14 19:26:04 2020
NAMESPACE: cert-manager
STATUS: deployed
REVISION: 1
TEST SUITE: None
NOTES:
cert-manager has been deployed successfully!

In order to begin issuing certificates, you will need to set up a ClusterIssuer
or Issuer resource (for example, by creating a 'letsencrypt-staging' issuer).

More information on the different types of issuers and how to configure them
can be found in our documentation:

https://cert-manager.io/docs/configuration/

For information on how to configure cert-manager to automatically provision
Certificates for Ingress resources, take a look at the `ingress-shim`
documentation:

https://cert-manager.io/docs/usage/ingress/
=======================================================================
= cert-manager has been installed. =
=======================================================================

# Get started with cert-manager here:
# https://docs.cert-manager.io/en/latest/tutorials/acme/http-validation.html

Thanks for using arkade!
Now we can install the docker registry app.
$ arkade install docker-registry
Using kubeconfig: /home/builder/.kube/config
Client: x86_64, Linux
2020/09/14 19:26:22 User dir established as: /home/builder/.arkade/
"stable" has been added to your repositories

Node architecture: "amd64"
Chart path: /tmp/charts
VALUES values.yaml
Command: /home/builder/.arkade/bin/helm [upgrade --install docker-registry stable/docker-registry --namespace default --values /tmp/charts/docker-registry/values.yaml --set secrets.htpasswd=admin:$2a$10$geGdnOsReO5tCCMzvbnd0eAF1V9DK3tEd8.7wtGrjlVJFIAMyLnTu
 --set persistence.enabled=false]
Release "docker-registry" does not exist. Installing it now.
NAME: docker-registry
LAST DEPLOYED: Mon Sep 14 19:26:36 2020
NAMESPACE: default
STATUS: deployed
REVISION: 1
TEST SUITE: None
NOTES:
1. Get the application URL by running these commands:
  export POD_NAME=$(kubectl get pods --namespace default -l "app=docker-registry,release=docker-registry" -o jsonpath="{.items[0].metadata.name}")
  echo "Visit http://127.0.0.1:8080 to use your application"
  kubectl -n default port-forward $POD_NAME 8080:5000
=======================================================================
= docker-registry has been installed. =
=======================================================================

# Your docker-registry has been configured

kubectl logs deploy/docker-registry

export IP="192.168.0.11" # Set to WiFI/ethernet adapter
export PASSWORD="" # See below
kubectl port-forward svc/docker-registry --address 0.0.0.0 5000 &

docker login $IP:5000 --username admin --password $PASSWORD
docker tag alpine:3.11 $IP:5000/alpine:3.11
docker push $IP:5000/alpine:3.11

# Find out more at:
# https://github.com/helm/charts/tree/master/stable/registry

Thanks for using arkade!
Registry credentials: admin 21xcuz0LPnv33U02572P
export PASSWORD=21xcuz0LPnv33U02572P
Using whatever DNS host you have, point a valid Domain Name to your exposed public IP:

Lastly, let’s tie it together by using the cert manager to get a valid SSL cert and apply it to the Nginx ingress for our docker registry.
$ arkade install docker-registry-ingress --email isaac.johnson@gmail.com --domain privatecr.tpk.best
Using kubeconfig: /home/builder/.kube/config
2020/09/14 20:23:36 /tmp/.arkade
=======================================================================
= Docker Registry Ingress and cert-manager Issuer have been installed =
=======================================================================

# You will need to ensure that your domain points to your cluster and is
# accessible through ports 80 and 443.
#
# This is used to validate your ownership of this domain by LetsEncrypt
# and then you can use https with your installation.

# Ingress to your domain has been installed for the Registry
# to see the ingress record run
kubectl get -n <installed-namespace> ingress docker-registry

# Check the cert-manager logs with:
kubectl logs -n cert-manager deploy/cert-manager

# A cert-manager Issuer has been installed into the provided
# namespace - to see the resource run
kubectl describe -n <installed-namespace> Issuer letsencrypt-prod-registry

# To check the status of your certificate you can run
kubectl describe -n <installed-namespace> Certificate docker-registry

# It may take a while to be issued by LetsEncrypt, in the meantime a
# self-signed cert will be installed

Thanks for using arkade!
We can check on the cert status to see when it’s procured
$ kubectl get certificate --all-namespaces
NAMESPACE NAME READY SECRET AGE
default docker-registry True docker-registry 42s
Using the Registry
Lets tag and push a built image to our private registry.
First login:
$ docker login privatecr.tpk.best --username admin --password 21xcuz0LPnv33U02572P
WARNING! Using --password via the CLI is insecure. Use --password-stdin.
Login Succeeded
Then, let’s see what images we have locally:
$ docker images
REPOSITORY TAG IMAGE ID CREATED SIZE
<none> <none> 53a330e070e6 7 days ago 946MB
node 12 45bd1e0ed0c2 13 days ago 919MB
idjohnson/yabbs 814 456bf09345cf 3 weeks ago 266MB
idjtestdrive-docker.jfrog.io/my-docker-image latest 822a387c037a 4 months ago 5.6MB
idjtestdrive-docker.jfrog.io/alpine 3.11.5 a187dde48cd2 5 months ago 5.6MB
idjohnson/hello-keda latest 299742db0e8e 6 months ago 501MB
idjohnson/hello-keda <none> 223cd87cda66 6 months ago 873MB
idjohnson/hello-keda <none> aeaceeef60d4 6 months ago 873MB
<none> <none> df208f899e7f 6 months ago 873MB
<none> <none> 5a7dcd5f003e 6 months ago 620MB
<none> <none> b6ed860d896d 6 months ago 620MB
<none> <none> 42d4bdbfed67 6 months ago 620MB
mcr.microsoft.com/azure-functions/node 3.0 d69666cc3d2f 7 months ago 620MB
hello-world latest bf756fb1ae65 8 months ago 13.3kB
idjtestdrive-docker-dev-local.jfrog.io/hello-world latest bf756fb1ae65 8 months ago 13.3kB
redis 3.2 87856cc39862 23 months ago 76MB
mcr.microsoft.com/azure-functions/node 2.0-arm32v7 743476f94088 23 months ago 501MB
Next we can tag and push one
$ docker tag bf756fb1ae65 privatecr.tpk.best/hello-world

$ docker push privatecr.tpk.best/hello-world
The push refers to repository [privatecr.tpk.best/hello-world]
9c27e219663c: Pushed
latest: digest: sha256:90659bf80b44ce6be8234e6ff90a1ac34acbeb826903b02cfa0da11c82cbc042 size: 525
builder@DESKTOP-2SQ9NQM:~/Workspaces/openfaas$
Datadog
Let’s install one of my favourite ALM tools Datadog with arkade
$ arkade install chart --repo-name stable/datadog \
> --set datadog.apiKey=$DD_API_KEY \
> --set datadog.apm.enabled="true" \
> --set datadog.clusterAgent.enabled="true" \
> --set datadog.clusterAgent.token=MTIzNDU1Njc4OTAxMjM0NTY3ODkwMTIzNDU2Nzg5MDAw
Using kubeconfig: /home/builder/.kube/config
Client: x86_64, Linux
2020/09/14 20:43:34 User dir established as: /home/builder/.arkade/
VALUES values.yaml
Command: /home/builder/.arkade/bin/helm [upgrade --install datadog stable/datadog --namespace default --values /tmp/charts/datadog/values.yaml --set datadog.clusterAgent.token=MTIzNDU1Njc4OTAxMjM0NTY3ODkwMTIzNDU2Nzg5MDAw --set datadog.apiKey=d7d34adf482eb2324efe26a87651421d --set datadog.apm.enabled=true --set datadog.clusterAgent.enabled=true]
Release "datadog" does not exist. Installing it now.
WARNING: This chart is deprecated
NAME: datadog
LAST DEPLOYED: Mon Sep 14 20:43:45 2020
NAMESPACE: default
STATUS: deployed
REVISION: 1
TEST SUITE: None
NOTES:
#################################################################
#### WARNING: This repository is deprecated ####
#################################################################

Following upcoming deprecation of https://github.com/helm/charts repository
The stable/datadog Helm chart has been moved to helm.datadoghq.com (source: https://github.com/DataDog/helm-charts)

You can add new repository by running:
  helm repo add datadog https://helm.datadoghq.com
  helm repo update

You can now replace stable/datadog by datadog/datadog in all your Helm commands
Datadog agents are spinning up on each node in your cluster. After a few
minutes, you should see your agents starting in your event stream:
    https://app.datadoghq.com/event/stream
The Datadog Agent is listening on port 8126 for APM service.
=======================================================================
                chart stable/datadog installed.
                =======================================================================

                Thanks for using arkade!
Soon we can at the least see infrastructure results:

Functions As a Service (The FaaS in OpenFaaS)
Let’s start with a basic Hello World in NodeJS
$ faas-cli new --lang node hello-nodejs
Folder: hello-nodejs created.
  ________  ____
 / _ \ _ _____ _ __|___ |_ _ ___/___ |
| | | | '_ \ / _ \ '_ \| |_ / _` |/ _` \___ \
| |_| | |_) | __/ | | | _| (_| | (_| |___) |
 \ ___/| .__ / \ ___|_| |_|_| \__ ,_|\ __,_|____ /
      |_|


Function created in folder: hello-nodejs
Stack file written: hello-nodejs.yml

Notes:
You have created a new function which uses Node.js 12.13.0 and the OpenFaaS
Classic Watchdog.

npm i --save can be used to add third-party packages like request or cheerio
npm documentation: https://docs.npmjs.com/

For high-throughput services, we recommend you use the node12 template which
uses a different version of the OpenFaaS watchdog.
Let’s edit the handler.js to write a console output line
$ cat hello-nodejs/handler.js
"use strict"

module.exports = async (context, callback) => {
    console.log('hello world');
    return {status: "done"}
}
With OpenFaaS, we first build the container:
$ faas-cli build -f ./hello-nodejs.yml
[0] > Building hello-nodejs.
Clearing temporary build folder: ./build/hello-nodejs/
Preparing: ./hello-nodejs/ build/hello-nodejs/function
Building: hello-nodejs:latest with node template. Please wait..
Sending build context to Docker daemon 10.24kB
Step 1/24 : FROM openfaas/classic-watchdog:0.18.1 as watchdog
0.18.1: Pulling from openfaas/classic-watchdog
ff01b6ed694a: Pulling fs layer
ff01b6ed694a: Verifying Checksum
ff01b6ed694a: Download complete
ff01b6ed694a: Pull complete
Digest: sha256:35bda3fcffdd89c21f990f240434799901c80627280eca86eec56db71b8bb30d
Status: Downloaded newer image for openfaas/classic-watchdog:0.18.1
 ---> 94b5e0bef891
Step 2/24 : FROM node:12.13.0-alpine as ship
12.13.0-alpine: Pulling from library/node
89d9c30c1d48: Pulling fs layer
cb4880ccba47: Pulling fs layer
abc31ffc07f9: Pulling fs layer
2137f333b9e3: Pulling fs layer
2137f333b9e3: Waiting
abc31ffc07f9: Verifying Checksum
abc31ffc07f9: Download complete
89d9c30c1d48: Verifying Checksum
89d9c30c1d48: Download complete
2137f333b9e3: Download complete
89d9c30c1d48: Pull complete
cb4880ccba47: Verifying Checksum
cb4880ccba47: Download complete
cb4880ccba47: Pull complete
abc31ffc07f9: Pull complete
2137f333b9e3: Pull complete
Digest: sha256:ae1822c17b0087cb1eea794e5a293d56cc1fe01f01ef5494d0687c1ef9584239
Status: Downloaded newer image for node:12.13.0-alpine
 ---> 69c8cc9212ec
Step 3/24 : COPY --from=watchdog /fwatchdog /usr/bin/fwatchdog
 ---> f8176e18b2b1
Step 4/24 : RUN chmod +x /usr/bin/fwatchdog
 ---> Running in 79c7b7ede76f
Removing intermediate container 79c7b7ede76f
 ---> 9983cdfdb98a
Step 5/24 : RUN addgroup -S app && adduser app -S -G app
 ---> Running in ae9498286e4c
Removing intermediate container ae9498286e4c
 ---> af8e34bde156
Step 6/24 : WORKDIR /root/
 ---> Running in 60057d387271
Removing intermediate container 60057d387271
 ---> 150762879e82
Step 7/24 : ENV NPM_CONFIG_LOGLEVEL warn
 ---> Running in da4059e4658d
Removing intermediate container da4059e4658d
 ---> 4ec83601c86c
Step 8/24 : RUN mkdir -p /home/app
 ---> Running in f1118ea5cdf4
Removing intermediate container f1118ea5cdf4
 ---> b5e1e6b0fcc2
Step 9/24 : WORKDIR /home/app
 ---> Running in 43ce8b79890d
Removing intermediate container 43ce8b79890d
 ---> e27730efc30f
Step 10/24 : COPY package.json ./
 ---> 9a1f96619ea9
Step 11/24 : RUN npm i --production
 ---> Running in 357d96576598
npm WARN NodejsBase@1.0.0 No description
npm WARN NodejsBase@1.0.0 No repository field.

added 1 package from 1 contributor and audited 1 package in 0.886s
found 0 vulnerabilities

Removing intermediate container 357d96576598
 ---> 97a8656d3d06
Step 12/24 : COPY index.js ./
 ---> 9b7c8153543a
Step 13/24 : WORKDIR /home/app/function
 ---> Running in 876285f25689
Removing intermediate container 876285f25689
 ---> 81c2ff23c4e2
Step 14/24 : COPY function/*.json ./
 ---> cf2016606eda
Step 15/24 : RUN npm i --production || :
 ---> Running in ea0edfafd17d
npm WARN function@1.0.0 No description
npm WARN function@1.0.0 No repository field.

up to date in 0.484s
found 0 vulnerabilities

Removing intermediate container ea0edfafd17d
 ---> ba2bdd24b58a
Step 16/24 : COPY --chown=app:app function/ .
 ---> 7a19f76a0282
Step 17/24 : WORKDIR /home/app/
 ---> Running in a19f3fbb7fa1
Removing intermediate container a19f3fbb7fa1
 ---> e17ddbaa8051
Step 18/24 : RUN chmod +rx -R ./function && chown app:app -R /home/app && chmod 777 /tmp
 ---> Running in a23c4ab41e08
Removing intermediate container a23c4ab41e08
 ---> 54a64c3435ea
Step 19/24 : USER app
 ---> Running in fa3094eb0d52
Removing intermediate container fa3094eb0d52
 ---> 2a26fd9763ec
Step 20/24 : ENV cgi_headers="true"
 ---> Running in 3aecb59fc60f
Removing intermediate container 3aecb59fc60f
 ---> 23cd257a6041
Step 21/24 : ENV fprocess="node index.js"
 ---> Running in e0c54efe7026
Removing intermediate container e0c54efe7026
 ---> ebd532230b5b
Step 22/24 : EXPOSE 8080
 ---> Running in 97bf9559ffe4
Removing intermediate container 97bf9559ffe4
 ---> 54228f2704f7
Step 23/24 : HEALTHCHECK --interval=3s CMD [-e /tmp/.lock] || exit 1
 ---> Running in e96da7985ac9
Removing intermediate container e96da7985ac9
 ---> 96b12e07f312
Step 24/24 : CMD ["fwatchdog"]
 ---> Running in 42fa2f2da009
Removing intermediate container 42fa2f2da009
 ---> 1501959d6239
Successfully built 1501959d6239
Successfully tagged hello-nodejs:latest
Image: hello-nodejs:latest built.
[0] < Building hello-nodejs done in 21.00s.
[0] Worker done.

Total build time: 21.00s

$ docker images | grep hello-nodejs
hello-nodejs latest 1501959d6239 2 minutes ago 96MB
Deploying should have worked in the way I show below, but for some reason, it was blocking me:
$ faas-cli deploy -f ./hello-nodejs.yml
Deploying: hello-nodejs.
WARNING! Communication is not secure, please consider using HTTPS. Letsencrypt.org offers free SSL/TLS certificates.

unauthorized access, run "faas-cli login" to setup authentication for this server

Function 'hello-nodejs' failed to deploy with status code: 401


builder@DESKTOP-2SQ9NQM:~/Workspaces/openfaas$ faas-cli deploy -f ./hello-nodejs.yml
Deploying: hello-nodejs.
WARNING! Communication is not secure, please consider using HTTPS. Letsencrypt.org offers free SSL/TLS certificates.
2020/09/14 21:10:31 http: proxy error: dial tcp: lookup idjkubeles-idjkubelessrg-70b42e-ca330874.hcp.centralus.azmk8s.io on 172.23.128.1:53: no such host

Unexpected status: 502, message:

Function 'hello-nodejs' failed to deploy with status code: 502


$ faas-cli login -u admin -p 17UuY6tXF6JP2Al0A17h1RS1H --gateway http://52.154.246.111:8080
WARNING! Using --password is insecure, consider using: cat ~/faas_pass.txt | faas-cli login -u user --password-stdin
Calling the OpenFaaS server to validate the credentials...
WARNING! Communication is not secure, please consider using HTTPS. Letsencrypt.org offers free SSL/TLS certificates.
credentials saved for admin http://52.154.246.111:8080
builder@DESKTOP-2SQ9NQM:~/Workspaces/openfaas$ faas-cli deploy -f ./hello-nodejs.yml
Deploying: hello-nodejs.
WARNING! Communication is not secure, please consider using HTTPS. Letsencrypt.org offers free SSL/TLS certificates.
2020/09/14 21:21:03 http: proxy error: dial tcp: lookup idjkubeles-idjkubelessrg-70b42e-ca330874.hcp.centralus.azmk8s.io on 172.23.128.1:53: no such host

Unexpected status: 502, message:

Function 'hello-nodejs' failed to deploy with status code: 502
While gateway detection should have worked, I’ll assume it was due to mucking about in my local environment. We can force a gateway to make it deploy into our cluster.
Force a gateway:
$ cat ./hello-nodejs.yml
version: 1.0
provider:
  name: openfaas
  gateway: http://127.0.0.1:8080
functions:
  hello-nodejs:
    lang: node
    handler: ./hello-nodejs
    image: hello-nodejs:latest


$ faas-cli deploy --gateway http://52.154.246.111:8080 -f ./hello-nodejs.yml
Deploying: hello-nodejs.
WARNING! Communication is not secure, please consider using HTTPS. Letsencrypt.org offers free SSL/TLS certificates.

Deployed. 202 Accepted.
URL: http://52.154.246.111:8080/function/hello-nodejs.openfaas-fn
Checking our pods, however we see some errors:
$ kubectl get pods hello-nodejs-567c5cc95-2zgvr -n openfaas-fn
NAME READY STATUS RESTARTS AGE
hello-nodejs-567c5cc95-2zgvr 0/1 ImagePullBackOff 0 22h

$ kubectl describe pod hello-nodejs-567c5cc95-2zgvr -n openfaas-fn | tail -n 10
    Optional: false
QoS Class: BestEffort
Node-Selectors: <none>
Tolerations: node.kubernetes.io/not-ready:NoExecute for 300s
                 node.kubernetes.io/unreachadable:NoExecute for 300s
Events:
  Type Reason Age From Message
  ---- ------ ---- ---- -------
  Normal BackOff 41m (x5758 over 22h) kubelet, aks-nodepool1-14499286-vmss000002 Back-off pulling image "hello-nodejs:latest"
  Warning Failed 92s (x5936 over 22h) kubelet, aks-nodepool1-14499286-vmss000002 Error: ImagePullBackOff
Uh oh…Image backoff.
The problem is our container needs to be exposed where the underlying chart can see it. So we need to push that image somewhere… Luckily we have a private registry!
$ kubectl create secret docker-registry regsecret --docker-username=admin --docker-password=21xcuz0LPnv33U02572P --docker-email=isaac.johnson@gmail.com
secret/regsecret created
We can tag and push
$ docker images | grep hello-nodejs
hello-nodejs latest 1501959d6239 23 hours ago 96MB

$ docker tag 1501959d6239 privatecr.tpk.best/hello-nodejs

$ docker push privatecr.tpk.best/hello-nodejs
The push refers to repository [privatecr.tpk.best/hello-nodejs]
2ce599e13160: Pushed
069ca8a97008: Pushed
0a6041a7fd31: Pushed
f76c83bc9e0f: Pushed
97127063ab77: Pushed
b2a887c2bbf7: Pushed
f102ec27b4fb: Pushed
7570c7a796e3: Pushed
7c54597d2ce3: Pushed
8607b596bb79: Pushed
08d8e0925a73: Pushed
6ce16b164ed0: Pushed
d76ecd300100: Pushed
77cae8ab23bf: Pushed
latest: digest: sha256:4933415d9a733780675fc8d81b3295c609a0919e70a5c5ff17bc04b60d53d0d5 size: 3447


builder@DESKTOP-2SQ9NQM:~/Workspaces/openfaas$ cat hello-nodejs.yml
version: 1.0
provider:
  name: openfaas
  gateway: http://127.0.0.1:8080
functions:
  hello-nodejs:
    lang: node
    handler: ./hello-nodejs
    image: hello-nodejs:latest
To use our private registry, we’ll need to add a secret to the cluster kubernetes can use to login and pull the image:
$ kubectl create secret -n openfaas-fn docker-registry regcred --docker-server=https://privatecr.tpk.best/v2/ --docker-username=admin --docker-password=21xcuz0LPnv33U02572P --docker-email=isaac.johnson@gmail.com
Our new YAML file has an updated FQDN to the image in our private registry:
$ vi hello-nodejs.yml
$ cat hello-nodejs.yml
version: 1.0
provider:
  name: openfaas
  gateway: http://127.0.0.1:8080
functions:
  hello-nodejs:
    lang: node
    handler: ./hello-nodejs
    image: privatecr.tpk.best/hello-nodejs
    secrets:
     - regcred
Let’s test a full build and push to see everything is now working:
$ faas-cli build -f ./hello-nodejs.yml
[0] > Building hello-nodejs.
Clearing temporary build folder: ./build/hello-nodejs/
Preparing: ./hello-nodejs/ build/hello-nodejs/function
Building: privatecr.tpk.best/hello-nodejs:latest with node template. Please wait..
Sending build context to Docker daemon 10.24kB
Step 1/24 : FROM openfaas/classic-watchdog:0.18.1 as watchdog
 ---> 94b5e0bef891
Step 2/24 : FROM node:12.13.0-alpine as ship
 ---> 69c8cc9212ec
Step 3/24 : COPY --from=watchdog /fwatchdog /usr/bin/fwatchdog
 ---> Using cache
 ---> f8176e18b2b1
Step 4/24 : RUN chmod +x /usr/bin/fwatchdog
 ---> Using cache
 ---> 9983cdfdb98a
Step 5/24 : RUN addgroup -S app && adduser app -S -G app
 ---> Using cache
 ---> af8e34bde156
Step 6/24 : WORKDIR /root/
 ---> Using cache
 ---> 150762879e82
Step 7/24 : ENV NPM_CONFIG_LOGLEVEL warn
 ---> Using cache
 ---> 4ec83601c86c
Step 8/24 : RUN mkdir -p /home/app
 ---> Using cache
 ---> b5e1e6b0fcc2
Step 9/24 : WORKDIR /home/app
 ---> Using cache
 ---> e27730efc30f
Step 10/24 : COPY package.json ./
 ---> Using cache
 ---> 9a1f96619ea9
Step 11/24 : RUN npm i --production
 ---> Using cache
 ---> 97a8656d3d06
Step 12/24 : COPY index.js ./
 ---> Using cache
 ---> 9b7c8153543a
Step 13/24 : WORKDIR /home/app/function
 ---> Using cache
 ---> 81c2ff23c4e2
Step 14/24 : COPY function/*.json ./
 ---> Using cache
 ---> cf2016606eda
Step 15/24 : RUN npm i --production || :
 ---> Using cache
 ---> ba2bdd24b58a
Step 16/24 : COPY --chown=app:app function/ .
 ---> Using cache
 ---> 7a19f76a0282
Step 17/24 : WORKDIR /home/app/
 ---> Using cache
 ---> e17ddbaa8051
Step 18/24 : RUN chmod +rx -R ./function && chown app:app -R /home/app && chmod 777 /tmp
 ---> Using cache
 ---> 54a64c3435ea
Step 19/24 : USER app
 ---> Using cache
 ---> 2a26fd9763ec
Step 20/24 : ENV cgi_headers="true"
 ---> Using cache
 ---> 23cd257a6041
Step 21/24 : ENV fprocess="node index.js"
 ---> Using cache
 ---> ebd532230b5b
Step 22/24 : EXPOSE 8080
 ---> Using cache
 ---> 54228f2704f7
Step 23/24 : HEALTHCHECK --interval=3s CMD [-e /tmp/.lock] || exit 1
 ---> Using cache
 ---> 96b12e07f312
Step 24/24 : CMD ["fwatchdog"]
 ---> Using cache
 ---> 1501959d6239
Successfully built 1501959d6239
Successfully tagged privatecr.tpk.best/hello-nodejs:latest
Image: privatecr.tpk.best/hello-nodejs:latest built.
[0] < Building hello-nodejs done in 3.11s.
[0] Worker done.

Total build time: 3.11s


$ faas-cli push -f ./hello-nodejs.yml
[0] > Pushing hello-nodejs [privatecr.tpk.best/hello-nodejs:latest].
The push refers to repository [privatecr.tpk.best/hello-nodejs]
2ce599e13160: Layer already exists
069ca8a97008: Layer already exists
0a6041a7fd31: Layer already exists
f76c83bc9e0f: Layer already exists
97127063ab77: Layer already exists
b2a887c2bbf7: Layer already exists
f102ec27b4fb: Layer already exists
7570c7a796e3: Layer already exists
7c54597d2ce3: Layer already exists
8607b596bb79: Layer already exists
08d8e0925a73: Layer already exists
6ce16b164ed0: Layer already exists
d76ecd300100: Layer already exists
77cae8ab23bf: Layer already exists
latest: digest: sha256:4933415d9a733780675fc8d81b3295c609a0919e70a5c5ff17bc04b60d53d0d5 size: 3447
We may need to delete the last deployment:
$ faas-cli delete --gateway http://52.154.246.111:8080 -f ./hello-nodejs.yml
Deleting: hello-nodejs.openfaas-fn
Removing old function.
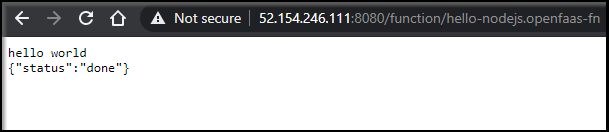
Now deploy and our function should be exposed:
$ faas-cli deploy --gateway http://52.154.246.111:8080 -f ./hello-nodejs.yml
Deploying: hello-nodejs.
WARNING! Communication is not secure, please consider using HTTPS. Letsencrypt.org offers free SSL/TLS certificates.

Deployed. 202 Accepted.
URL: http://52.154.246.111:8080/function/hello-nodejs.openfaas-fn

$ kubectl get pods -n openfaas-fn
NAME READY STATUS RESTARTS AGE
hello-nodejs-54c98c7857-whvvl 1/1 Running 0 39s
Now that it’s working, we can see how easy it is to create subsequent functions. Deploying a similar function:
$ cat hello-nodejs/handler.js
"use strict"

module.exports = async (context, callback) => {
    console.log('hello world2');
    return {status: "done"}
}
And build, push and deploy….
$ faas-cli build -f ./hello-nodejs.yml && faas-cli push -f ./hello-nodejs.yml && faas-cli deploy --gateway http://52.154.246.111:8080 -f ./hello-nodejs.yml
[0] > Building hello-nodejs2.
Clearing temporary build folder: ./build/hello-nodejs2/
Preparing: ./hello-nodejs/ build/hello-nodejs2/function
Building: privatecr.tpk.best/hello-nodejs2:latest with node template. Please wait..
Sending build context to Docker daemon 10.24kB
Step 1/24 : FROM openfaas/classic-watchdog:0.18.1 as watchdog
---> 94b5e0bef891
Step 2/24 : FROM node:12.13.0-alpine as ship
---> 69c8cc9212ec
Step 3/24 : COPY --from=watchdog /fwatchdog /usr/bin/fwatchdog
---> Using cache
---> f8176e18b2b1
Step 4/24 : RUN chmod +x /usr/bin/fwatchdog
---> Using cache
---> 9983cdfdb98a
Step 5/24 : RUN addgroup -S app && adduser app -S -G app
---> Using cache
---> af8e34bde156
Step 6/24 : WORKDIR /root/
---> Using cache
---> 150762879e82
Step 7/24 : ENV NPM_CONFIG_LOGLEVEL warn
---> Using cache
---> 4ec83601c86c
Step 8/24 : RUN mkdir -p /home/app
---> Using cache
---> b5e1e6b0fcc2
Step 9/24 : WORKDIR /home/app
---> Using cache
---> e27730efc30f
Step 10/24 : COPY package.json ./
---> Using cache
---> 9a1f96619ea9
Step 11/24 : RUN npm i --production
---> Using cache
---> 97a8656d3d06
Step 12/24 : COPY index.js ./
---> Using cache
---> 9b7c8153543a
Step 13/24 : WORKDIR /home/app/function
---> Using cache
---> 81c2ff23c4e2
Step 14/24 : COPY function/*.json ./
---> Using cache
---> cf2016606eda
Step 15/24 : RUN npm i --production || :
---> Using cache
---> ba2bdd24b58a
Step 16/24 : COPY --chown=app:app function/ .
---> d4d64d848152
Step 17/24 : WORKDIR /home/app/
---> Running in a2d2c70feb85
Removing intermediate container a2d2c70feb85
---> 46ba33c220d7
Step 18/24 : RUN chmod +rx -R ./function && chown app:app -R /home/app && chmod 777 /tmp
---> Running in e414b3a8b2d4
Removing intermediate container e414b3a8b2d4
---> ddd07f65151d
Step 19/24 : USER app
---> Running in 4fe680df9845
Removing intermediate container 4fe680df9845
---> 6afb4c1c314c
Step 20/24 : ENV cgi_headers="true"
---> Running in 25db427f9144
Removing intermediate container 25db427f9144
---> 34f55992bf7c
Step 21/24 : ENV fprocess="node index.js"
---> Running in 95a02ae0b486
Removing intermediate container 95a02ae0b486
---> 0d53335cfe0e
Step 22/24 : EXPOSE 8080
---> Running in 673c1b132374
Removing intermediate container 673c1b132374
---> f761faa62435
Step 23/24 : HEALTHCHECK --interval=3s CMD [-e /tmp/.lock] || exit 1
---> Running in 65268e2014d6
Removing intermediate container 65268e2014d6
---> b625d64a5a77
Step 24/24 : CMD ["fwatchdog"]
---> Running in cc0f2b305257
Removing intermediate container cc0f2b305257
---> 488daa130274
Successfully built 488daa130274
Successfully tagged privatecr.tpk.best/hello-nodejs2:latest
Image: privatecr.tpk.best/hello-nodejs2:latest built.
[0] < Building hello-nodejs2 done in 5.83s.
[0] Worker done.
Total build time: 5.83s
[0] > Pushing hello-nodejs2 [privatecr.tpk.best/hello-nodejs2:latest].
The push refers to repository [privatecr.tpk.best/hello-nodejs2]
b4bfed393ebd: Pushed
97e48e94629a: Pushed
0a6041a7fd31: Mounted from hello-nodejs
f76c83bc9e0f: Mounted from hello-nodejs
97127063ab77: Mounted from hello-nodejs
b2a887c2bbf7: Mounted from hello-nodejs
f102ec27b4fb: Mounted from hello-nodejs
7570c7a796e3: Mounted from hello-nodejs
7c54597d2ce3: Mounted from hello-nodejs
8607b596bb79: Mounted from hello-nodejs
08d8e0925a73: Mounted from hello-nodejs
6ce16b164ed0: Mounted from hello-nodejs
d76ecd300100: Mounted from hello-nodejs
77cae8ab23bf: Mounted from hello-nodejs
latest: digest: sha256:5f92dbd2f5b863f513cb86f08b0b783ff90f5750b00488a46197be2f71cddddb size: 3447
[0] < Pushing hello-nodejs2 [privatecr.tpk.best/hello-nodejs2:latest] done.
[0] Worker done.
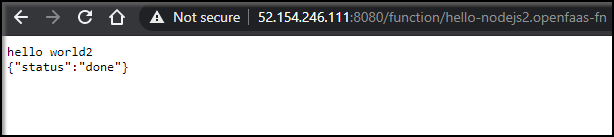
Deploying: hello-nodejs2.
WARNING! Communication is not secure, please consider using HTTPS. Letsencrypt.org offers free SSL/TLS certificates.
Deployed. 202 Accepted.
URL: http://52.154.246.111:8080/function/hello-nodejs2.openfaas-fn
We can see both functions running now:
$ kubectl get pods -n openfaas-fn
NAME READY STATUS RESTARTS AGE
hello-nodejs-54c98c7857-whvvl 1/1 Running 0 12m
hello-nodejs2-6dbc4bffcc-7k7kf 1/1 Running 0 2m27s
Summary
I like the active nature of OpenFaaS and really appreciate the ease of using Arkade to install common tooling like the Dashboard, DataDog or a private registry.
Of the tooling we looked at so far, OpenFaaS is in the same lane as Kubeless - creating containers and real deployments for us - things we could expose with native kubernetes ingress routes - but also persistent bespoke containers.