

Published: Jan 26, 2020 by Isaac Johnson
When using kubernetes, one piece that always goes hand-in-hand is the container registry. often when we talk about bringing up a cluster, there is the implicit assumption that the registry is “someone else’s problem”; be it public images on docker hub, or quayor gcr.io.
Perhaps you’re in an organization content to leverage the artifact management suite and stuff images in Nexus or Artifactory. Even Gitlab now bundles a container registry.
But what about situations where you cannot do that; either you are without a “free” host, in an isolation environment, or perhaps, just for speed, keeping the containers with the container scheduling platform would be far more performant.
Getting a K8s cluster (AKS)
You can use whatever cluster system you want. For this demo, we’ll be using RBAC enabled 1.14 in Azure Kuberenetes Service.
First, login to Azure with the CLI
$ az login
Note, we have launched a browser for you to login. For old experience with device code, use "az login --use-device-code"
You have logged in. Now let us find all the subscriptions to which you have access...
[
  {
    "cloudName": "AzureCloud",
    "id": "d955c0ba-13dc-44cf-a29a-8fed74cbb22d",
    "isDefault": true,
    "name": "Pay-As-You-Go",
    "state": "Enabled",
    "tenantId": "28c575f6-ade1-4838-8e7c-7e6d1ba0eb4a",
    "user": {
      "name": "isaac.johnson@gmail.com",
      "type": "user"
    }
  }
]
Next, in Azure all things go in a Resource Group, so let’s create that
$ az group create -n idjselfhostedcrrg --location centralus
{
  "id": "/subscriptions/d955c0ba-13dc-44cf-a29a-8fed74cbb22d/resourceGroups/idjselfhostedcrrg",
  "location": "centralus",
  "managedBy": null,
  "name": "idjselfhostedcrrg",
  "properties": {
    "provisioningState": "Succeeded"
  },
  "tags": null,
  "type": "Microsoft.Resources/resourceGroups"
}

Now, for expediency, let’s just create the AKS cluster from the command line (instead of UI or terraform):
$ az aks create -g idjselfhostedcrrg -n idjquickaks01 --ssh-key-value /Users/johnsi10/.ssh/id_rsa.pub --kubernetes-version 1.14.8 --node-count 2
Running…
If the create step is taking time (does for me at times), you can use another window to monitor progress:
$ az aks list -o table
Name Location ResourceGroup KubernetesVersion ProvisioningState Fqdn
------------- ---------- ----------------- ------------------- ------------------- -------------------------------------------------------------------
idjquickaks01 centralus idjselfhostedcrrg 1.14.8 Creating idjquickak-idjselfhostedcrr-d955c0-47dba0d3.hcp.centralus.azmk8s.io
JOHNSI10-M1:~ johnsi10$
When done, we’ll see it succeeded in the table.
$ az aks list -o table
Name Location ResourceGroup KubernetesVersion ProvisioningState Fqdn
------------- ---------- ----------------- ------------------- ------------------- -------------------------------------------------------------------
idjquickaks01 centralus idjselfhostedcrrg 1.14.8 Succeeded idjquickak-idjselfhostedcrr-d955c0-47dba0d3.hcp.centralus.azmk8s.io
Next we need to get the kubeconfig to be used by kubectl and helm and verify our connection (i usually check the nodes)
$ az aks get-credentials -n idjquickaks01 -g idjselfhostedcrrg --admin
Merged "idjquickaks01-admin" as current context in /Users/johnsi10/.kube/config

$ kubectl get nodes
NAME STATUS ROLES AGE VERSION
aks-nodepool1-30223684-vmss000000 Ready agent 2m44s v1.14.8
aks-nodepool1-30223684-vmss000001 Ready agent 2m40s v1.14.8

Since AKS 1.14.x, by default, isn’t RBAC’ed, we can just init to install tiller…
Even though i didn’t specify RBAC, it became apparent that it’s the default now:
builder@DESKTOP-JBA79RT:~$ helm install stable/nginx-ingress --name nginxingress --set rbac.create=true,controller.hostNetwork=true,controller.daemonset.useHostPort=true,dnsPolicy=ClusterFirstWithHostNet,controller.kind=DaemonSet
Error: release nginxingress failed: namespaces "default" is forbidden: User "system:serviceaccount:kube-system:default" cannot get resource "namespaces" in API group "" in the namespace "default"
Set up RBAC for AKS (please note the tiller image version):
builder@DESKTOP-JBA79RT:~$ cat rbac-config.yaml
apiVersion: v1
kind: ServiceAccount
metadata:
  name: tiller
  namespace: kube-system
---
apiVersion: rbac.authorization.k8s.io/v1
kind: ClusterRoleBinding
metadata:
  name: tiller
roleRef:
  apiGroup: rbac.authorization.k8s.io
  kind: ClusterRole
  name: cluster-admin
subjects:
  - kind: ServiceAccount
    name: tiller
    namespace: kube-system

builder@DESKTOP-JBA79RT:~$ kubectl apply -f rbac-config.yaml
serviceaccount/tiller created
clusterrolebinding.rbac.authorization.k8s.io/tiller created


builder@DESKTOP-JBA79RT:~$ cat helm_init.yaml
---
apiVersion: apps/v1
kind: Deployment
metadata:
  creationTimestamp: null
  labels:
    app: helm
    name: tiller
  name: tiller-deploy
  namespace: kube-system
spec:
  replicas: 1
  strategy: {}
  selector:
    matchLabels:
      app: helm
      name: tiller
  template:
    metadata:
      creationTimestamp: null
      labels:
        app: helm
        name: tiller
    spec:
      automountServiceAccountToken: true
      containers:
      - env:
        - name: TILLER_NAMESPACE
          value: kube-system
        - name: TILLER_HISTORY_MAX
          value: "200"
        image: gcr.io/kubernetes-helm/tiller:v2.16.1
        imagePullPolicy: IfNotPresent
        livenessProbe:
          httpGet:
            path: /liveness
            port: 44135
          initialDelaySeconds: 1
          timeoutSeconds: 1
        name: tiller
        ports:
        - containerPort: 44134
          name: tiller
        - containerPort: 44135
          name: http
        readinessProbe:
          httpGet:
            path: /readiness
            port: 44135
          initialDelaySeconds: 1
          timeoutSeconds: 1
        resources: {}
      serviceAccountName: tiller
status: {}

---
apiVersion: v1
kind: Service
metadata:
  creationTimestamp: null
  labels:
    app: helm
    name: tiller
  name: tiller-deploy
  namespace: kube-system
spec:
  ports:
  - name: tiller
    port: 44134
    targetPort: tiller
  selector:
    app: helm
    name: tiller
  type: ClusterIP
status:
  loadBalancer: {}

$ kubectl apply -f helm_init.yaml
You’ll see i used image: gcr.io/kubernetes-helm/tiller:v2.16.1. That’s because on this host, the local helm was the latest 2.* version. You want Helm and Tiller to match up.
If you did as I did and launched “helm init” assuming RBAC was disabled, you’ll see a warning and evidence that it is terminating the old tiller pod:
builder@DESKTOP-JBA79RT:~$ kubectl apply -f helm_init.yaml
Warning: kubectl apply should be used on resource created by either kubectl create --save-config or kubectl apply
deployment.apps/tiller-deploy configured
Warning: kubectl apply should be used on resource created by either kubectl create --save-config or kubectl apply
service/tiller-deploy configured
builder@DESKTOP-JBA79RT:~$ kubectl get pods --all-namespaces
NAMESPACE NAME READY STATUS RESTARTS AGE
kube-system coredns-7fc597cc45-grj6p 1/1 Running 0 63m
kube-system coredns-7fc597cc45-k5sv7 1/1 Running 0 67m
kube-system coredns-autoscaler-7ccc76bfbd-tkjch 1/1 Running 0 67m
kube-system kube-proxy-8z8vp 1/1 Running 0 64m
kube-system kube-proxy-lvbjr 1/1 Running 0 62m
kube-system kube-proxy-nq5p9 1/1 Running 0 64m
kube-system kubernetes-dashboard-cc4cc9f58-vwfbt 1/1 Running 0 67m
kube-system metrics-server-58b6fcfd54-9hccf 1/1 Running 0 67m
kube-system tiller-deploy-b48f8ff76-wsz6q 1/1 Running 0 22s
kube-system tiller-deploy-dc4f6cccd-st96s 0/1 Terminating 0 10m
kube-system tunnelfront-784656988f-vwdxz 1/1 Running 0 67m

Installing NGINX Ingress Controller
builder@DESKTOP-JBA79RT:~$ helm version
Client: &version.Version{SemVer:"v2.16.1", GitCommit:"bbdfe5e7803a12bbdf97e94cd847859890cf4050", GitTreeState:"clean"}
Server: &version.Version{SemVer:"v2.16.1", GitCommit:"bbdfe5e7803a12bbdf97e94cd847859890cf4050", GitTreeState:"clean"}
builder@DESKTOP-JBA79RT:~$
builder@DESKTOP-JBA79RT:~$
builder@DESKTOP-JBA79RT:~$ helm install stable/nginx-ingress --name nginxingress --set rbac.create=true,controller.hostNetwork=true,controller.daemonset.useHostPort=true,dnsPolicy=ClusterFirstWithHostNet,controller.kind=DaemonSet
NAME: nginxingress
LAST DEPLOYED: Sat Jan 25 14:14:21 2020
NAMESPACE: default
STATUS: DEPLOYED

RESOURCES:
==> v1/ClusterRole
NAME AGE
nginxingress-nginx-ingress 1s

==> v1/ClusterRoleBinding
NAME AGE
nginxingress-nginx-ingress 1s

==> v1/DaemonSet
NAME AGE
nginxingress-nginx-ingress-controller 1s

==> v1/Deployment
NAME AGE
nginxingress-nginx-ingress-default-backend 1s

==> v1/Pod(related)
NAME AGE
nginxingress-nginx-ingress-controller-5gtcq 1s
nginxingress-nginx-ingress-controller-p79kn 1s
nginxingress-nginx-ingress-controller-rdvz7 1s
nginxingress-nginx-ingress-default-backend-7b577b7bd6-cw25f 1s

==> v1/Role
NAME AGE
nginxingress-nginx-ingress 1s

==> v1/RoleBinding
NAME AGE
nginxingress-nginx-ingress 1s

==> v1/Service
NAME AGE
nginxingress-nginx-ingress-controller 1s
nginxingress-nginx-ingress-default-backend 1s

==> v1/ServiceAccount
NAME AGE
nginxingress-nginx-ingress 1s
nginxingress-nginx-ingress-backend 1s


NOTES:
The nginx-ingress controller has been installed.
It may take a few minutes for the LoadBalancer IP to be available.
You can watch the status by running 'kubectl --namespace default get services -o wide -w nginxingress-nginx-ingress-controller'

An example Ingress that makes use of the controller:

  apiVersion: extensions/v1beta1
  kind: Ingress
  metadata:
    annotations:
      kubernetes.io/ingress.class: nginx
    name: example
    namespace: foo
  spec:
    rules:
      - host: www.example.com
        http:
          paths:
            - backend:
                serviceName: exampleService
                servicePort: 80
              path: /
    # This section is only required if TLS is to be enabled for the Ingress
    tls:
        - hosts:
            - www.example.com
          secretName: example-tls

If TLS is enabled for the Ingress, a Secret containing the certificate and key must also be provided:

  apiVersion: v1
  kind: Secret
  metadata:
    name: example-tls
    namespace: foo
  data:
    tls.crt: <base64 encoded cert>
    tls.key: <base64 encoded key>
  type: kubernetes.io/tls
Certificate Manager
Next, we need to setup the cert manager:
builder@DESKTOP-JBA79RT:~$ kubectl apply -f https://raw.githubusercontent.com/jetstack/cert-manager/release-0.9/deploy/manifests/00-crds.yaml
customresourcedefinition.apiextensions.k8s.io/certificates.certmanager.k8s.io created
customresourcedefinition.apiextensions.k8s.io/certificaterequests.certmanager.k8s.io created
customresourcedefinition.apiextensions.k8s.io/challenges.certmanager.k8s.io created
customresourcedefinition.apiextensions.k8s.io/clusterissuers.certmanager.k8s.io created
customresourcedefinition.apiextensions.k8s.io/issuers.certmanager.k8s.io created
customresourcedefinition.apiextensions.k8s.io/orders.certmanager.k8s.io created
Now, create a namespace and disable cert-manager validation with a label on said namespace:
builder@DESKTOP-JBA79RT:~$ kubectl create namespace cert-manager namespace/cert-manager created
builder@DESKTOP-JBA79RT:~$ kubectl describe namespace cert-manager
Name: cert-manager
Labels: <none>
Annotations: <none>
Status: Active

No resource quota.

No resource limits.
builder@DESKTOP-JBA79RT:~$ kubectl label namespace cert-manager certmanager.k8s.io/disable-validation=true
namespace/cert-manager labeled
builder@DESKTOP-JBA79RT:~$ kubectl describe namespace cert-manager
Name: cert-manager
Labels: certmanager.k8s.io/disable-validation=true
Annotations: <none>
Status: Active

No resource quota.

No resource limits.
Installing the Cert Manager
builder@DESKTOP-JBA79RT:~$ helm repo add jetstack https://charts.jetstack.io
"jetstack" has been added to your repositories
builder@DESKTOP-JBA79RT:~$ helm repo update
Hang tight while we grab the latest from your chart repositories...
...Skip local chart repository
...Successfully got an update from the "jetstack" chart repository
...Successfully got an update from the "stable" chart repository
Update Complete.
builder@DESKTOP-JBA79RT:~$ helm install --name cert-manager --namespace cert-manager --version v0.9.1 jetstack/cert-manager
NAME: cert-manager
LAST DEPLOYED: Sat Jan 25 14:48:19 2020
NAMESPACE: cert-manager
STATUS: DEPLOYED

RESOURCES:
==> v1/ClusterRole
NAME AGE
cert-manager-edit 1s
cert-manager-view 1s
cert-manager-webhook:webhook-requester 1s

==> v1/Deployment
NAME AGE
cert-manager 1s
cert-manager-cainjector 1s
cert-manager-webhook 1s

==> v1/Pod(related)
NAME AGE
cert-manager-5b9ff77b7-fb6dz 1s
cert-manager-cainjector-59d69b9b-fkbhp 1s
cert-manager-webhook-cfd6587ff-dbc2n 1s

==> v1/Service
NAME AGE
cert-manager-webhook 1s

==> v1/ServiceAccount
NAME AGE
cert-manager 1s
cert-manager-cainjector 1s
cert-manager-webhook 1s

==> v1alpha1/Certificate
NAME AGE
cert-manager-webhook-ca 1s
cert-manager-webhook-webhook-tls 1s

==> v1alpha1/Issuer
NAME AGE
cert-manager-webhook-ca 1s
cert-manager-webhook-selfsign 1s

==> v1beta1/APIService
NAME AGE
v1beta1.admission.certmanager.k8s.io 1s

==> v1beta1/ClusterRole
NAME AGE
cert-manager-cainjector 1s
cert-manager-controller-certificates 1s
cert-manager-controller-challenges 1s
cert-manager-controller-clusterissuers 1s
cert-manager-controller-ingress-shim 1s
cert-manager-controller-issuers 1s
cert-manager-controller-orders 1s
cert-manager-leaderelection 1s

==> v1beta1/ClusterRoleBinding
NAME AGE
cert-manager-cainjector 1s
cert-manager-controller-certificates 1s
cert-manager-controller-challenges 1s
cert-manager-controller-clusterissuers 1s
cert-manager-controller-ingress-shim 1s
cert-manager-controller-issuers 1s
cert-manager-controller-orders 1s
cert-manager-leaderelection 1s
cert-manager-webhook:auth-delegator 1s

==> v1beta1/RoleBinding
NAME AGE
cert-manager-webhook:webhook-authentication-reader 1s

==> v1beta1/ValidatingWebhookConfiguration
NAME AGE
cert-manager-webhook 1s


NOTES:
cert-manager has been deployed successfully!

In order to begin issuing certificates, you will need to set up a ClusterIssuer
or Issuer resource (for example, by creating a 'letsencrypt-staging' issuer).

More information on the different types of issuers and how to configure them
can be found in our documentation:

https://docs.cert-manager.io/en/latest/reference/issuers.html

For information on how to configure cert-manager to automatically provision
Certificates for Ingress resources, take a look at the `ingress-shim`
documentation:

https://docs.cert-manager.io/en/latest/reference/ingress-shim.html
Now that that the cert manager is setup, we need to create an Issuer. This abstraction is there because perhaps you use Vault or a proper CA or Venefi. “ACME” is shorthand for Let’s Encrypt which will give use SSL certs for free (some limitations apply).
builder@DESKTOP-JBA79RT:~$ cat issuer.yaml
apiVersion: certmanager.k8s.io/v1alpha1
kind: ClusterIssuer
metadata:
  name: letsencrypt-prod
  namespace: default
spec:
  acme:
    # The ACME server URL
    server: https://acme-v02.api.letsencrypt.org/directory
    # Email address used for ACME registration
    email: isaac.johnson@gmail.com
    # Name of a secret used to store the ACME account private key
    privateKeySecretRef:
      name: letsencrypt-prod
    # Enable the HTTP-01 challenge provider
    solvers:
    - http01:
        ingress:
          class: nginx
builder@DESKTOP-JBA79RT:~$ kubectl apply -f issuer.yaml
clusterissuer.certmanager.k8s.io/letsencrypt-prod created
I do want to take a moment and say that LI Prod has limitations - per hour per day. etc. But it does give a totally valid signed SSL.
If you are testing these steps and don’t really want to hit any limits. There is a “staging” environment that has something like 50k / day/ email request limits you can bang on. And the only real difference is the CA isn’t a globally valid one. From their description:
The staging environment intermediate certificate (“Fake LE Intermediate X1”) is issued by a root certificate not present in browser/client trust stores. If you wish to modify a test-only client to trust the staging environment for testing purposes you can do so by adding the “Fake LE Root X1” certificate to your testing trust store. Important: Do not add the staging root or intermediate to a trust store that you use for ordinary browsing or other activities, since they are not audited or held to the same standards as our production roots, and so are not safe to use for anything other than testing.
If you want to use staging, just change the server line:
server: https://acme-staging-v02.api.letsencrypt.org/directory
Setting up DNS
The next step is to create a the actual DNS name to point to our ingress controllers public IP:
First, get our external IP:
builder@DESKTOP-JBA79RT:~$ kubectl get svc --all-namespaces
NAMESPACE NAME TYPE CLUSTER-IP EXTERNAL-IP PORT(S) AGE
cert-manager cert-manager-webhook ClusterIP 10.0.231.152 <none> 443/TCP 8m
default kubernetes ClusterIP 10.0.0.1 <none> 443/TCP 110m
default nginxingress-nginx-ingress-controller LoadBalancer 10.0.178.83 23.99.200.252 80:32425/TCP,443:30876/TCP 41m
default nginxingress-nginx-ingress-default-backend ClusterIP 10.0.52.243 <none> 80/TCP 41m
kube-system kube-dns ClusterIP 10.0.0.10 <none> 53/UDP,53/TCP 110m
kube-system kubernetes-dashboard ClusterIP 10.0.180.155 <none> 80/TCP 110m
kube-system metrics-server ClusterIP 10.0.69.98 <none> 443/TCP 110m
kube-system tiller-deploy ClusterIP 10.0.187.108 <none> 44134/TCP 53m
Now set an A pointer over to it via your DNS provider (i’ll use Linode this time): registry.tpk.pw → 23.99.200.252

once set:

If you want to use AWS, for instance, you would create a Route 53 entry in much the same way:

Create the Private Registry deployment
First we’ll need to create a login user:
JOHNSI10-M1:loc-tool johnsi10$ export PASSWD=example123
JOHNSI10-M1:loc-tool johnsi10$ export USER=admin

JOHNSI10-M1:loc-tool johnsi10$ echo $USER > registry-creds.txt
JOHNSI10-M1:loc-tool johnsi10$ echo $PASSWD >> registry-creds.txt
JOHNSI10-M1:loc-tool johnsi10$ docker run --entrypoint htpasswd registry:2 -Bbn $USER $PASSWD > ./htpasswd
Unable to find image 'registry:2' locally
2: Pulling from library/registry
486039affc0a: Pulling fs layer
ba51a3b098e6: Pulling fs layer
8bb4c43d6c8e: Pulling fs layer
6f5f453e5f2d: Pulling fs layer
42bc10b72f42: Pulling fs layer
6f5f453e5f2d: Waiting
42bc10b72f42: Waiting
ba51a3b098e6: Download complete
486039affc0a: Verifying Checksum
486039affc0a: Download complete
8bb4c43d6c8e: Verifying Checksum
8bb4c43d6c8e: Download complete
6f5f453e5f2d: Verifying Checksum
6f5f453e5f2d: Download complete
42bc10b72f42: Verifying Checksum
42bc10b72f42: Download complete
486039affc0a: Pull complete
ba51a3b098e6: Pull complete
8bb4c43d6c8e: Pull complete
6f5f453e5f2d: Pull complete
42bc10b72f42: Pull complete
Digest: sha256:7d081088e4bfd632a88e3f3bcd9e007ef44a796fddfe3261407a3f9f04abe1e7
Status: Downloaded newer image for registry:2
If, perhaps by mistake, you lost the password, you can use the running container to do the same thing:
builder@DESKTOP-2SQ9NQM:/mnt/c/Users/isaac/Desktop$ kubectl exec -it private-registry-docker-registry-5b44f88984-wf6p8 /bin/sh
/ $ htpasswd -Bbn admin admin123
/ $ exit
admin:$2y$05$rFXN0CD1uxfT65cOuJQsKuv2ofSkLal0XqCIx9pnUzE4V5gZdOZKW
builder@DESKTOP-2SQ9NQM:/mnt/c/Users/isaac/Desktop$ cat htpasswd | base64
YWRtaW46JDJ5JDA1JHJGWE4wQ0QxdXhmVDY1Y091SlFzS3V2Mm9mU2tMYWwwWHFDSXg5cG5VekU0
VjVnWmRPWktXCgo=
If you are changing it on a running instance, do the following:
[1] get the old yaml to a file
$ kubectl get secret private-registry-docker-registry-secret -o yaml > private-registry-docker-registry-secret.yaml
[2] edit the yaml and save the htpassword var to match the one from above
builder@DESKTOP-2SQ9NQM:/mnt/c/Users/isaac/Desktop$ vi private-registry-docker-registry-secret.yaml
$ cat private-registry-docker-registry-secret.yaml
apiVersion: v1
data:
  haSharedSecret: aWNyUXk0ZUNONUkzRHVXQQ==
  htpasswd: YWRtaW46JDJ5JDA1JHJGWE4wQ0QxdXhmVDY1Y091SlFzS3V2Mm9mU2tMYWwwWHFDSXg5cG5VekU0VjVnWmRPWktXCgo=
kind: Secret
metadata:
  creationTimestamp: "2020-01-25T21:05:46Z"
  labels:
    app: docker-registry
    chart: docker-registry-1.9.1
    heritage: Tiller
    release: private-registry
  name: private-registry-docker-registry-secret
  namespace: default
  resourceVersion: "13095"
  selfLink: /api/v1/namespaces/default/secrets/private-registry-docker-registry-secret
  uid: 74f04e6d-3fb6-11ea-9b92-1a7820dbcd4e
type: Opaque
builder@DESKTOP-2SQ9NQM:/mnt/c/Users/isaac/Desktop$ kubectl apply -f ./private-registry-docker-registry-secret.yaml
Warning: kubectl apply should be used on resource created by either kubectl create --save-config or kubectl apply
secret/private-registry-docker-registry-secret configured
[3] bounce the pod to make it take in the new value (from the configmap)
$ kubectl delete pod private-registry-docker-registry-5b44f88984-wf6p8
pod "private-registry-docker-registry-5b44f88984-wf6p8" deleted
If you aren’t changing it, now is the time to launch the registry:
$ helm install stable/docker-registry --name private-registry --namespace default --set persistence.enabled=false --set secrets.htpasswd=$(cat ./htpasswd)
The Ingress
I want to say, this step took me the longest. I’ve been spending a few days actually trying to figure out why I just couldnt get the certs signed; checking pod logs, trying a variety of DNS hosts (DO, Linode, AWS). In the end, it was stoopid annotations.
What you need to realize are two things:
- Annotations have quotes. Anyone who says otherwise is a dirty liar or showing you output from their console (where kubectl nicely trims them off).
- If you don’t have an issuer there (because they were trimmed off), the webhook and Cert service will ignore your Ingress request.
-
The “body size” is passed onto the Nginx controller. Which means when i first did “50m” and later “90m” and “150m”.. it stops containers of sizes that exceed that!. The way to say “proxy all the damn bits!” is to set the value to zero.
builder@DESKTOP-JBA79RT:~$ cat ingress.yaml — apiVersion: extensions/v1beta1 kind: Ingress metadata: name: registry namespace: default annotations: certmanager.k8s.io/cluster-issuer: “letsencrypt-prod” kubernetes.io/ingress.class: “nginx” nginx.ingress.kubernetes.io/proxy-body-size: “0” nginx.ingress.kubernetes.io/proxy-read-timeout: “900” nginx.ingress.kubernetes.io/proxy-send-timeout: “900” labels: app: docker-registry spec: tls:
- hosts:
- cregistry4.freshbrewed.science secretName: cregistry4.freshbrewed.science-cert rules:
- host: cregistry4.freshbrewed.science
http:
paths:
- path: / backend: serviceName: private-registry-docker-registry servicePort: 5000
builder@DESKTOP-JBA79RT:~$ kubectl apply -f ingress.yaml ingress.extensions/registry created
- hosts:
Verifying it got the certificate
You can check that the ingress resolves:
builder@DESKTOP-JBA79RT:~/Workspaces$ kubectl get ingress --all-namespaces
NAMESPACE NAME HOSTS ADDRESS PORTS AGE
default registry cregistry4.freshbrewed.science 80, 443 20h
And also see the certs are listed:
builder@DESKTOP-JBA79RT:~/Workspaces$ kubectl get cert --all-namespaces
NAMESPACE NAME READY SECRET AGE
cert-manager cert-manager-webhook-ca True cert-manager-webhook-ca 22h
cert-manager cert-manager-webhook-webhook-tls True cert-manager-webhook-webhook-tls 22h
default cregistry4.freshbrewed.science-cert True cregistry4.freshbrewed.science-cert 20h


builder@DESKTOP-JBA79RT:~$ kubectl get cert
NAME READY SECRET AGE
cregistry4.freshbrewed.science-cert True cregistry4.freshbrewed.science-cert 4m29s
It’s that last that took a few (between 1m and 7m was my experience)
Requesting a Certificate Manually
You shouldn’t need this, but in case you were curious
apiVersion: certmanager.k8s.io/v1alpha1
kind: Certificate
metadata:
  name: cregistry4-freshbrewed-science
  namespace: default
spec:
  secretName: cregistry4.freshbrewed.science-cert
  issuerRef:
    name: letsencrypt-prod
    kind: ClusterIssuer
  commonName: cregistry4.freshbrewed.science
  dnsNames:
  - cregistry4.freshbrewed.science
  acme:
    config:
    - http01:
        ingressClass: nginx
      domains:
      - cregistry4.freshbrewed.science
Verification via web browser
we can also verify our cert is now valid in that the lock icon in the browser of your choice is good (no self signed anymore). You can view Cert details to see the Let’s Encrypt CA

Testing the Container Registry
We should now be able to login to the container registry from docker.
builder@DESKTOP-2SQ9NQM:/mnt/c/Users/isaac/Desktop$ export PASSWD=admin123
builder@DESKTOP-2SQ9NQM:/mnt/c/Users/isaac/Desktop$ echo $PASSWD | docker login cregistry4.freshbrewed.science --user
name admin --password-stdin
WARNING! Your password will be stored unencrypted in /home/builder/.docker/config.json.
Configure a credential helper to remove this warning. See
https://docs.docker.com/engine/reference/commandline/login/#credentials-store

Login Succeeded
Now, while i have docker on WSL but its not running (limitation of my distro right now). So if you have Window 10 home or no actually docker service running, trying to list images will catch you up.
builder@DESKTOP-2SQ9NQM:/mnt/c/Users/isaac/Desktop$ docker images
Cannot connect to the Docker daemon at unix:///var/run/docker.sock. Is the docker daemon running?
builder@DESKTOP-2SQ9NQM:/mnt/c/Users/isaac/Desktop$ docker -v
Docker version 18.09.7, build 2d0083d
For my purposes, I installed docker desktop on my laptop so i could do the rest.
C:\Users\isaac>docker login cregistry4.freshbrewed.science
Username: admin
Password:
Login Succeeded

C:\Users\isaac>docker pull hello-world
Using default tag: latest
latest: Pulling from library/hello-world
1b930d010525: Pull complete
Digest: sha256:9572f7cdcee8591948c2963463447a53466950b3fc15a247fcad1917ca215a2f
Status: Downloaded newer image for hello-world:latest
docker.io/library/hello-world:latest

C:\Users\isaac>docker images
REPOSITORY TAG IMAGE ID CREATED SIZE
hello-world latest fce289e99eb9 13 months ago 1.84kB

C:\Users\isaac>docker tag hello-world:latest cregistry4.freshbrewed.science/hello-world

C:\Users\isaac>docker push cregistry4.freshbrewed.science/hello-world
The push refers to repository [cregistry4.freshbrewed.science/hello-world]
af0b15c8625b: Pushed
latest: digest: sha256:92c7f9c92844bbbb5d0a101b22f7c2a7949e40f8ea90c8b3bc396879d95e899a size: 524
I should note that i setup my ingress with “90m” for the nginx.ingress.kubernetes.io/proxy-body-size which meant smaller images were fine:
latest: Pulling from library/ubuntu
5c939e3a4d10: Pull complete
c63719cdbe7a: Pull complete
19a861ea6baf: Pull complete
651c9d2d6c4f: Pull complete
Digest: sha256:8d31dad0c58f552e890d68bbfb735588b6b820a46e459672d96e585871acc110
Status: Downloaded newer image for ubuntu:latest
docker.io/library/ubuntu:latest

C:\Users\isaac>docker images
REPOSITORY TAG IMAGE ID CREATED SIZE
ubuntu latest ccc6e87d482b 10 days ago 64.2MB
cregistry4.freshbrewed.science/hello-world latest fce289e99eb9 13 months ago 1.84kB
hello-world latest fce289e99eb9 13 months ago 1.84kB

C:\Users\isaac>docker tag ubuntu:latest cregistry4.freshbrewed.science/ubuntu:latest

C:\Users\isaac>docker push cregistry4.freshbrewed.science/ubuntu:latest
The push refers to repository [cregistry4.freshbrewed.science/ubuntu]
f55aa0bd26b8: Pushed
1d0dfb259f6a: Pushed
21ec61b65b20: Pushed
43c67172d1d1: Pushed
latest: digest: sha256:bc025862c3e8ec4a8754ea4756e33da6c41cba38330d7e324abd25c8e0b93300 size: 1152
but the moment i tried something big and husky, like Nexus, it vomited it back.
sonatype/nexus3 latest 87d9a097d22c 5 weeks ago 634MB
cregistry4.freshbrewed.science/hello-world latest fce289e99eb9 13 months ago 1.84kB
hello-world latest fce289e99eb9 13 months ago 1.84kB

C:\Users\isaac>docker tag sonatype/nexus3 cregistry4.freshbrewed.science/sonatype/nexus3

C:\Users\isaac>docker push cregistry4.freshbrewed.science/sonatype/nexus3
The push refers to repository [cregistry4.freshbrewed.science/sonatype/nexus3]
12c1ac852ced: Pushing [==================================================>] 403.7MB/403.7MB
258f7001b906: Pushed
4bd7408cc1c8: Pushed
c630f5c3e169: Pushing [===========================================>] 201.2MB/230.8MB
error parsing HTTP 413 response body: invalid character '<' looking for beginning of value: "<html>\r\n<head><title>413 Request Entity Too Large</title></head>\r\n<body>\r\n<center><h1>413 Request Entity Too Large</h1></center>\r\n<hr><center>openresty/1.15.8.2</center>\r\n</body>\r\n</html>\r\n"

C:\Users\isaac>docker push cregistry4.freshbrewed.science/sonatype/nexus3
The push refers to repository [cregistry4.freshbrewed.science/sonatype/nexus3]
12c1ac852ced: Pushing [==================================================>] 403.7MB/403.7MB
258f7001b906: Layer already exists
4bd7408cc1c8: Layer already exists
c630f5c3e169: Pushed
error parsing HTTP 413 response body: invalid character '<' looking for beginning of value: "<html>\r\n<head><title>413 Request Entity Too Large</title></head>\r\n<body>\r\n<center><h1>413 Request Entity Too Large</h1></center>\r\n<hr><center>openresty/1.15.8.2</center>\r\n</body>\r\n</html>\r\n"

C:\Users\isaac>docker push cregistry4.freshbrewed.science/sonatype/nexus3
The push refers to repository [cregistry4.freshbrewed.science/sonatype/nexus3]
12c1ac852ced: Pushing [==================================================>] 403.7MB/403.7MB
258f7001b906: Layer already exists
4bd7408cc1c8: Layer already exists
c630f5c3e169: Layer already exists
error parsing HTTP 413 response body: invalid character '<' looking for beginning of value: "<html>\r\n<head><title>413 Request Entity Too Large</title></head>\r\n<body>\r\n<center><h1>413 Request Entity Too Large</h1></center>\r\n<hr><center>openresty/1.15.8.2</center>\r\n</body>\r\n</html>\r\n"
It was this blog (https://imti.co/413-request-entity-too-large/) that clued me in.. Once i adjusted the body-size, large images were fine:
builder@DESKTOP-JBA79RT:~$ cat ingress.yaml
---
apiVersion: extensions/v1beta1
kind: Ingress
metadata:
  name: registry
  namespace: default
  annotations:
    certmanager.k8s.io/cluster-issuer: "letsencrypt-prod"
    kubernetes.io/ingress.class: "nginx"
    nginx.ingress.kubernetes.io/proxy-body-size: "0"
    nginx.ingress.kubernetes.io/proxy-read-timeout: "900"
    nginx.ingress.kubernetes.io/proxy-send-timeout: "900"
  labels:
    app: docker-registry
spec:
  tls:
  - hosts:
    - cregistry4.freshbrewed.science
    secretName: cregistry4.freshbrewed.science-cert
  rules:
  - host: cregistry4.freshbrewed.science
    http:
      paths:
      - path: /
        backend:
          serviceName: private-registry-docker-registry
          servicePort: 5000

C:\Users\isaac\helm>kubectl apply -f ingress.yaml
ingress.extensions/registry configured

## that solved it!

C:\Users\isaac\helm>kubectl apply -f ingress.yaml
ingress.extensions/registry configured

C:\Users\isaac\helm>docker push cregistry4.freshbrewed.science/sonatype/nexus3
The push refers to repository [cregistry4.freshbrewed.science/sonatype/nexus3]
12c1ac852ced: Pushed
258f7001b906: Layer already exists
4bd7408cc1c8: Layer already exists
c630f5c3e169: Layer already exists
latest: digest: sha256:6570855dfbc3eb094fe5cbbacec87aa8b91d16394dab627177e1deeebb5ac8ee size: 1158
Using a private registry in Kubernetes:
Let’s wrap this demo up by showing, briefly, how we can leverage this with our cluster.
First we need to set a secret so AKS can pull from the private repo:
$ kubectl create secret docker-registry regcred --docker-server=https://cregistry4.freshbrewed.science/v2/ --docker-username=admin --docker-password=admin123 --docker-email=isaac.johnson@gmail.com
Then let’s just fire a container (though i will terminate since it’s just hello-world):
$ cat dep.yaml:
apiVersion: v1
kind: Pod
metadata:
  name: private-reg
spec:
  containers:
  - name: private-reg-container
    image: cregistry4.freshbrewed.science/hello-world
  imagePullSecrets:
  - name: regcred

$ kubectl apply -f ./dep.yaml
After launching it, while the pod completes, we can see it was pulled just fine:
Events: Type Reason Age From Message ---- ------ ---- ---- ------- Normal Scheduled 62s default-scheduler Successfully assigned default/private-reg to aks-nodepool1-30223684-2 Normal Pulling 17s (x4 over 61s) kubelet, aks-nodepool1-30223684-2 Pulling image "cregistry4.freshbrewed.science/hello-world" Normal Pulled 17s (x4 over 60s) kubelet, aks-nodepool1-30223684-2 Successfully pulled image "cregistry4.freshbrewed.science/hello-world"
What will this cost?
What will this cost. It’s hard to be certain. I can say that for 9 hours of demo, I racked up $0.84.

But after loading the large image, i checked back 22h after creation and my spend was at $3.56!
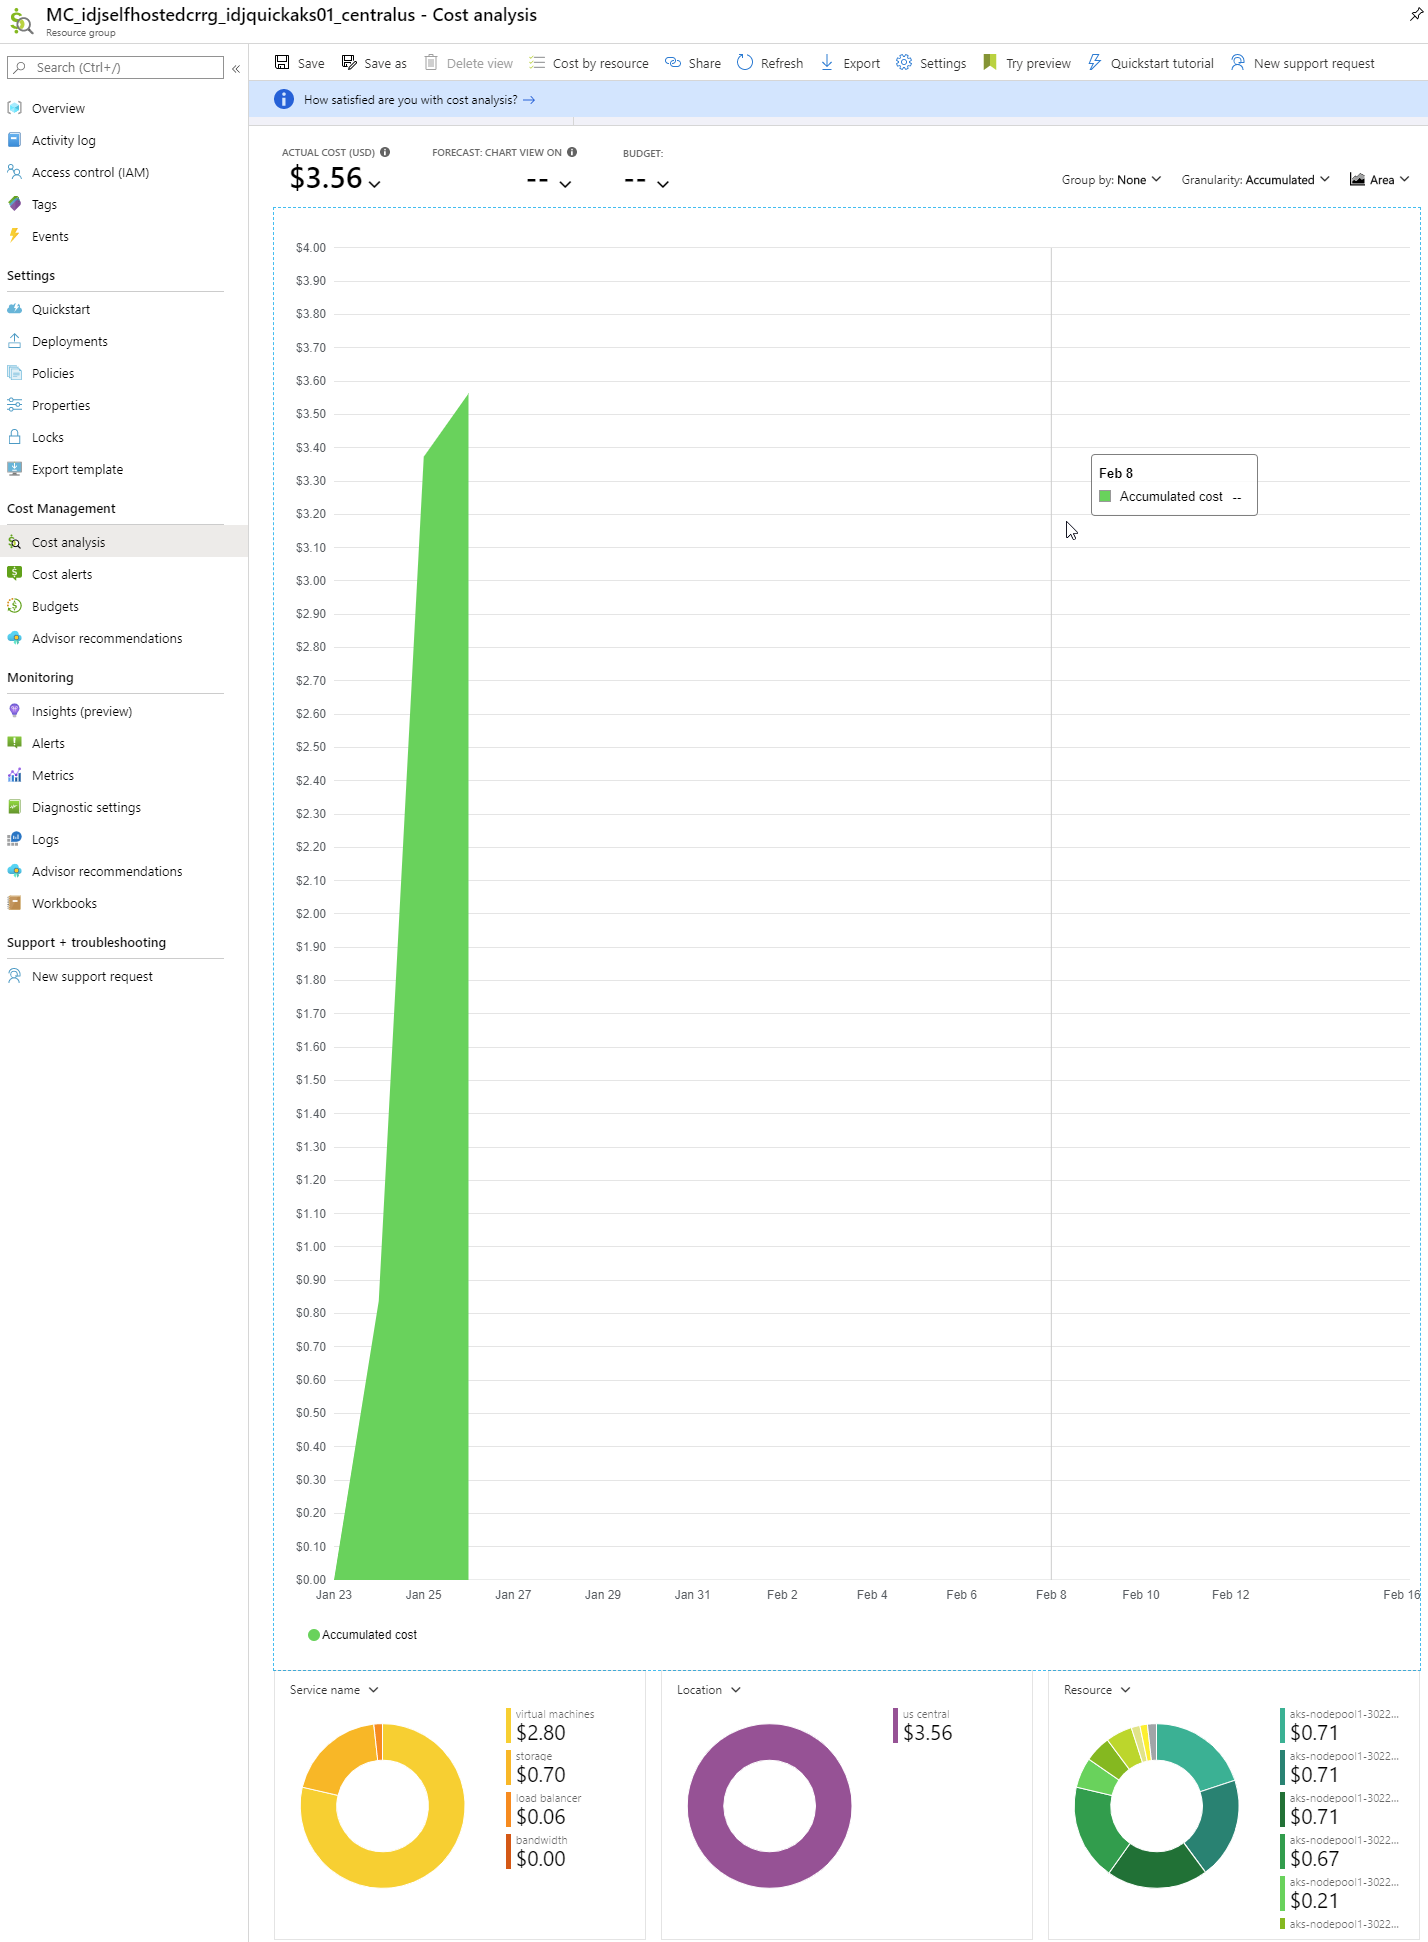
Now i recognize a typical cluster will host far more than a Container Registry service. 13 hours amounted to $2.73. What I first estimated as about an $80/mo spend was looking like $160. For that price, IBM’s container registry starts looking pretty nice.
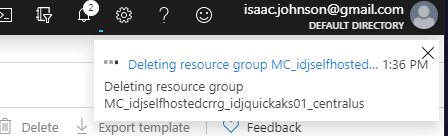
Cleanup
Make sure to delete both the resource group you created to host the management plane (idjselfhostedcrrg) and the managed one (MC_idjselfhostedcrrg_idjquickaks01_centralus).
While R53 is almost too cheap to care, it’s worthwhile to remove our DNS as well.

Summary
If you are already in the business of hosting a kubernetes cluster, creating your own container registry is a great way to keep things self contained and use the infrastructure you’ve already set up.
While it takes a few steps to setup, leveraging the free Let’s Encrypt CA signing service is a great way to have a proper TLS encrypted registry your cluster, developers and CI/CD tooling can use.
Next we’ll explore more integrations and how this might work on a smaller cluster or different cloud provider.